


How To: Convert a Photo into a Line Art Drawing in Photoshop
If you're not much of a drawer, you can still get the look of a detailed drawing simply by taking a picture and using Photoshop's tools and filters to transform it into something that looks drawn by hand.
How To: Soften skin, control color & tones in Photoshop CS4
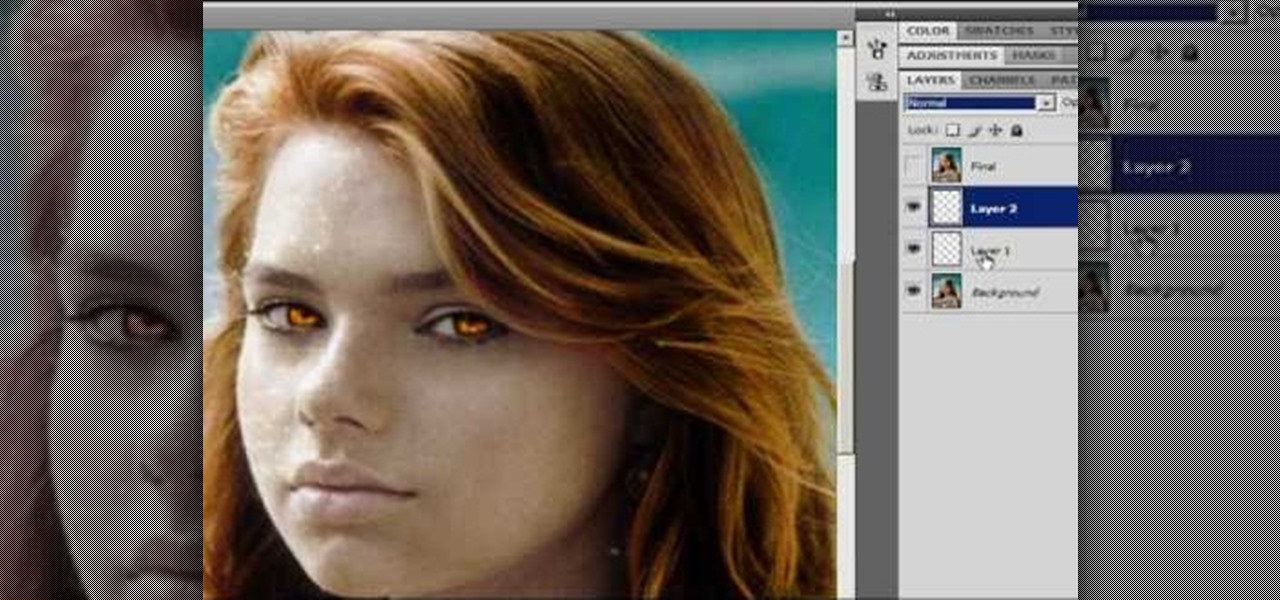
Learn about skin softening techniques and the controlling of color and tones when working in Adobe Photoshop! Whether you're new to computer graphics, new to Adobe Photoshop CS4 or a seasoned design professional just looking to pick up a few new tips and tricks, you're certain to like this free video software tutorial. For more information, including detailed, step-by-step instructions, and to get started managing skin tones in Photoshop yourself, watch this designer's guide!
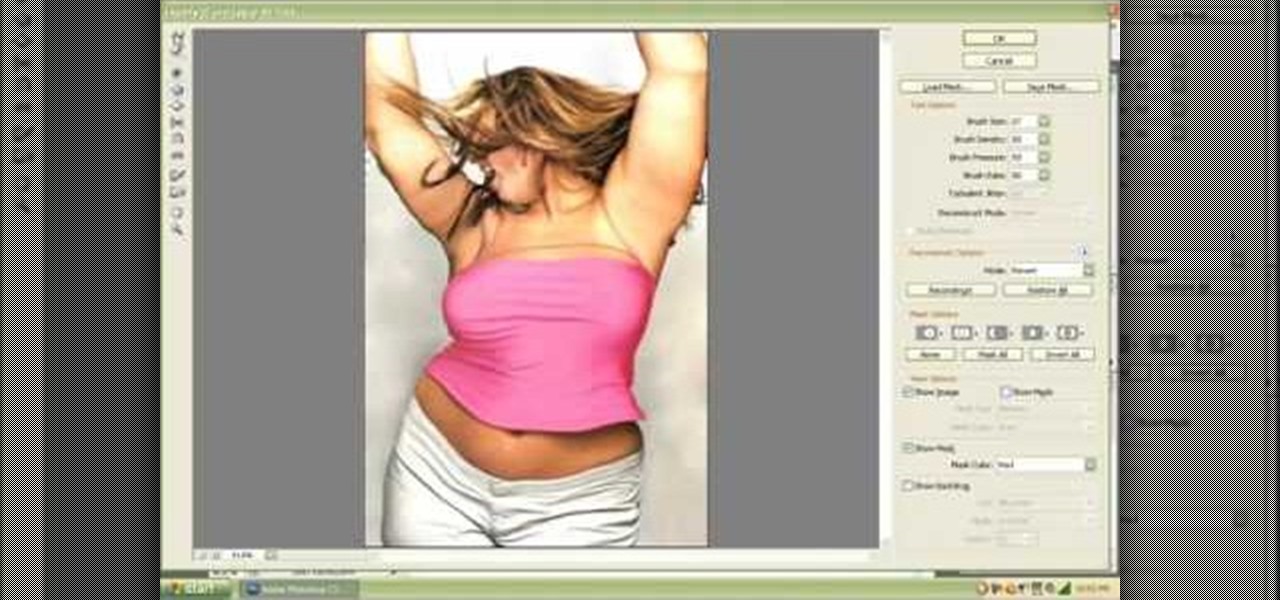
How To: Enlarge breasts in Photoshop
Thinking you need a little boost in the bra department for this year's Christmas card? Here is a tutorial on how to make your breasts appear larger using Photoshop.
How To: Batch process in FocalPoint plugin for Photoshop
This software tutorial shows you two ways to batch process image adjustments with the FocalPoint plugin for Photoshop. First, see how you can adjust one photo in FocalPoint, then copy those adjustments to all other open images. Second, learn how to use Photoshop actions and the Batch dialog to batch process in Photoshop on the image editing you are doing withing the FocalPoint plug-in. The first batch processing method works best with small numbers of photos, and the second works best when wo...

How To: Make Mona Lisa's Eyes Blink in Photoshop (GIF Animation)
If you loved The Da Vinci Code by Dan Brown, then listen up— there's been a new discovery found hidden within Leonardo da Vinci's most famous painting— the Mona Lisa.
How To: Change an object's color in Photoshop using magic wand
Use the "Magic Wand" tool to select the color you wish to change. The next step is to open the replace color box. Go to Image > Adjustments > Replace Color. After the Replace Color box is open, you may have to select the color that you want to change in the image. Sometimes, it will automatically select the color you're changing, but sometimes you will have to use the Eyedropper Tool and click a hue of the color you wish to change. After the color is selected in the "Replace Color" box, you c...

How To: Draw realistic eyelashes in Photoshop
This video demonstrates how to draw eyelashes using Adobe Photoshop and a graphics tablet. You need three tools to draw eyelashes: Soft Round Brush, Smudge Tool, and Eraser. Create a new layer. On the upper eyelid, draw each eyelash with Soft Round Brush (color: black, width 17px, opacity 100%). Use Smudge Tool (width 45 and straight 25%) on the eyelashes to straighten them. Use Eraser (width 65 and opacity 100%) if necessary. Create a new layer and use the same tools for the bottom of the ey...
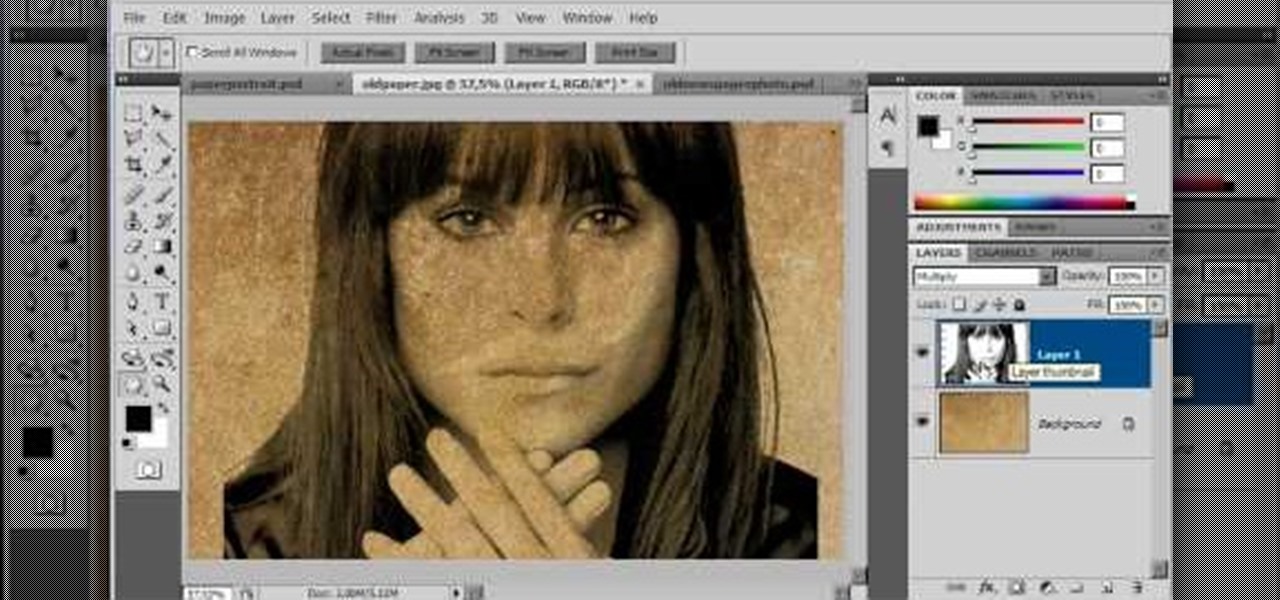
How To: Create an old faded newspaper effect in Photoshop
The video is about how an old stalled photographic image with faded backgrounds to a normal image. A nice clean digital image is taken and is mixed with a texture of a paper and produces a final composite image of all effects combined. The procedure is not that difficult but it needs to be followed in a proper order. First the paper texture is taken as a base and then the clean digital image is dragged onto this texture. The blending mode is adjusted from normal to multiplied blending mode, w...
How To: Unclothe People in Photoshop
Have you ever wanted to prank your friends by showing pictures of them naked? By learning these easy graphics editing techniques in Photoshop, you can quickly make people shirtless or nude in fake photos.

How To: Make A Cartoon From Your Photo With Photoshop CS4
Here I'm going to show you the most easiest and quickest way to make a cartoon from your photos. the photo can be anything, but must be well focused. so let's start with it.
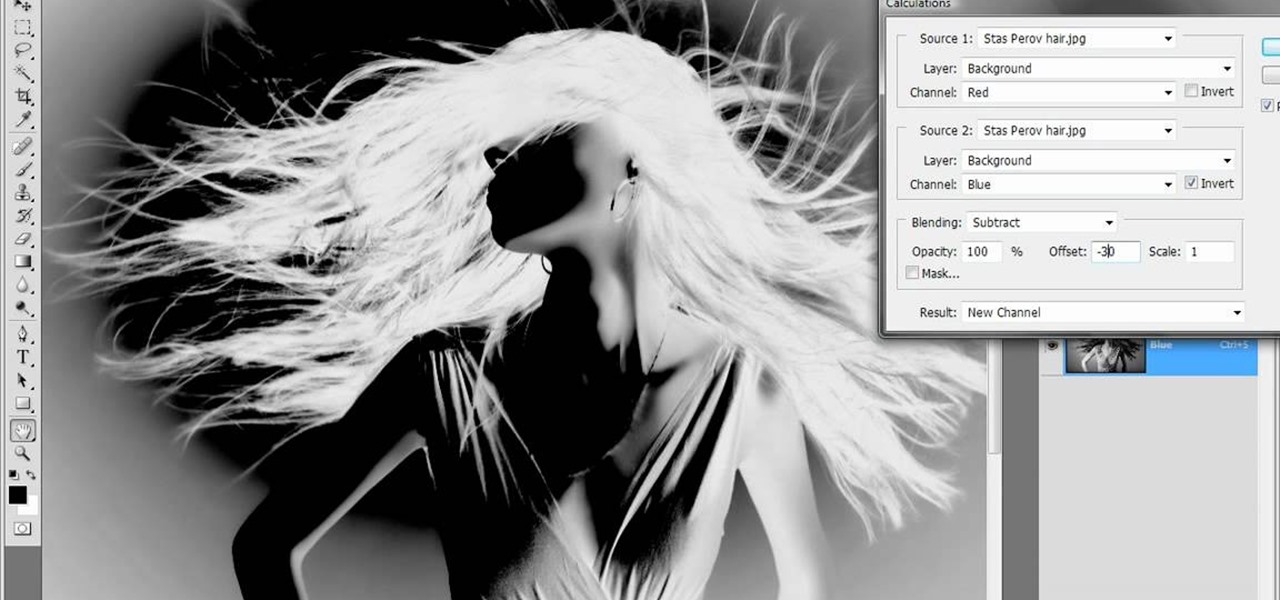
How To: Merge channels to create an alpha channel in Photoshop
One of the oldest, most abstruse, downright incomprehensible commands in Photoshop, Calculations lets you merge two channels to create a new alpha channel. Learn it: It's the backbone of masking. Whether you're new to Adobe's popular raster graphics editing software or a seasoned professional just looking to better acquaint yourself with the program and its various features and filters, you're sure to be well served by this video tutorial. For more information, including detailed, step-by-ste...

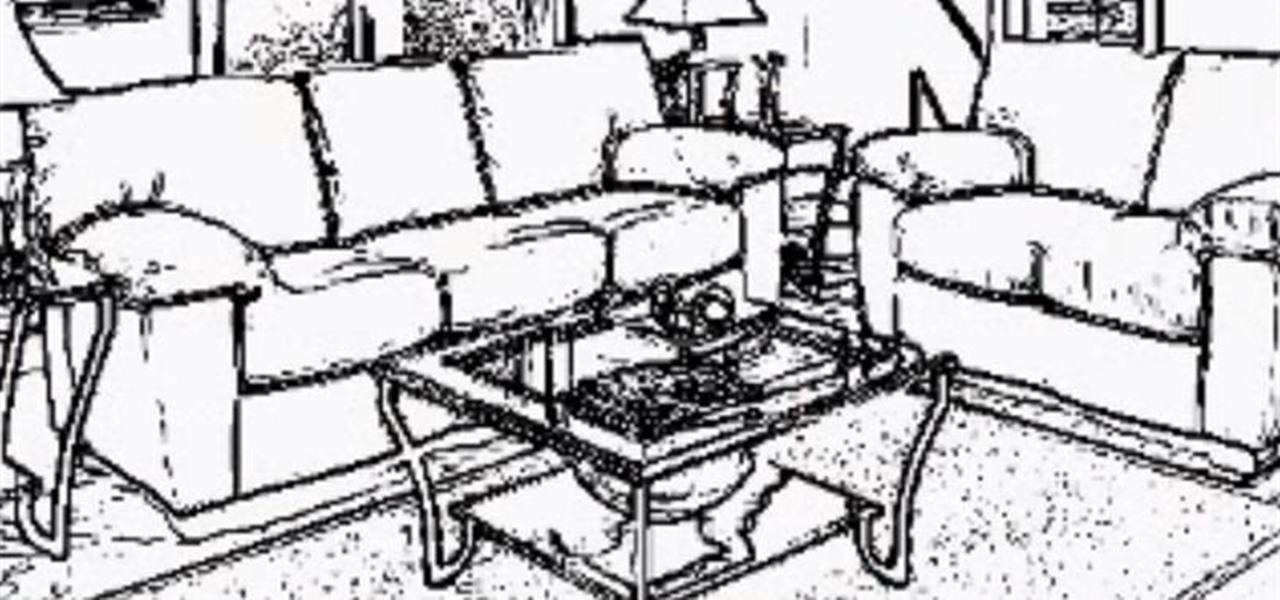
How To: Turn a picture into a sketch using Photoshop CS4
If you've ever wanted to sketch something from scratch and realize you don't have the time to take formal classes, then Photoshop might be what you need. In this helpful tutorial, you'll find out how to take your photos, or any other photo out there, and turn it into a beautiful masterpiece. So sit back and enjoy this tutorial on how to turn a picture into a sketch using Photoshop CS4.
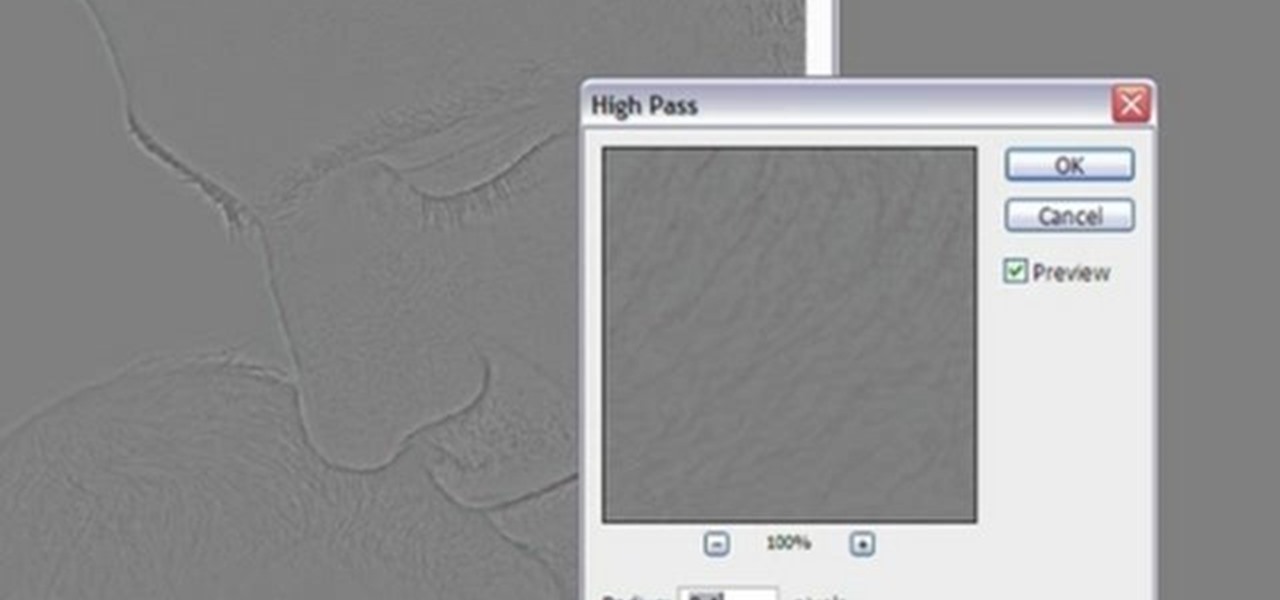
How To: Use the high pass sharpening filter in Photoshop
In this video tutorial, viewers learn how to sharpen photos in Adobe Photoshop CS3. Begin by opening the image in the program and duplicate the image layer. To duplicate, press the control and J button. With that images, go to Filter, choose Other and select High Pass. The images will now be covered entirely of gray. It is recommended to set the radius as 5-6 pixels and then press OK. Change the layer blending mode to overlay, soft light, hard light, vivid light or linear light. This video wi...

How To: Create a Shepard Fairey "Hope" poster in Photoshop
Ash Davies believes that it is important to understand how to properly use Photoshop, especially with the Obama "Hope" posters that have become increasingly popular. The first step is to cut out the image that you want to use for the poster. To do this, you have to use the polygon tool and trace around the object you wish. After done, select Layer via cut to separate. Creating a new layer and choose color fde5a9 for the background layer. After this, you can create the different blue and red l...
How To: Apply the 'Tom Goes to the Mayor' style to an image
This is an animation style which takes real pictures and outlines it to make you look almost cartoon-like. To start with you want to take a picture and get a cut out of the subject with the background transparent. Then get yourself a nice color for the outline and go to filter, sketch, and photocopy. This will look roughly like a colored outline of the subject but then you want to add some more touches by adding detail (usually around 3) and darkness (around 35 is nice).
How To: Retain aspect ratio when cropping in Photoshop
Pixelated photos are always a site for sore eyes. When you crop your photos in Photoshop you can keep your aspect ratio to stay wayward of the "pixelation desecration". When you hold down Shift during your crop it will retain the aspect ratio so you have nothing to worry about. There are also some more commands to help keep aspect ratio during zoom, crop, moving, or anything else of that matter. This video will demonstrate exactly how to retain aspect ratio when cropping in Adobe Photoshop.
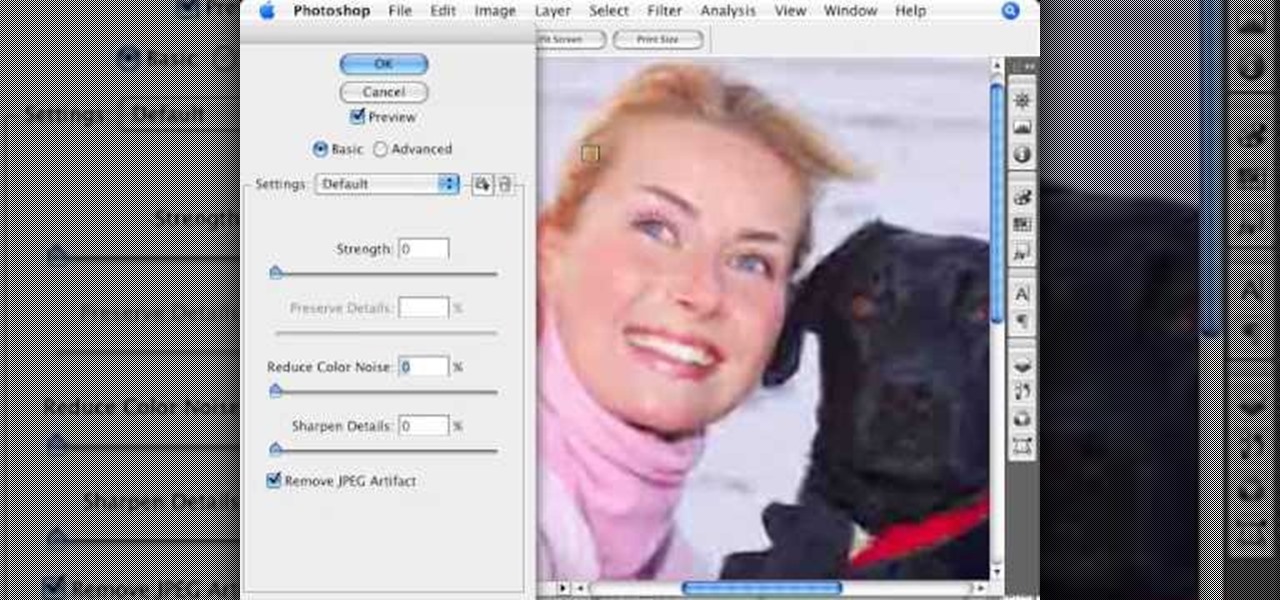
How To: Remove JPEG artifacts in Photoshop
Photoshopuniverse shows how to remove JPEG Artifacts in photoshop. It's simple. Sometimes it happens that, you get the best picture which is related with your work, but unfortunately its low quality or small. If you zoom in a small picture it will pixilated. You will see some blocks. Luckily there is a way to remove it from photoshop. Go to- filter, then noise, then reduce noise. There will be an options of removing JPEG artifact. Check that. After watching the video you can remove JPEG artif...
How To: Create e-mail icon in Photoshop
This video will walk you through the process of creating your very own icon to use for your email by using Adobe Photoshop. Photoshop is a great tool to use for a variety of purposes and in this instance can make the perfect icon in just minutes.
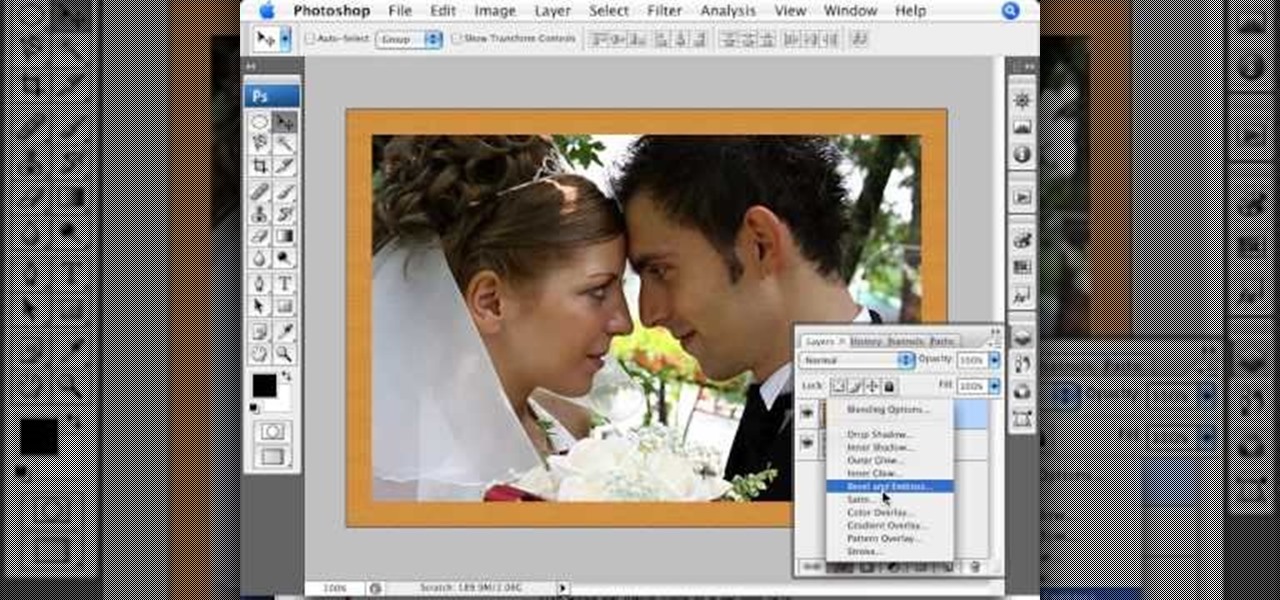
How To: Create a wood photo frame in Photoshop
In this video tutorial by photoshopuniverse you learn how to create a wood photo frame in Photoshop for your photos. Take the photo that you want to add a frame to, open it in Photoshop. Open the layers palette and double click to convert to a regular layer and increase the canvas size of the image to the required thickness of the frame. Create a new layer and fill in with the wooden pattern. Apply a mask and reveal the photo as shown. Apply the desired effects bevel and emboss to get the woo...

How To: Create a comic book style cloud in Photoshop
Do you want to learn how to create a comic book style cloud using Photoshop? Now you can with this video. First of all, create a blue colored layer. Next, create a few white shapes on this background. Now duplicated this layer. Go to the bottom layer and make it black. Go back to the top layer and move it a tiny bit so that the black shows. Combine the layers and now blur it. There you have it, a comic style cloud in under 3 minutes.
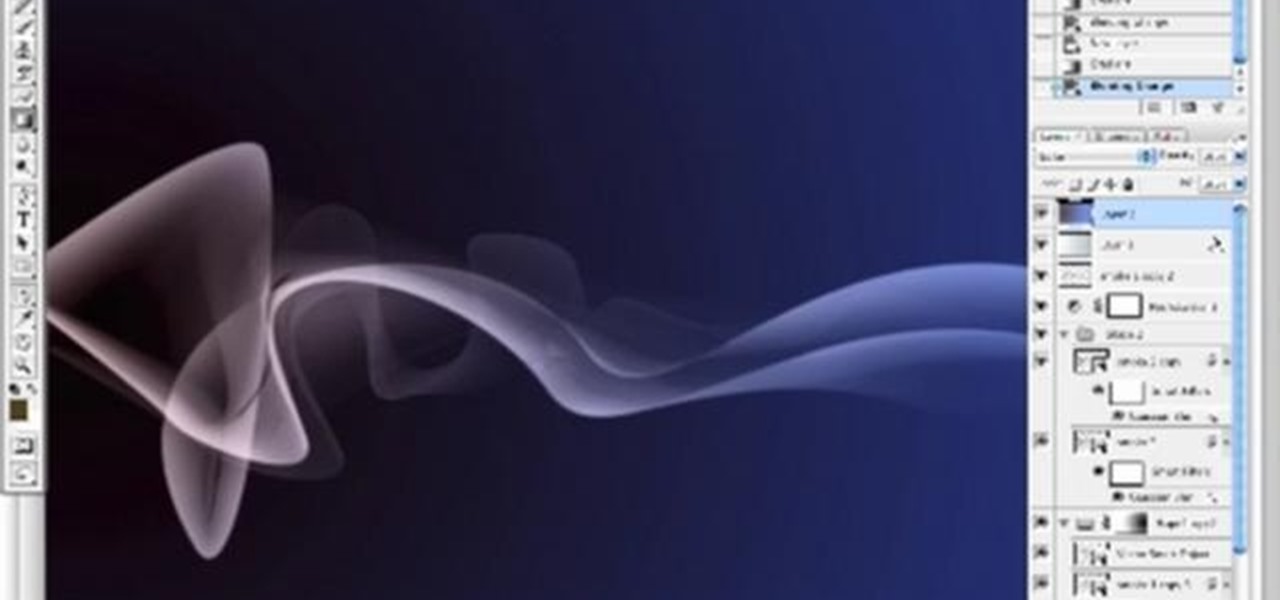
How To: Create digital smoke in Photoshop & Illustrator
In this image editing software tutorial we are going to show you how to easily create digital abstract smoke using both Illustrator and Photoshop. One of the best things about this technique is that it’s very customizable and you can do it pretty quickly. Watch and learn how to create smoke effects in Illustrator and Photoshop.
How To: Create a name plaque in Photoshop
Your name may not be forever minted in stone or gold for all of posterity to gaze at, but you can certainly bling up your family name by making your own name plaque using Photoshop. This Photoshop tutorial will teach you how to put your name - or whatever word you want - in a shiny golden/wooden plaque with a brass plate. You'll be using filters as well as several other tools.
How To: Create an array from a rasterized object in Photoshop
This image editing software tutorial shows you how to create an array from a rasterized object in Photoshop CS3. An array (in design terms, not programming terms) is an object that duplicates itself around a pivot point. So learn how to work with arrays to create designs in this Photoshop video.

How To: Create a 'zipper' effect in photos using Adobe Illustrator and Adobe Photoshop
Create crazy looking images by 'unzipping' a person or object using Adobe Illustrator to create the zipper and then adding it to an image in Adobe Photoshop. Your tools in Illustrator will be the basic shape tool, the brush pallet, and a transform filter. In Photoshop you'll need to use the select, puppet warp, and paintbrush tools.
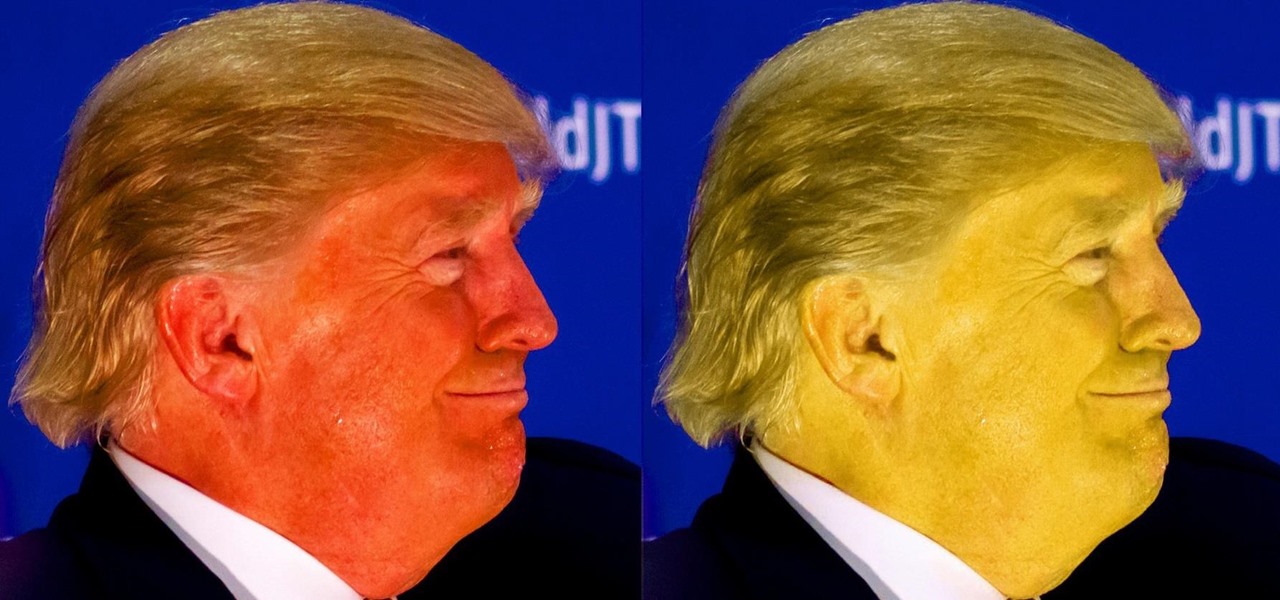
How To: Change Skin Tone in Photoshop
With Adobe Photoshop on your computer, it's super easy to change or adjust the skin tone of somebody in a digital photo. The process uses some basic selection and color adjustment tools, and it's a fun way to make a friend's face nauseously green or lessen the effects of overly strong, sometimes even orange, makeup.

How To: Use the halftone filter effect in Photoshop
Mama Shan shows you how to get a halftone printer dot look on an image using Photoshop.

How To: Create a glowing ribbon in Photoshop
This tutorial shows you how to create a glowing ribbon in Photoshop using blend modes and layer styles. These methods can be applied to any object you want - not just a ribbon.

How To: Make a cool, tech looking wallpaper in Adobe Photoshop
Create a wallpaper for your own tech company or project! This Adobe Photoshop tutorial walks you through the process of creating a flashy red and black wallpaper, complete with a logo and a glowing, live-wire looking line running across the screen.
How To: Turn anyone into a sparkly vampire from Twilight
In the Twilight Saga by Stephenie Meyer, vampires don't melt away in the sunlight. Instead, they sparkle like a beautiful piece of crystal. In this clip, learn how to take a photo of anyone at all and turn them into a sparkling daytime vegetarian vampire like the Cullen family. If you are dying to know what you would look like as a vamp, check out this clip and celebrate the release of Eclipse with a sparkling photo of yourself.
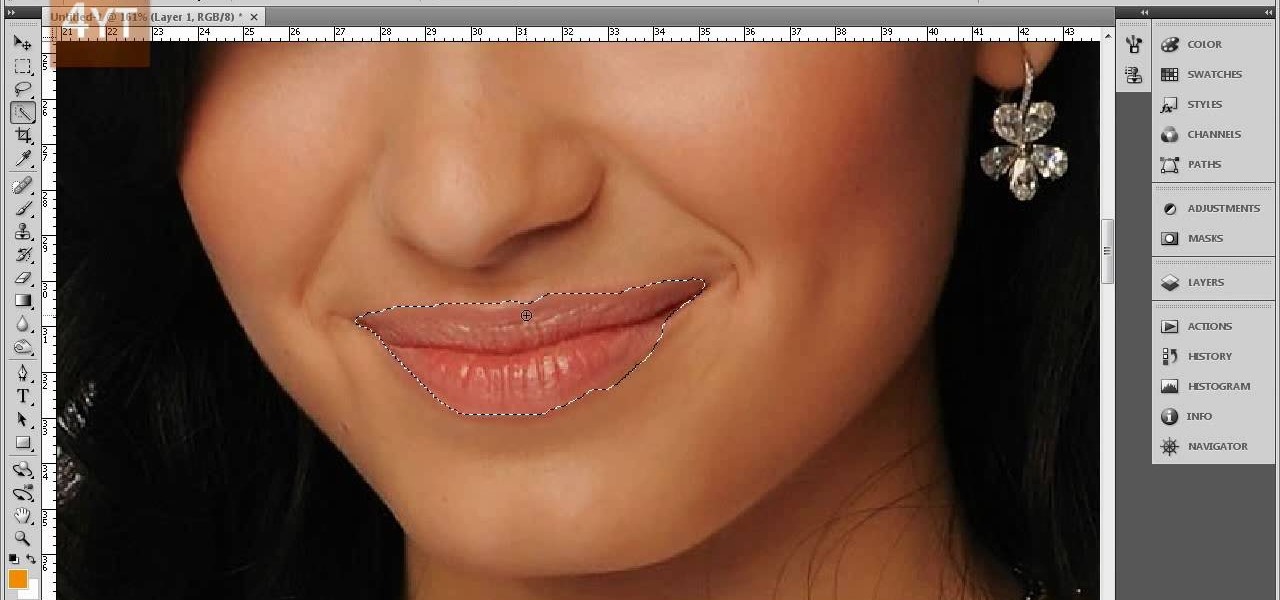
How To: Change lip color & shade in Photoshop
Forget to put on lipstick before a photo? Or perhaps you want to spice up an old photo of someone you love. Well their is a way, as 4YouTutorial demonstrates step by step using Photoshop CS4. First upload a photo or image into Photoshop. Next access your Photoshop layers and delete the default locked layer. After, activate the zoom tool and zoom in on the photo where the lips are located. Next choose the quick selection tool (make sure it's on plus) and drag it over her lips. This process can...
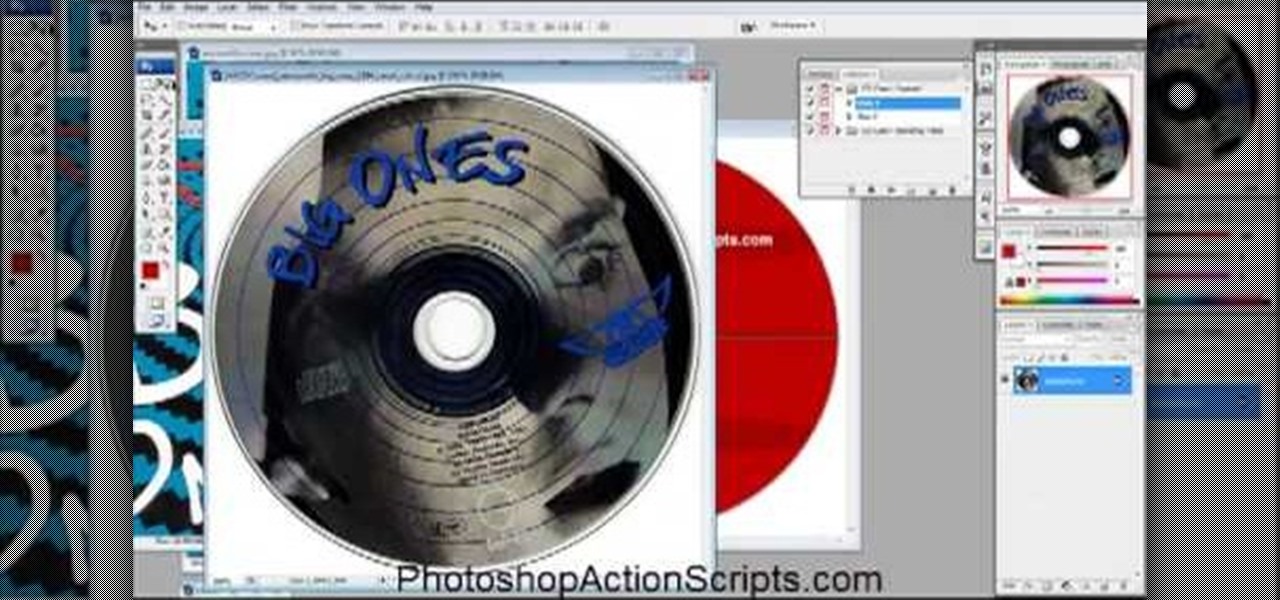
How To: Make a CD cover in Photoshop
This video is about how to make a CD cover. First, open up the image that you have. Then, you need an action script. Click on the action's palette and pick which CD cover you want to do. Then you click step one which will run a template for you to set everything up and place your graphic in. The next thing to do is to slide the graphic image on to the template through the select tool. Then, click free transform found on the edit toolbar and just double click the image. The next step is to edi...
How To: Create a digital pixel effect in Photoshop
Ever wondered about those digital effects in advertisements having some parts in pixels? Let's try it. Open Photoshop and take a picture. Duplicate its layer and on the new layer,select it and go to filters->pixelate->mosaic. Then you can mask the new layer with having some parts in blur and the other one's in focus or can use gradient. You can lighten or darken the mask layer for better output. This helps in creating unique styles and digitize your world.
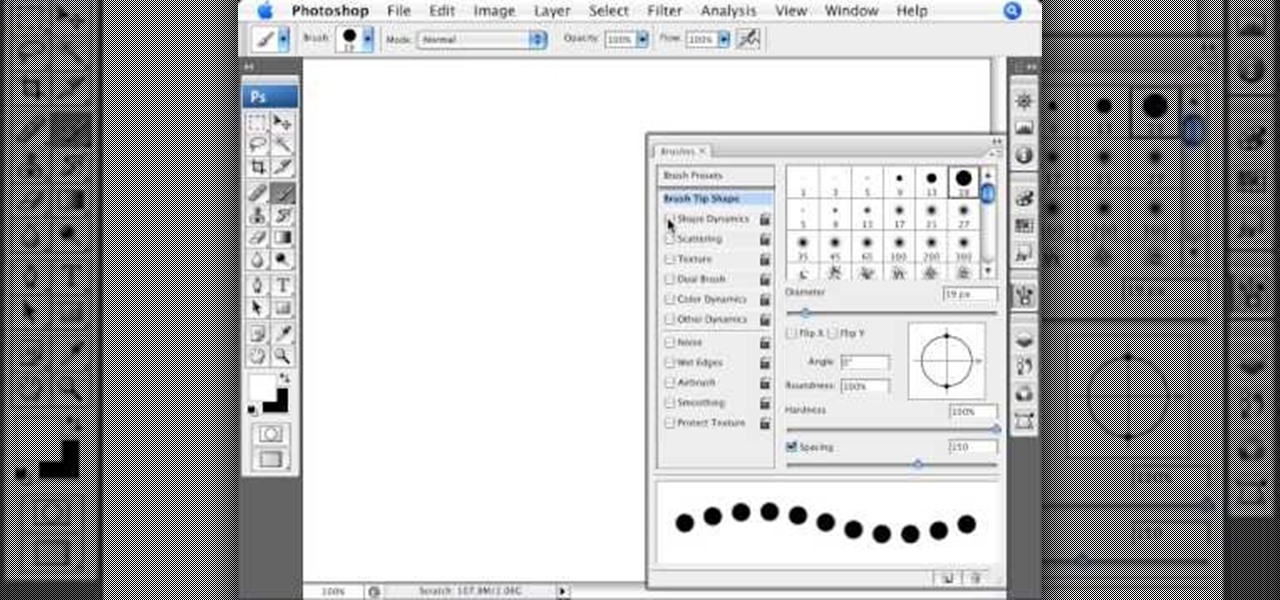
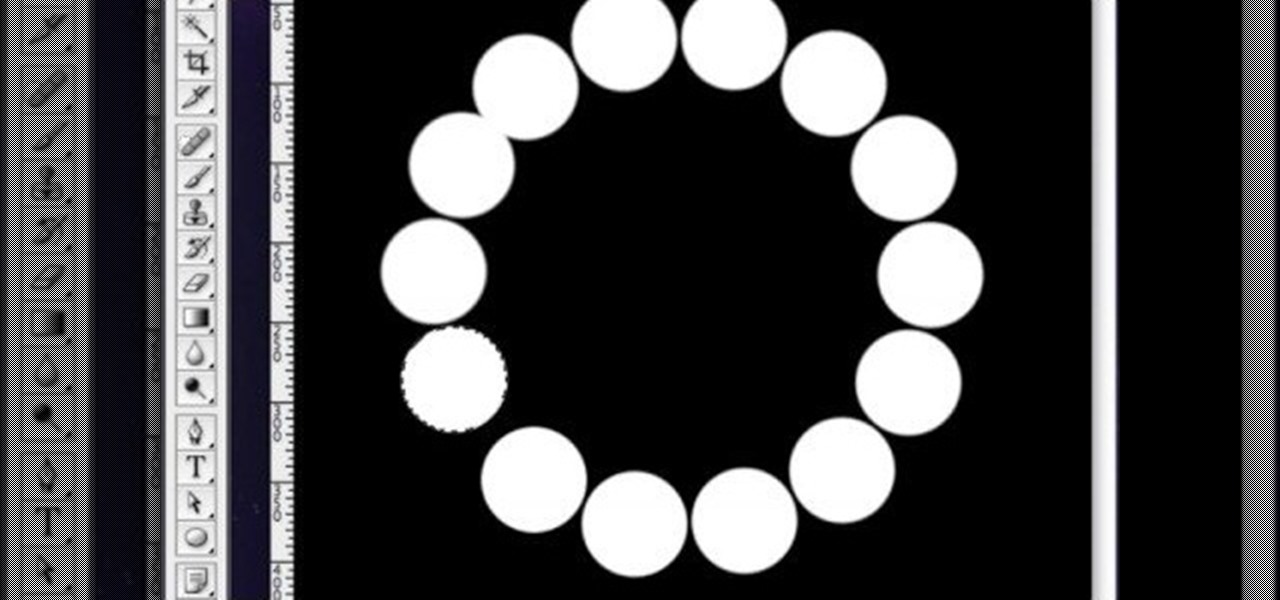
How To: Create dotted lines in Photoshop
In this tutorial Photoshopuniverse describes how to create dotted lines in Adobe Photoshop using the brush palette. First create a new blank document in Adobe Photoshop. To open brushes palette, go to menu Window - Brushes. By adjusting spacing and hardness of brush under Brush Tip Shapes menu you can draw desirable dotted lines. To get uniform circled dots uncheck Shape Dynamics box. By holding the shift key click and drag to get a straight dotted line. To create bullet holes or perforated h...
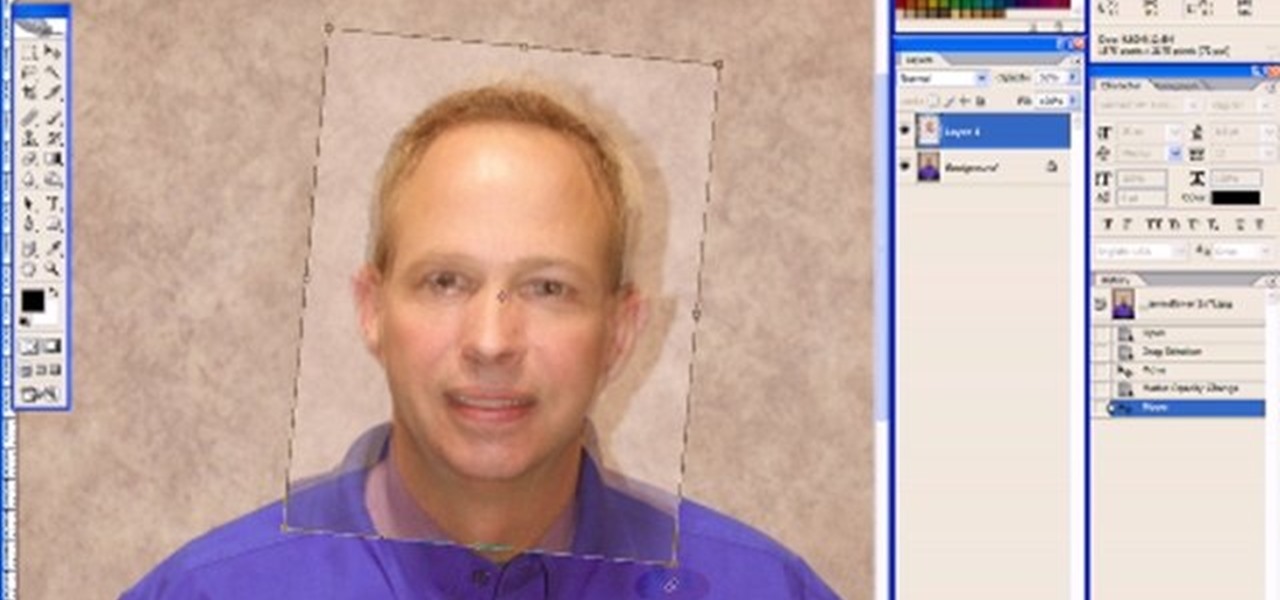
How To: Replace facial features in Photoshop CS2
Using Photoshop CS2, we demonstrate how to take facial features from one photograph and drop them into another. Learn how to use layer masks to do some creative face swapping in Photoshop CS2.
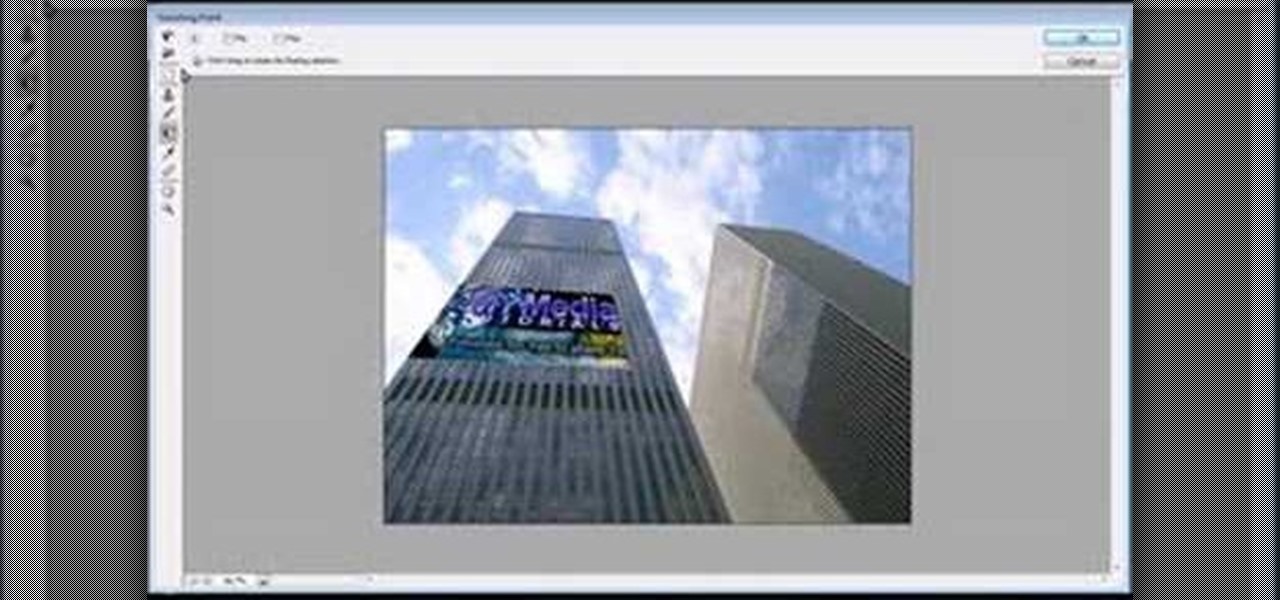
How To: Use vanishing point in Photoshop
Jordan shows how to use Vanishing Point - a useful tool is Photoshop! The vanishing point tool is Photoshop's way of allowing you to create images that look 3-dimensional and allows you to add components and lighting to an image while maintaining the proper perspective. So check out this Photoshop tutorial on the vanishing point tool and prepare to add some cool 3D effects to your photos.

How To: Create a pulsating animation with Photoshop
Have you ever wondered how to add a pulsating animation to your images? This video shows you how to do it using Photoshop and Imageready. This example involves the creation of a pulsating speaker.
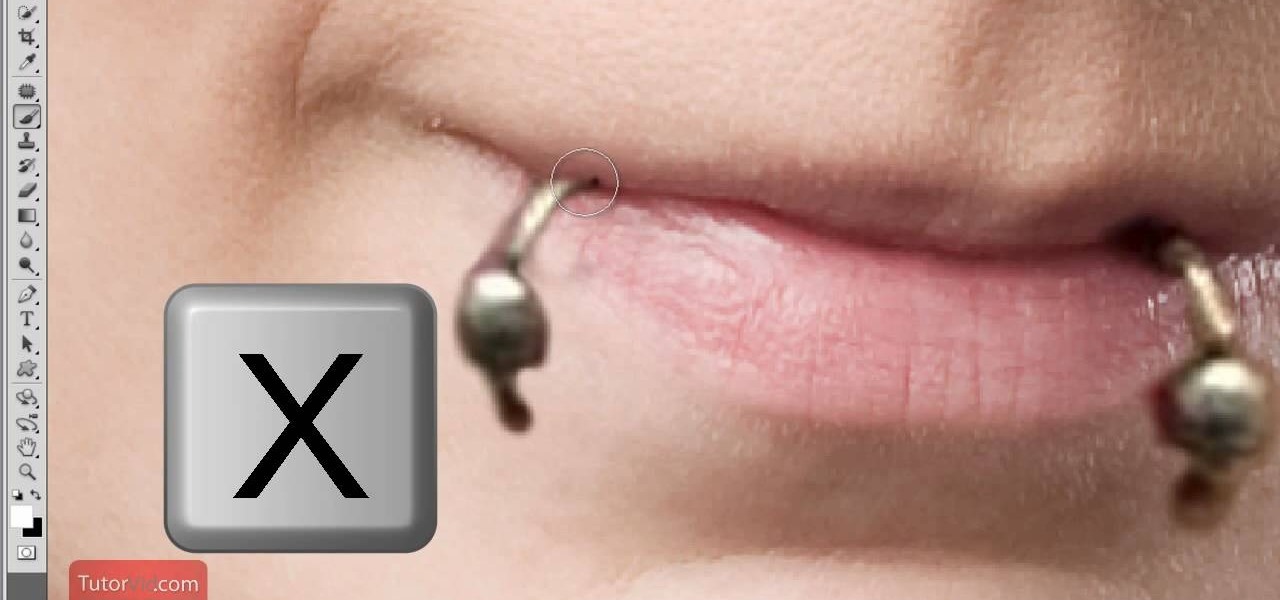
How To: Find out how you will look with a piercing using Photoshop
If you're thinking about getting a piercing, but aren't sure how it will make you look, you can use a program like Photoshop or GIMP to edit in a fake piercing. Start with a photo of yourself, with the area you are considering piercing shown prominently. Then find a picture of someone with the same kind of piercing that you want, and then use some of the editing tools and tricks in photoshops to see how it will look on you!
How To: Make a text watermark with a transparent background in Adobe Photoshop
If you're serious about your video creations you're going to want to watermark them. To do this, you'll need Adobe Photoshop to create, in this case, a text watermark with a transparent background. It's not hard to do with this simple tutorial, so get going!
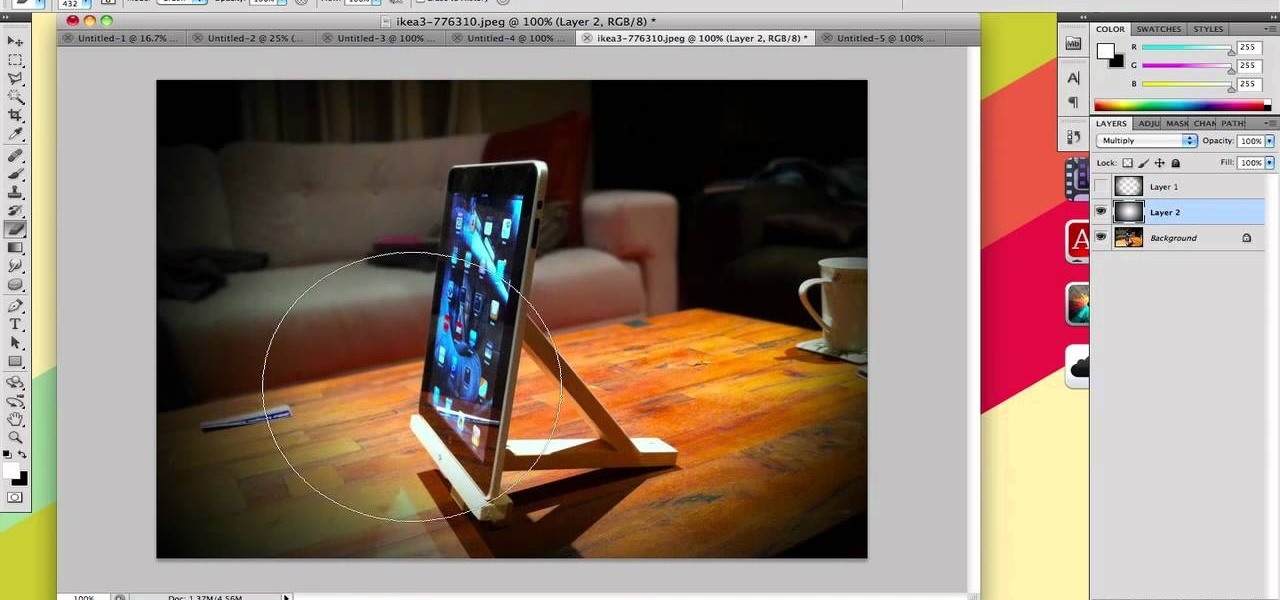
How To: Make your photos look like they were taken with a great camera
If you take a lot of photos with your smartphone or cheap digital camera, you can see the difference compared to results from a pro camera. So, if you want to get a professional camera look without dropping the money, check out this video to learn how to enhance your pics. This trick works with Photoshop, or any photo editing software that has a selection tool, a gradient tool and a gaussian blur filter.

How To: Remove unwanted objects with the Spot Healing Tool in Photoshop Elements 9
Use the Spot Healing Brush Tool in Photoshop Elements 9 to remove power lines, trees, cars, even your Aunt Marge. If it's in the picture and you want it out, this simply tutorial will show you how to do it.
Next Page
Prev Page