With Adobe Photoshop on your computer, it's super easy to change or adjust the skin tone of somebody in a digital photo. The process uses some basic selection and color adjustment tools, and it's a fun way to make a friend's face nauseously green or lessen the effects of overly strong, sometimes even orange, makeup.
This tutorial will work well on most versions of Photoshop for macOS and Windows, including the Creative Suite (CS) and Creative Cloud (CC) iterations. This guide can also be mimicked almost exactly with free photo-editing programs such as GIMP.
For this guide, I'll be using this image of President Trump as an example, which has already been Photoshopped from this image (for full disclosure).
Select the Skin You Want to Change
You can use any one of the selection tools available in Photoshop, but for this guide, I'll be using the Magic Wand Tool. Select the tool, then change the tolerance to 35 and set the "Sample Size" to Point Sample.

From there, it's time to start selecting. Left-click your cursor over the face once, then hold the Shift key and continue to left-click to select as much of the face as possible. If you select a part of the image you don't want, like the hair, hold the Alt or Option key and left-click the area to deselect it.
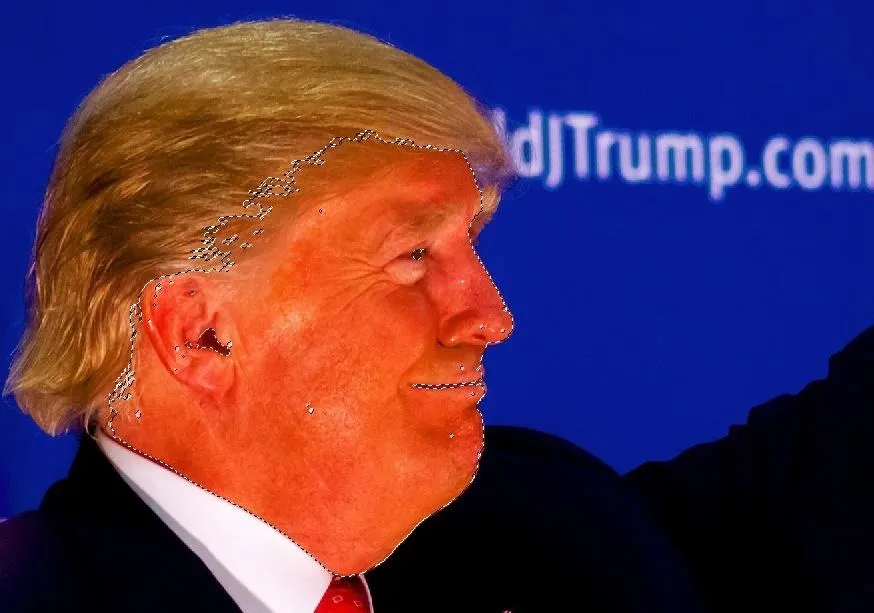
This may take some time to get perfect. Once you have the general area selected, you can lower the Magic Wand tolerance to fine-tune any areas you missed, or deselect any areas you don't want (like the eyes).
Desaturate & Adjust the Image
With the face selected, head to the menu bar at the top of Photoshop and select Image -> Adjustments -> Desaturate.
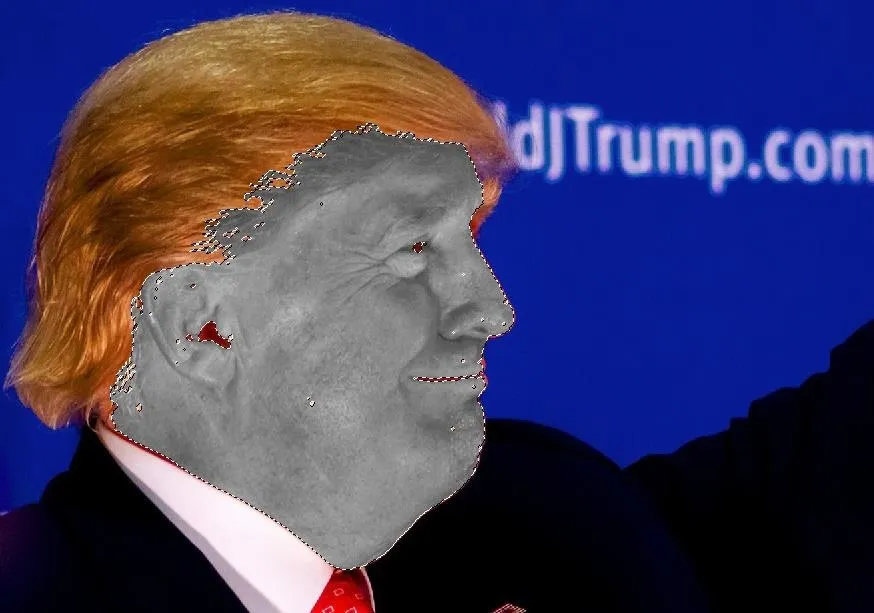
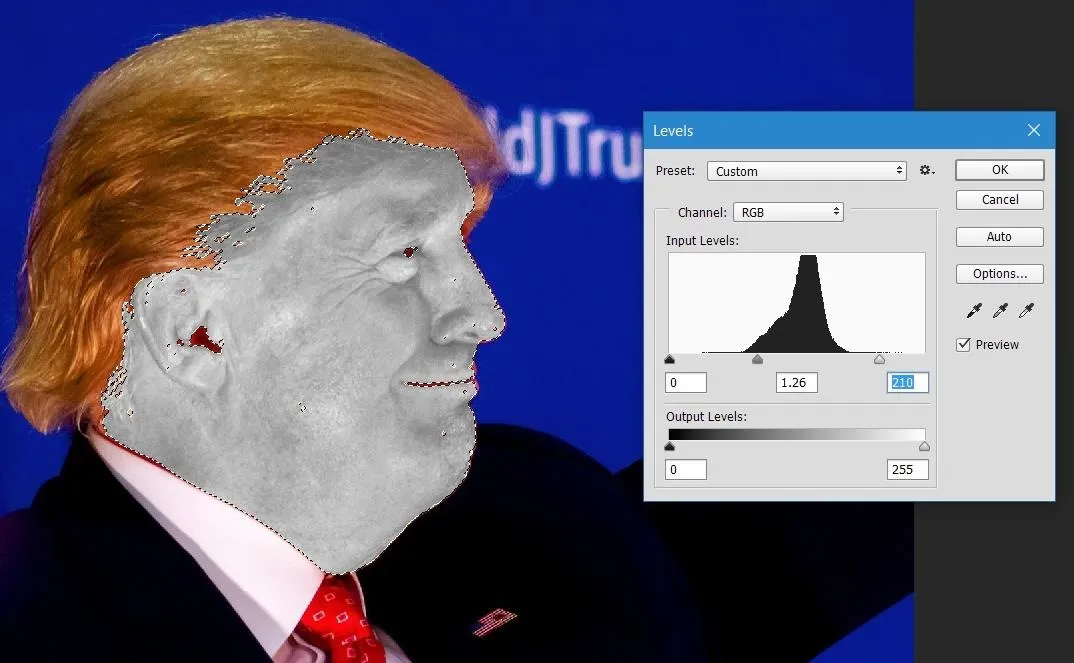
Now go to Image -> Adjustments -> Levels, then start with the furthest slider to the right in the "Input Levels" section and bring it to the left some. Then do the same with the middle slider. This will vary on a case-by-case basis, so you'll need to play around here to desaturate the colors properly.
Color the Face
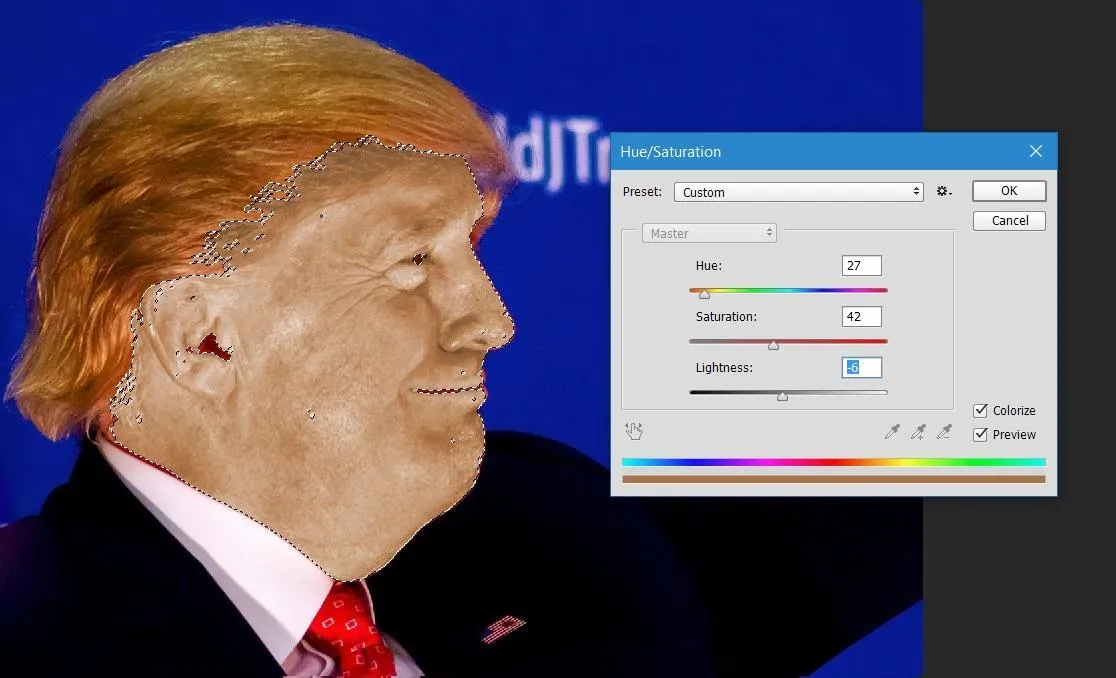
All that's left to do now is add some color and adjust it to your liking. Go to Image -> Adjustments -> Hue/Saturation, then tick the option for "Colorize."
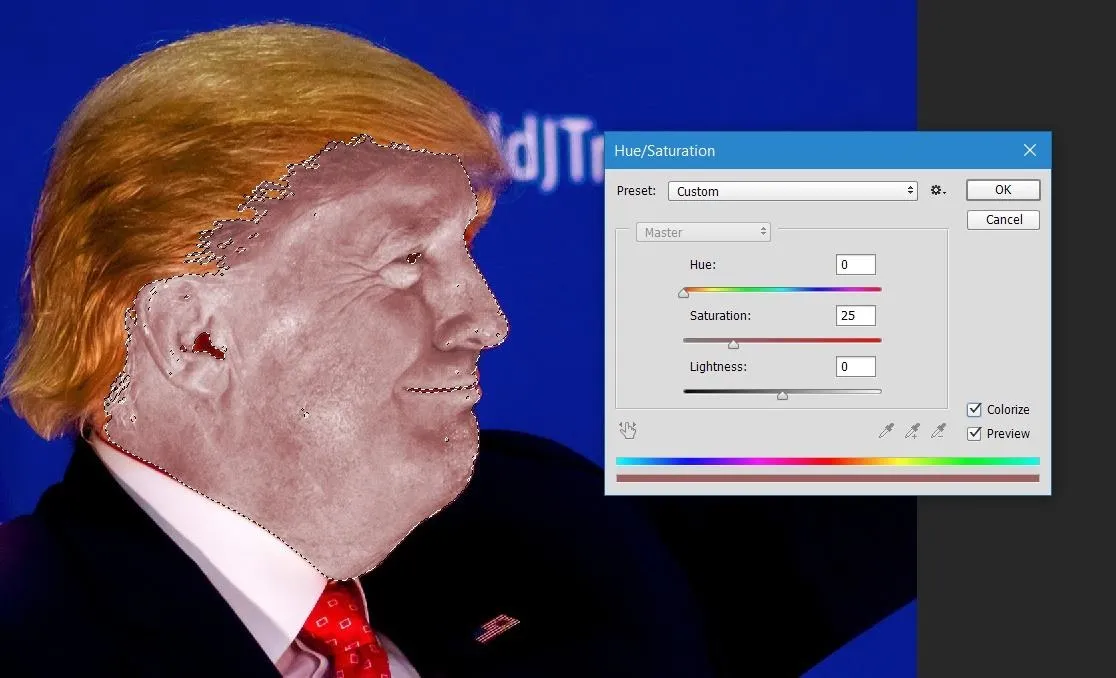
Now that we added some color back, it's time to adjust the tone. Use the Hue, Saturation, and Lightness sliders to settle on the skin tone you want. Again, you'll need to play around with this to get it where you want it.
And there's your finished product. I'm sure you could do a much better job than I did. However, I was not merely trying to turn a Photoshopped image back into the original photo, but was just trying to change the color period.
For Minor Skin Tone Changes
If I wanted to make minor adjustments to skin tone (like making the face just a little less red, in this case), after selecting the facial area with the Magic Wand Tool, you could just go to Image -> Adjustments -> Hue/Saturation, then lower the saturation a bit.

Minor saturation tweak after Magic Wand Tool.
Depending on the picture, you could get better results by not selecting anything and going straight into adjusting the saturation of the whole image to tweak skin tone instead of flat out changing it. In this scenario, just tweaking the red saturation will work well, since there isn't much red elsewhere in the image except on the tie.

This is just lowering the red saturation of the whole image.
Watch the Video for More Help
Need more help? Check out the video reference by Howard Pinsky, a Photoshop trainer, on YouTube below. It will walk you through the whole process with different photograph and skin tone example.
Cover photo and screenshots by WonderHowTo


Comments
Be the first, drop a comment!