


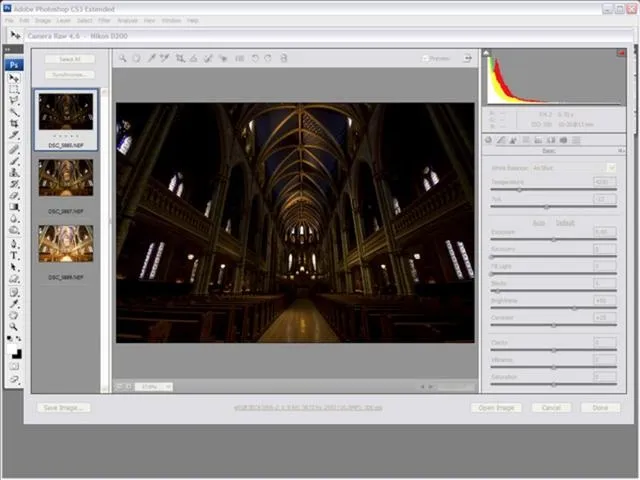
Yanick's Photo School demonstrates how to use Photoshop to make HDR images in Photoshop CS3. This tutorial first explains that HDR means "High Dynamic Range" which is a process to get details from a photo from both the highlights and shadows of a particular scene. The first thing that is necessary is to take multiple views of the same image with different exposures. To start off, you will take three exposures: one that is two stops down, one that is normal exposure, and one that is two stops up. This will give you the necessary range of exposures for the HDR end result. To be more detailed you could take even more exposures. After importing the images into camera raw, the first step is to open the images in Photoshop. The next step, is to go to File, Automate, and Merge to HDR. You then align the images and select 16 Bit/Chanel option. The HDR Conversion dialogue box will appear and you will be able to edit your HDR photograph to your liking.
Apple's iOS 26 and iPadOS 26 updates are packed with new features, and you can try them before almost everyone else. First, check Gadget Hacks' list of supported iPhone and iPad models, then follow the step-by-step guide to install the iOS/iPadOS 26 beta — no paid developer account required.


Comments
Be the first, drop a comment!