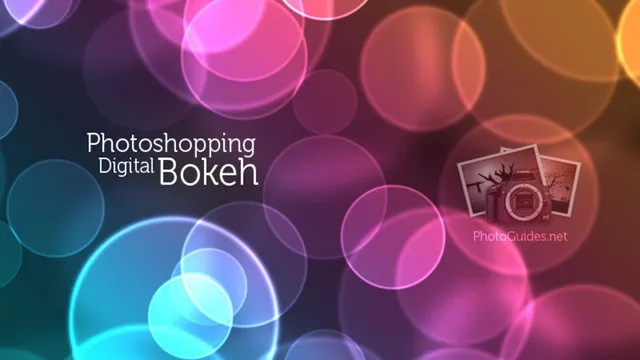
Ash Davies teaches us how to Photoshop digital bokeh with this tutorial. First, open up Photoshop and create a new canvas with your width at 1920 and your height at 1200. Now, create a new layer and set your background layer as invisible. Now create a medium size circle and reduce the fill to 50%. Now enter blending options and add a stroke of 10 pixels to the inside with the color set to black. Now define the shape as a brush and then click "edit" and "define brush preset" name this, "bokeh". You can now hide your bokeh brush layer. In order to paint, select the paint pallet and find your newly defined brush. First, turn the visibility of the background to "on" then change the color to 26,26,26. Now apply this color to your background. Now add a new layer and rename it "colors". Go to blending options and select "gradient overlay". Click on "gradient" and add in your colors: ffff85, 1bdaeb, 9b3b81, and d27e34. Now click "ok" and change blend mode to overlay and angle to 45 degrees. Now, create a new folder and call it "bokeh" and make the layer "color dodge". Now select your bokeh brush and you will have the scattered effect!
- Hot
- Latest
-
How To: Use x-ray techniques in Photoshop to show naked skin through clothing (NSFW)
-
How To: Change Skin Tone in Photoshop
-
How To: Unclothe people in Photoshop
-
How To: See through clothes with Photoshop CS5
-
How To: Convert a Photo into a Line Art Drawing in Photoshop
-
How To: Change an object's color in Photoshop using magic wand
-
How To: Make your own passport size photo
-
How To: Remove stains, dirt and discoloration in Photoshop
-
How To: Create a magazine cover in Photoshop
-
How To: Reveal nipples with the Photoshop x-ray effect
-
How To: Sex up Facebook pics with Photoshop patch tools/levels
-
How To: Remove a bra strap using Adobe Photoshop
-
How To: Use the Liquify Tool—The Number One Way to Make Boobs Bigger in Photoshop
-
How To: Fix Blurry Photos in Photoshop
-
How To: Created animated .gif files in Adobe Photoshop CS2
-
How To: Reshape facial structure with Photoshop liquify
-
How To: Use the F shortcut key in Photoshop
-
How To: Remove unwanted objects with the Spot Healing Tool in Photoshop Elements 9
-
How To: Trace a picture in Photoshop with the path tool
-
How To: Create a neon light text effect Photoshop CS3 or CS4
-
How To: Use x-ray techniques in Photoshop to show naked skin through clothing (NSFW)
-
How To: Change Skin Tone in Photoshop
-
How To: Unclothe people in Photoshop
-
How To: See through clothes with Photoshop CS5
-
How To: Convert a Photo into a Line Art Drawing in Photoshop
-
How To: Change an object's color in Photoshop using magic wand
-
How To: Make your own passport size photo
-
How To: Remove stains, dirt and discoloration in Photoshop
-
How To: Create a magazine cover in Photoshop
-
How To: Reveal nipples with the Photoshop x-ray effect
-
How To: Sex up Facebook pics with Photoshop patch tools/levels
-
How To: Remove a bra strap using Adobe Photoshop
-
How To: Use the Liquify Tool—The Number One Way to Make Boobs Bigger in Photoshop
-
How To: Fix Blurry Photos in Photoshop
-
How To: Created animated .gif files in Adobe Photoshop CS2
-
How To: Reshape facial structure with Photoshop liquify
-
How To: Use the F shortcut key in Photoshop
-
How To: Remove unwanted objects with the Spot Healing Tool in Photoshop Elements 9
-
How To: Trace a picture in Photoshop with the path tool
-
How To: Create a neon light text effect Photoshop CS3 or CS4
Be the First to Comment
Share Your Thoughts