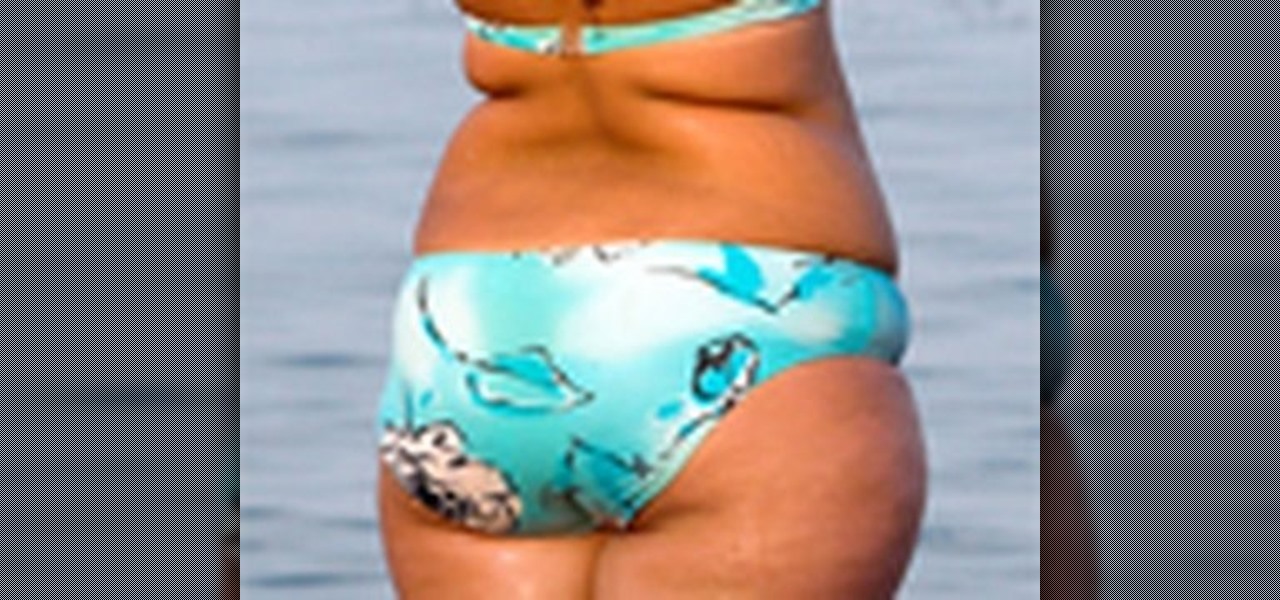

This video shows the method to do weight loss using Photoshop. Open the image and go to 'Filters' and 'Liquify'. Click on the 'Forward Warp Tool' on the left. Zoom into the back area and drag the mouse in towards the body to make it thin. Keep the 'Brush Pressure' high to get a sharp result. 'Brush Size' determines how large the brush is and the area affected by it. Use the 'Pucker Tool' and click on the ass to reduce it. Reduce the sides of the ass with the 'Forward Warp Tool' and reduce the sides of the ass. Click 'OK.' Click on the 'Patch Tool' and make an outline of the area in which you want to get rid. Drag the mouse from inside the outline to a smooth area you want to replace, and let go of the mouse. Use the 'Clone Stamp Tool' for areas where 'Patch Tool' doesn't work well. Hold the 'Alter' option and sample the area. Brush the area that you want to fix. Use the 'Liquify' option to lean the areas of the body again. This finishes the task.
Just updated your iPhone? You'll find new emoji, enhanced security, podcast transcripts, Apple Cash virtual numbers, and other useful features. There are even new additions hidden within Safari. Find out what's new and changed on your iPhone with the iOS 17.4 update.


Be the First to Comment
Share Your Thoughts