

Photoshop How-Tos


How To: Draw a realistic mouth in Photoshop
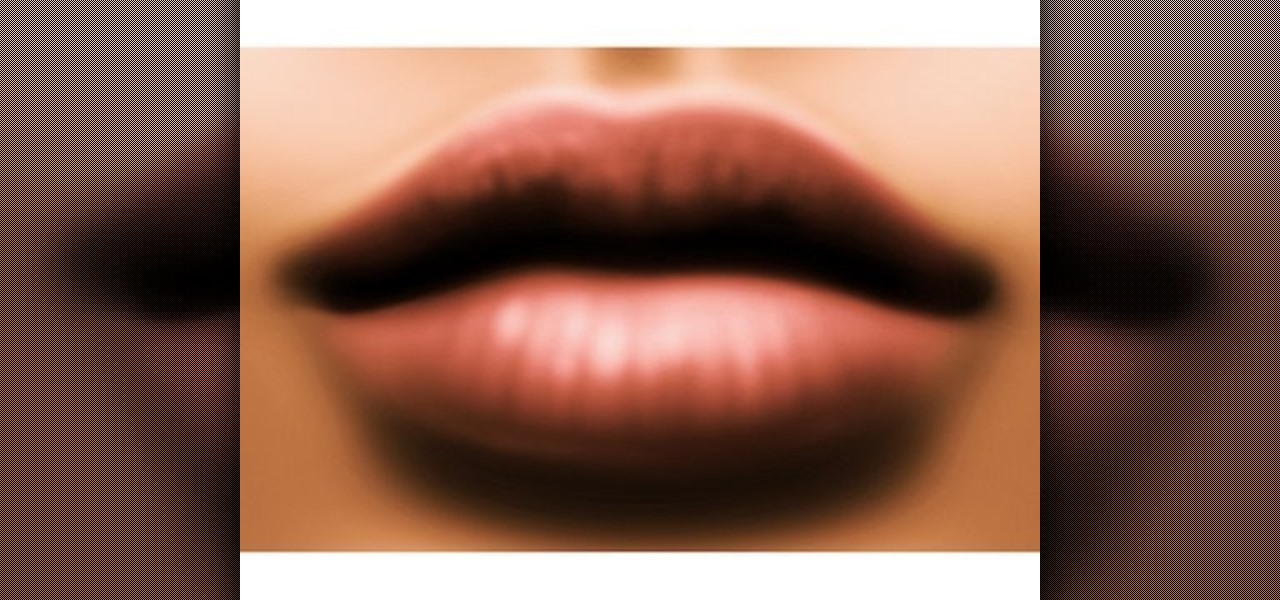
Are you interested painting in 3D mode? Let's try the human mouth first. First, get the basic shade of the lips with a single color. Then, fade out the top side of the upper lip part and give it a less sharp edge. Then paint the depth area above the lips. Edge out the top lip and add more shades on the bottom one. Then add those small vertical lines with low opacity. Add a gradient map over it and another pink layer(color burn).The lips are ready and it will help you in your painting skills.
How To: Changing colors of an object in Photoshop
In the tutorial, GeorgiAnastaso shows your how to change color of an object in Photoshop. First of all open the picture which you want to change. Then make a new layer and go to make adjustment layer option. There will be three options. Hue, saturation and lightness. If you change the hue amount it will change the color of your object. Saturation will maintain the color amount. After finishing this tutorial you will be enable to change any color in photoshop.
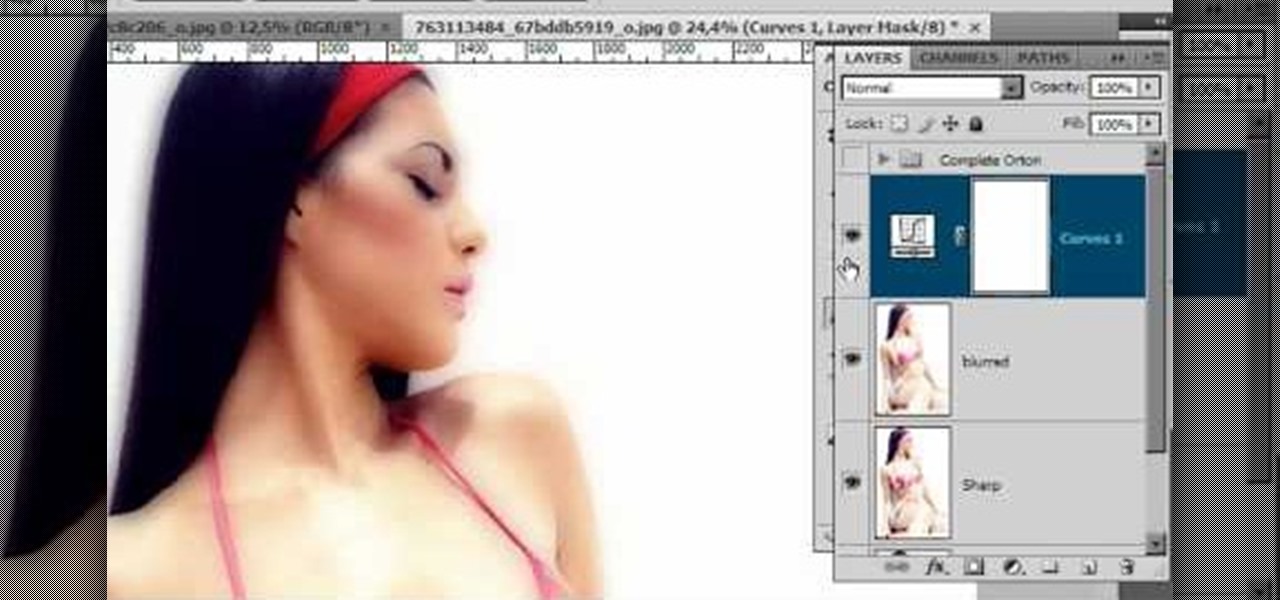
How To: Create the Orton glow effect in Photoshop
In this video tutorial, viewers learn how to create the Orton glow effect using Adobe Photoshop. The Orton glow effect is achieved by combining a sharp image with a duplicate that is deliberately blurred or softened. The overall result is often characterized as a dreamscape, diffusion, or softening glow. It is an effect used for landscapes and portraits. This video provides voice narration and step-by-step instructions for viewers to easily understand and follow along. This video will benefit...
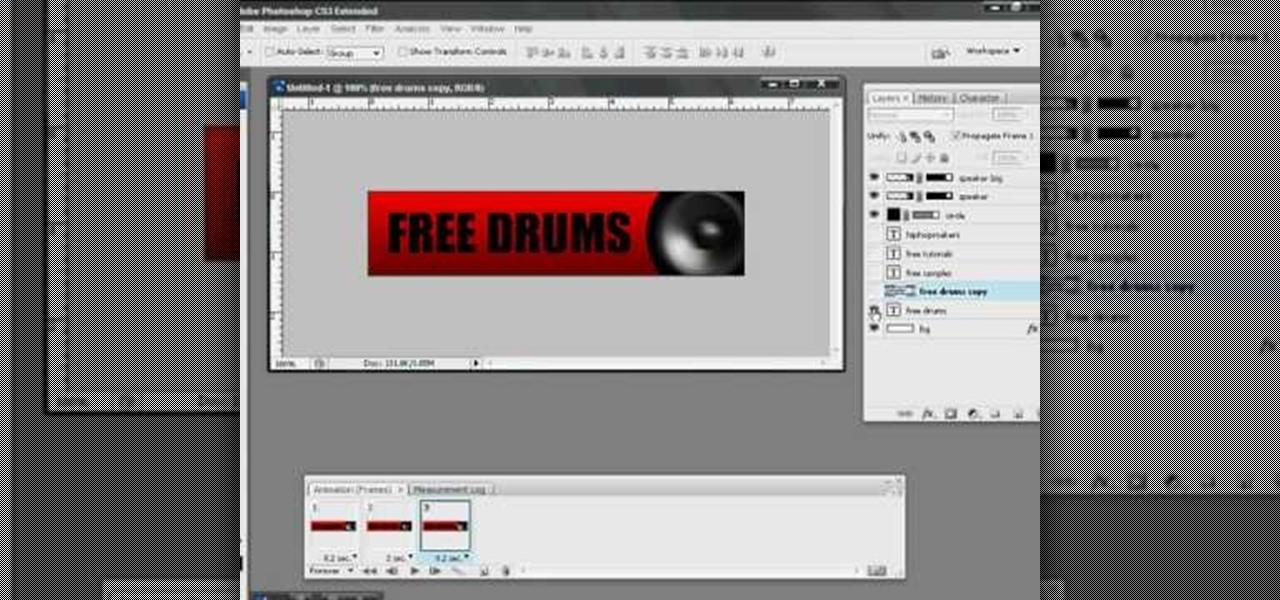
How To: Make a animated banner for MySpace in Photoshop
The video explains how to make a animated banner in photoshop. The narrator explains step by step how to create the banner, what colors he used in the banner and the width and length of it as well. He also shows other techniques that he used to create the banner. The video is about ten minutes long and is very informational for those interested in creating animated banners for their website. The narrator has other instructional videos on the same subject as well.
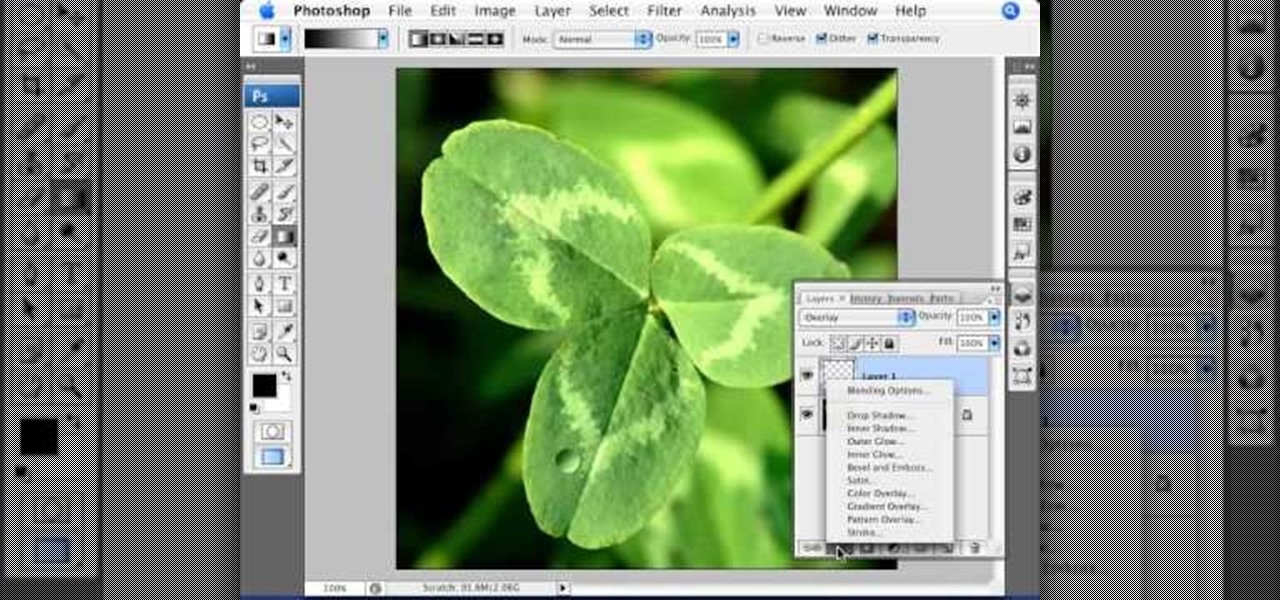
How To: Create a water droplet in Photoshop
This video offers Photoshop users a detailed procedure for adding simulated water droplets to photographs. A male voice-over describes each step in a conversational tone, and his instructions are easy to follow and apply. As he narrates, each step is carried out on screen, allowing you to find the different Photoshop tools and settings when you do it yourself. The procedure uses the gradient tool, drop shadow, and liquefy filter to create a water droplet to a clover leaf. In addition to showi...
How To: Make a little planet effect in Photoshop
Watch this video to learn how to make a little planet effect in Photoshop. Go to Image>Image Size and resize the picture making the width and height equal . Don't forget to unmark the "Constrain Proportions" option. Now that you have a squared photo go to Image>Rotate Canvas>180. Go to Filter>Distort>Polar Coordinates and select the option "Rectangular to Polar". Now rotate as you want to and remove any failures.After you select the picture, make sure the sides are alike and that the horizont...
How To: Change an object's color in Photoshop using magic wand
Use the "Magic Wand" tool to select the color you wish to change. The next step is to open the replace color box. Go to Image > Adjustments > Replace Color. After the Replace Color box is open, you may have to select the color that you want to change in the image. Sometimes, it will automatically select the color you're changing, but sometimes you will have to use the Eyedropper Tool and click a hue of the color you wish to change. After the color is selected in the "Replace Color" box, you c...
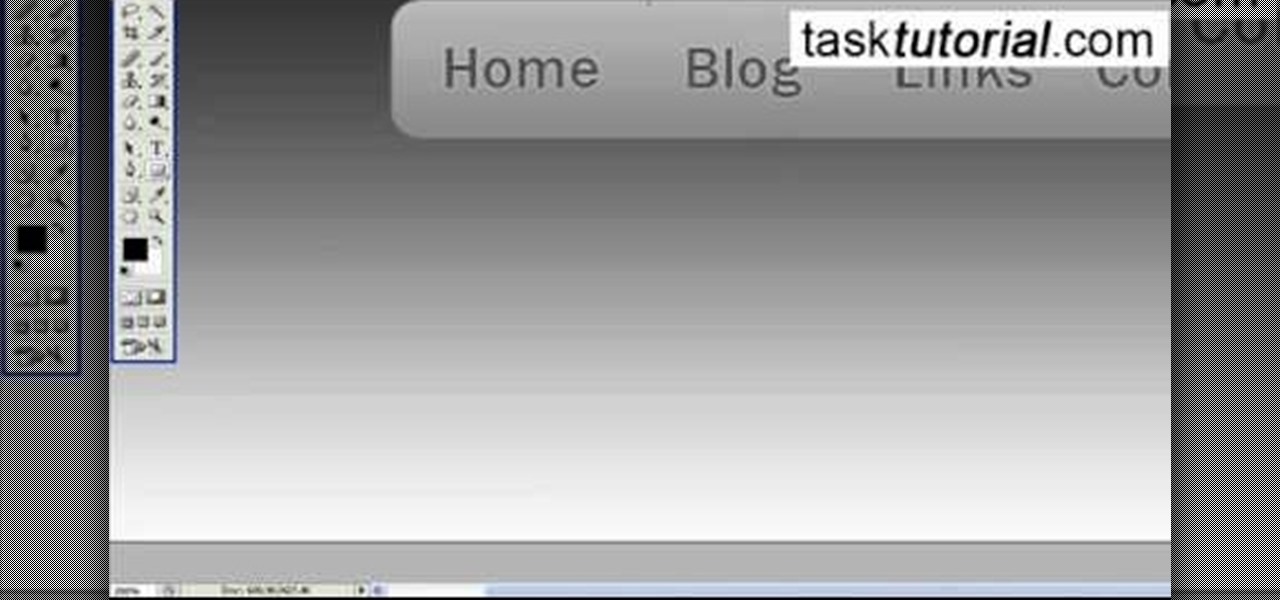
How To: Create a navigation bar in Photoshop
In this video tutorial, viewers will learn how to create a navigation bar, using Adobe Photoshop. Adobe Photoshop is a graphics editing program. Viewers will learn how to use multiple layers, layer effects, gradient options and drawing tools. Viewers will be able to customize their own color and designs. This video provides voice narration and a visual demonstration that allows viewers to easily understand and follow along. This video will benefit those viewers who design websites and web pages.
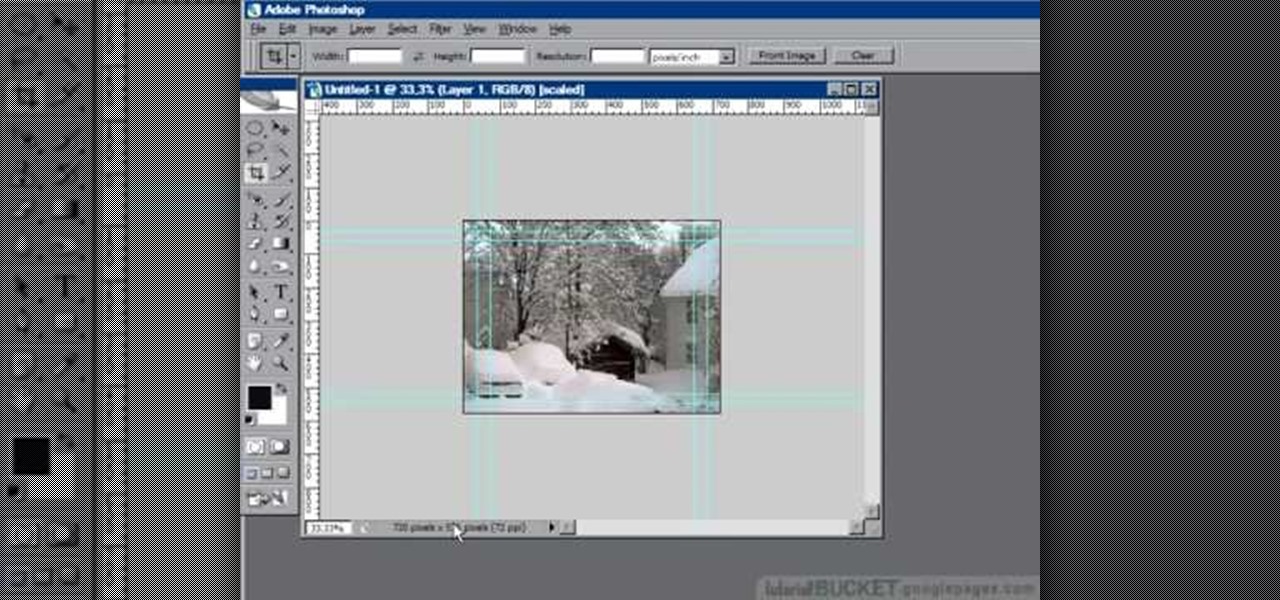
How to Use Photoshop for video: pan & scan image preparation
In this Adobe Photoshop tutorial the instructor shows how to prepare pan and scan images. To prepare an image by panning and scanning is quite different than preparing an image normally for using in your video. These images should be extra sized as you would perform special effects on the image in your video. This is also called as "Ken Burns" effect. Now go to the file, new menu and select the video format that you want to use according to your requirement. Enable the correct pixel aspect ra...
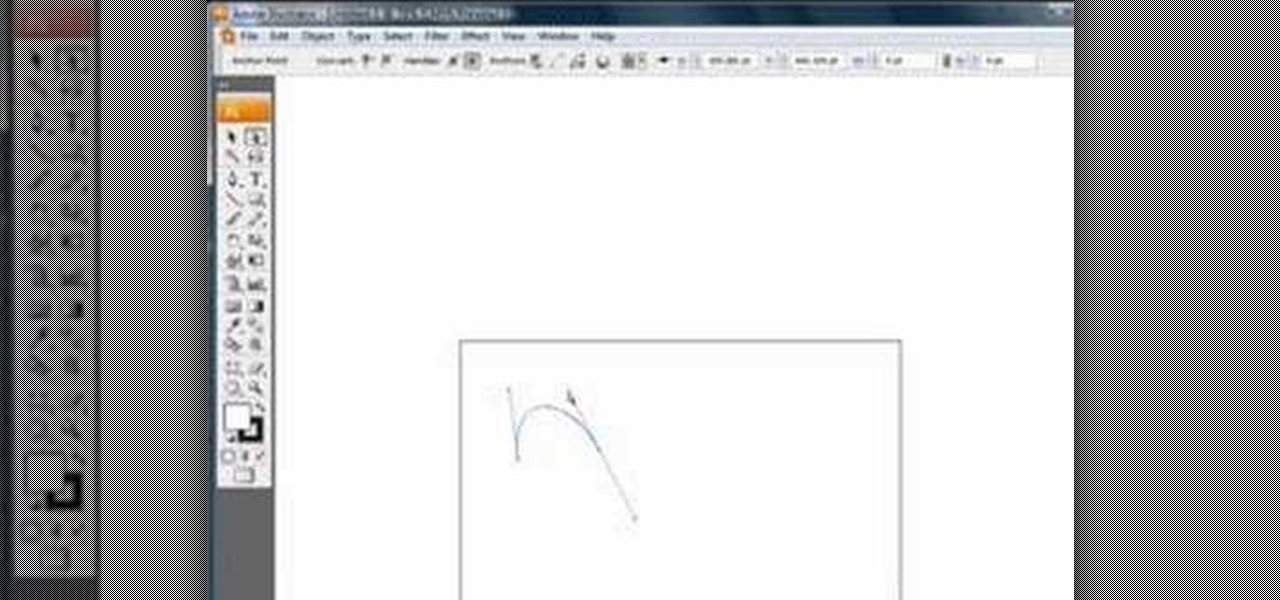
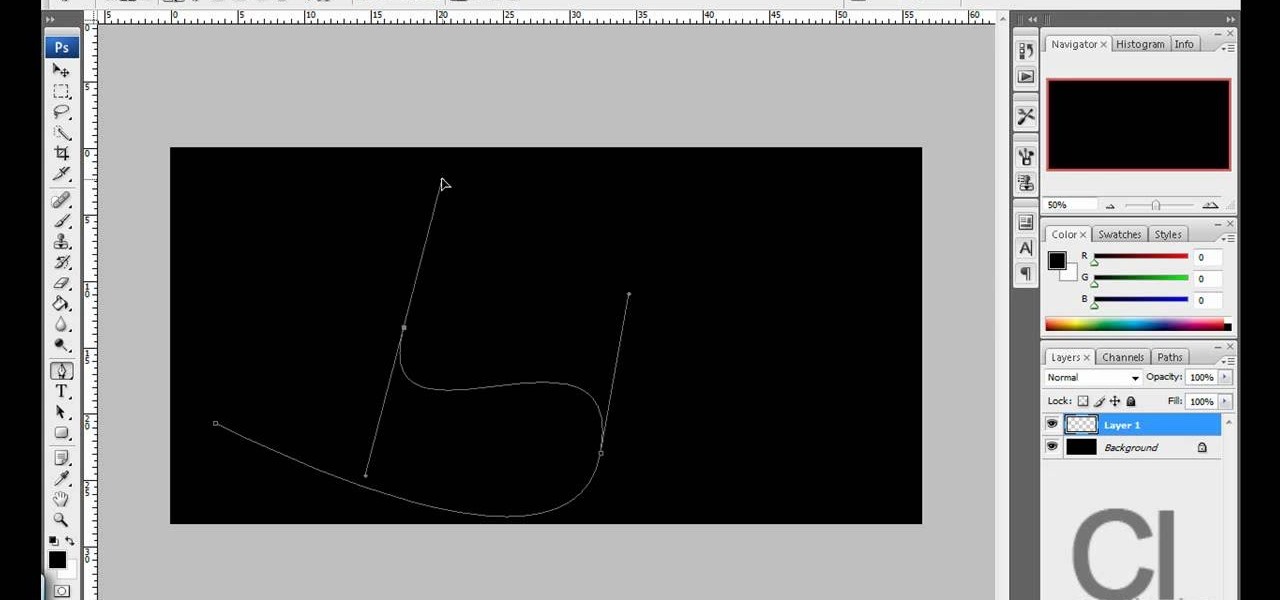
How To: Use the pen tool in Photoshop, Flash, & After Effects
Chad Perkins shows how to use the Bezier pen tool in Photoshop, Flash, and After Effects. Perkins attempts to shed light on how the tool can be used and dispels certain misconceptions about the pen tool. The pen tool allows users to create various types of paths, either open or closed, at the most basic level of use. At the more complex level, the pen tool can be used to create professional looking curves. For better understanding of what the pen tool can do for graphics and other designs, fo...
How To: Enhance the color of photos in Photoshop
Photoshopuniverse teaches you how to enhance the colors of photos using Adobe Photoshop. You get a photo and duplicate that layer. Set the blending mode to Soft Light. You repeat that step, only the blend mode should be Lighten. The shadows are now darker. You can change the blend mode opacities to 60%-70%, but both layers should have about the same opacity. Also make sure that the white values are not to white and that details, like faces, are still OK to see.
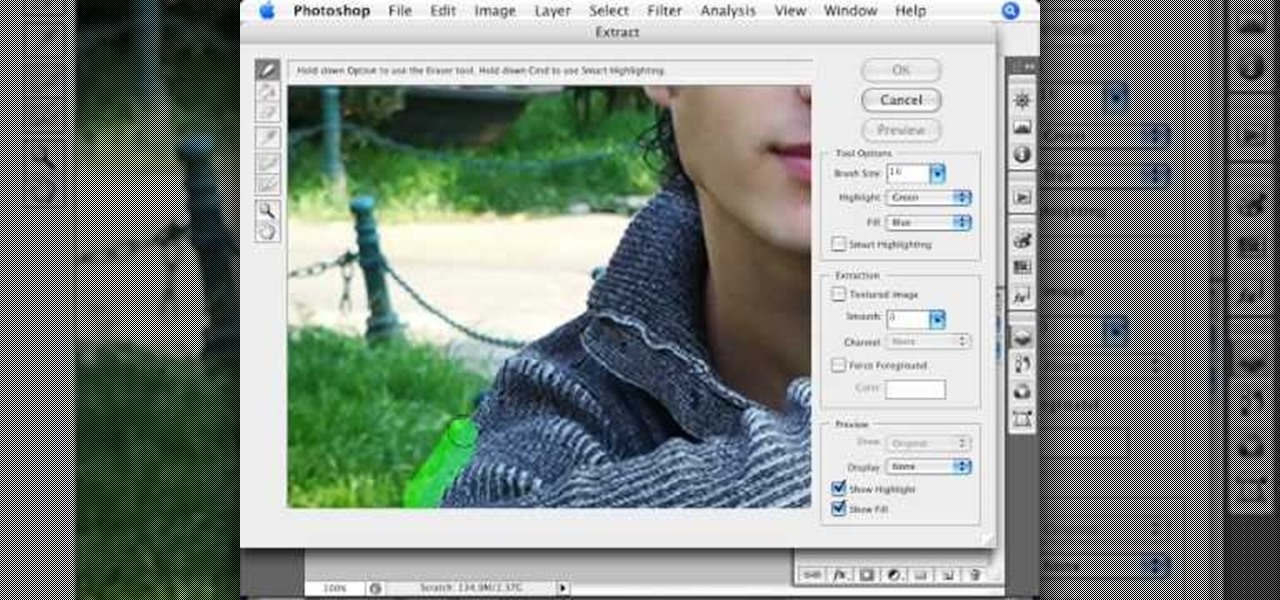
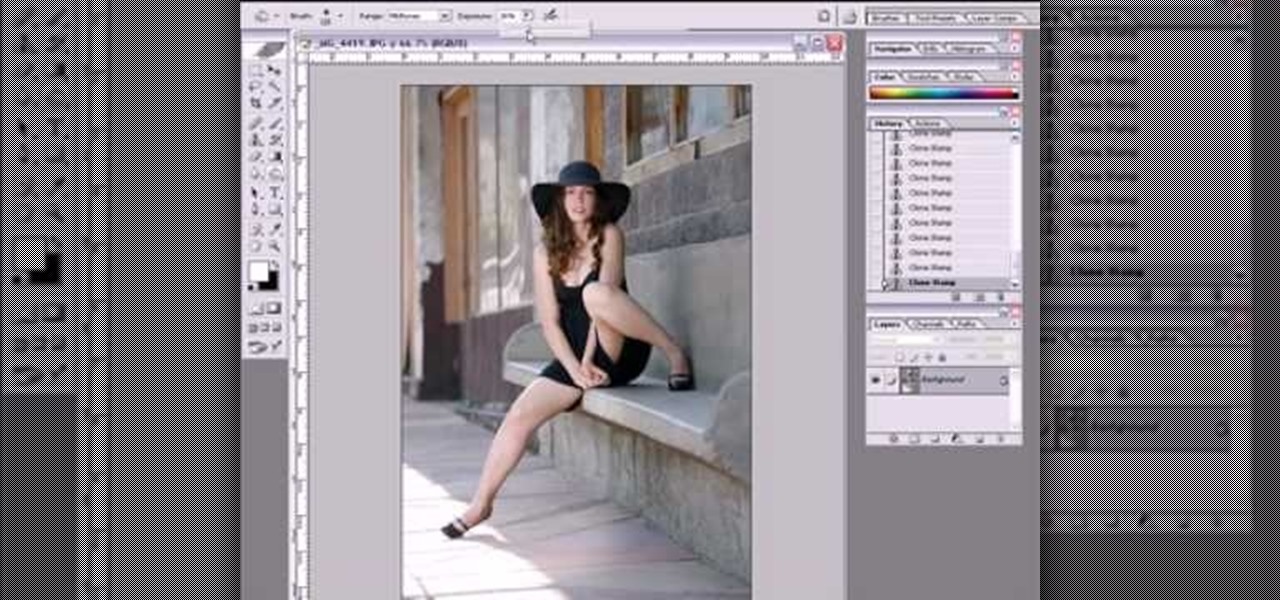
How To: Cast a shadow within a photo in Photoshop
When editing your photos in Photoshop, there are many different things you can do to manipulate your original image. One of those things is to add shadows. Using Photoshop you can cast a shadow within any photo, on any object. In this tutorial, learn exactly how to accomplish this. You will also learn how to use the extraction tool and distort mode to cast a realistic shadow on just about anything.
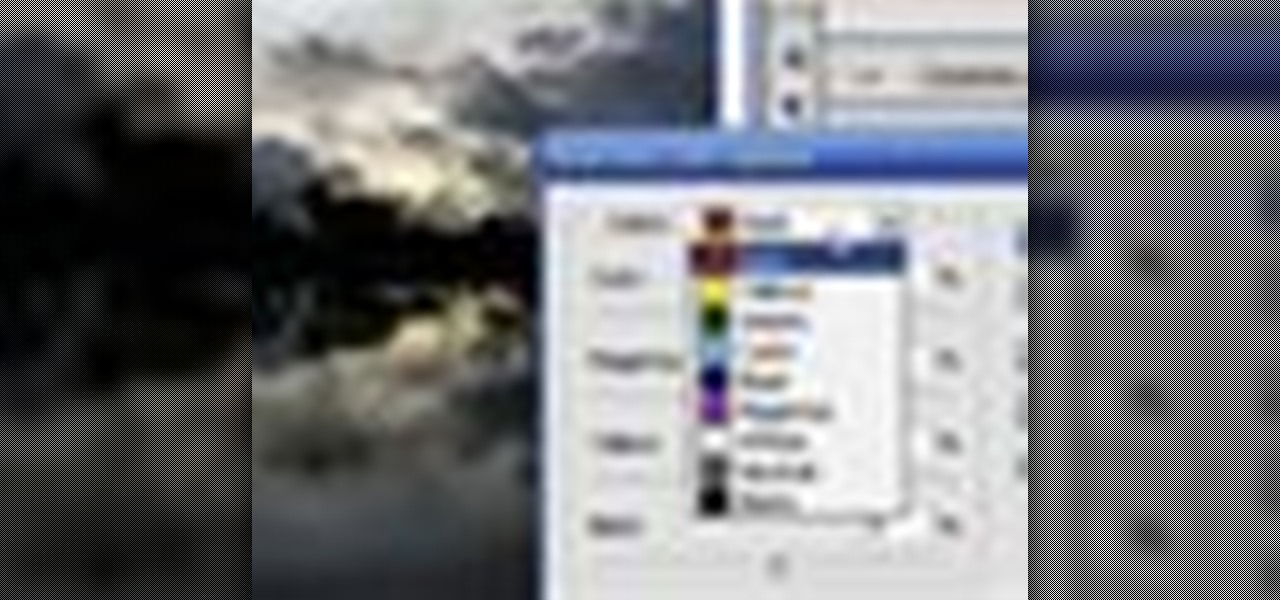
How To: Change selective color of the sky in Photoshop
Learn how to edit a picture to alter the color of the sky using Photoshop's selective color adjustment layer. This tool allows you to change a color in a photo. A good example of what this tool can do is to change a sunset to a sunrise in a photo. To begin with, you will need to open the selective color adjustment layer under the layer tab. Under the color menu, select the color that you want to alter. The tutorial goes over how much of each color to add or remove to get the desired effect. W...
How To: Draw 3D graffiti
Graffiti is a nuissance but it can also be an awesome form of true art. In this tutorial, learn how to draw 3D graffiti as demonstrated in Photoshop CS2. 3D graffiti gives your tag a very cool effect, making it appear to be popping out of the wall it is sprayed on and standing out from any other artwork nearby. Even though it looks advanced, creating 3D graffiti is actually quite easy to do. Try this style out and impress your fellow artists and passerbys alike.
How To: Create perfect black & white images in Photoshop
In this video tutorial, learn the several methods to get black & white images from color originals in Photoshop. The first method is the simple desaturate by going to image > adjustments > desaturate and it will wipe out the color from your image. The second non-destructive way of doing this is going into the layers palette, adding a new adjustment layer, choosing hue and saturation and dragging the saturation slide all the way down to minus (-) 100. The next method is going to the channels p...
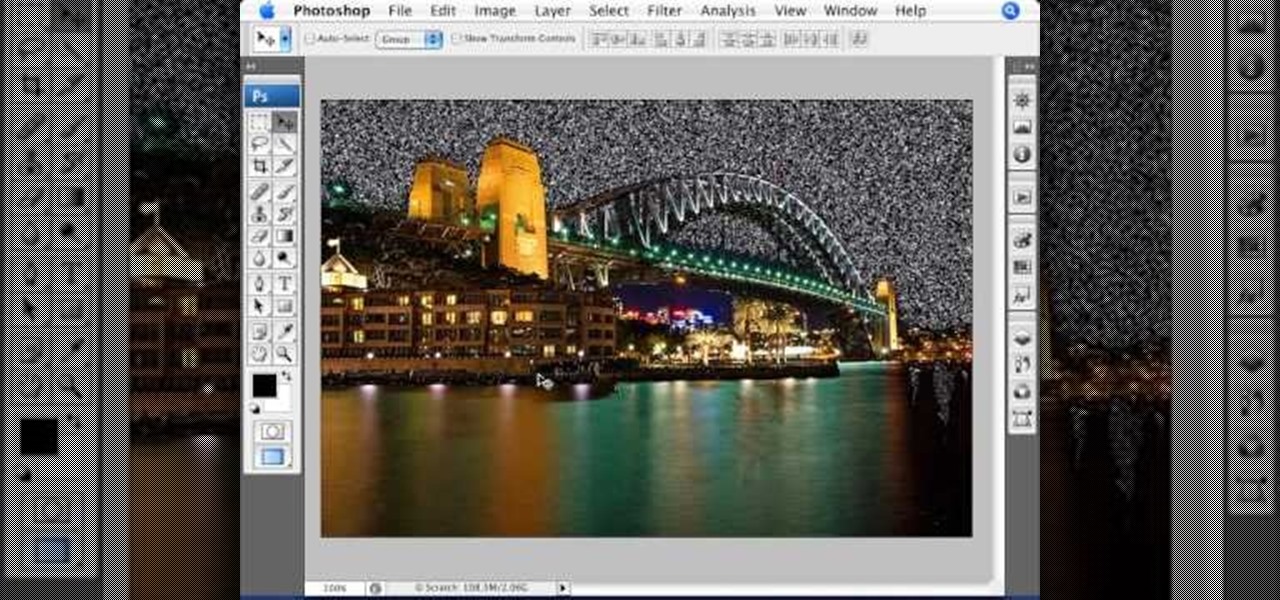
How To: Create a starry sky in Photoshop
The video is a Photoshop tutorial teaching how to create the starry sky effect, an effect that turn regular sky in a photo into a starry night sky using the Adobe Photoshop software. This effect is created by the use of Photoshop filters like noise, blur, levels and masking in order to achieve the look of a real night sky. By following the tutorial you will learn how to create and control the amount of stars in the photo's sky in only 6 minutes.

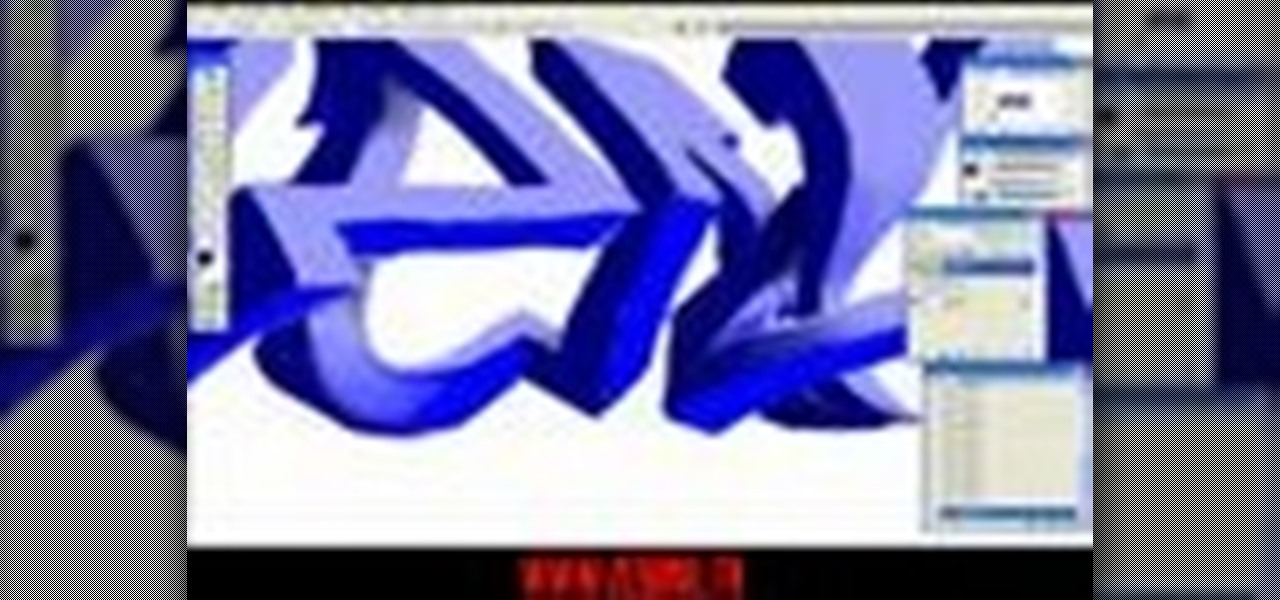
How To: Draw graffiti in Photoshop
This video shows you how to draw graffiti in Photoshop. The information relates to Illustrator and Adobe Photoshop CS2 or later. The presenter started in Illustrator and started to draw using the draw tool, created three letters, adjusted the thickness of the line, copied and pasted the letters to create a shadow effect. The presenter then used Photoshop. He used at least 3 layers to create the background and highlights. Three types of brushes and at five different colors (White, Black, and a...
How To: Create a studio background in Photoshop
This video by photoshopuniverse shows you how to make any photo seem as it was taken in a studio. Take the working photo and add a new layer over it and fill it in black as shown. Add a newer layer over that and add the filter> render> clouds effect. Increase the opacity of the cloud layer and merge it with the black layer as shown. Add the splatter effect and the sprayed stoke effect as shown onto the merged layer and add a hue and saturation adjustment layer and colorize it as desired. Go t...
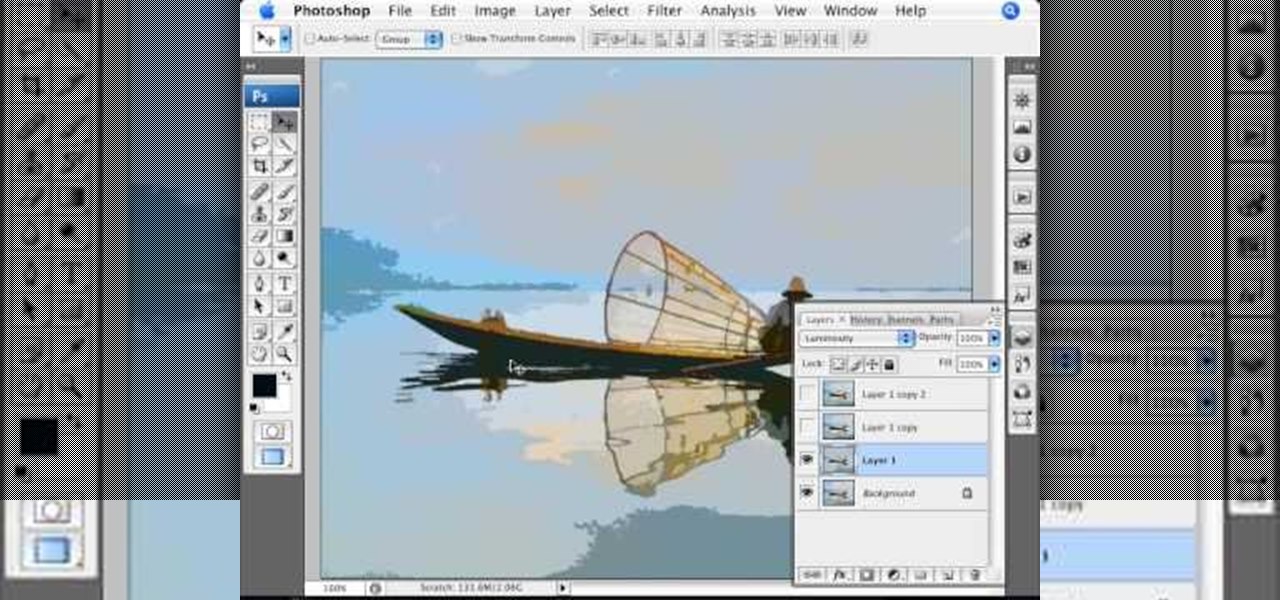
How To: Simulate a watercolor painting in Photoshop
Photoshopuniverse shows you how to simulate a watercolor painting on Photoshop. With this you can take any photo and make it look like it was a water color painting. Take any photo and then duplicate the layer 3 times including original. Focus on the first layer go to cut out. You want a high edge fidelity, and add the number of levels no more than 5. Add some simplicity and the change mode too luminosity. Go to the second copy layer do a dry brush increase size to maximum. add just a little ...

How To: Make your own passport size photo
This video instructs the watcher on how to create a passport-sized photo in Photoshop. First, open Photoshop and choose the image that you want using the "Browse" option. Then go to "image", from there "select image size" and select the image size you want (e.g. 35 mm by 43 mm). Next, under "File", go to "select new" and select the size of the paper you use in your printer. Select image and move it to the new file. Copy it as many times as you want in that file. Save, then print. Watch this v...
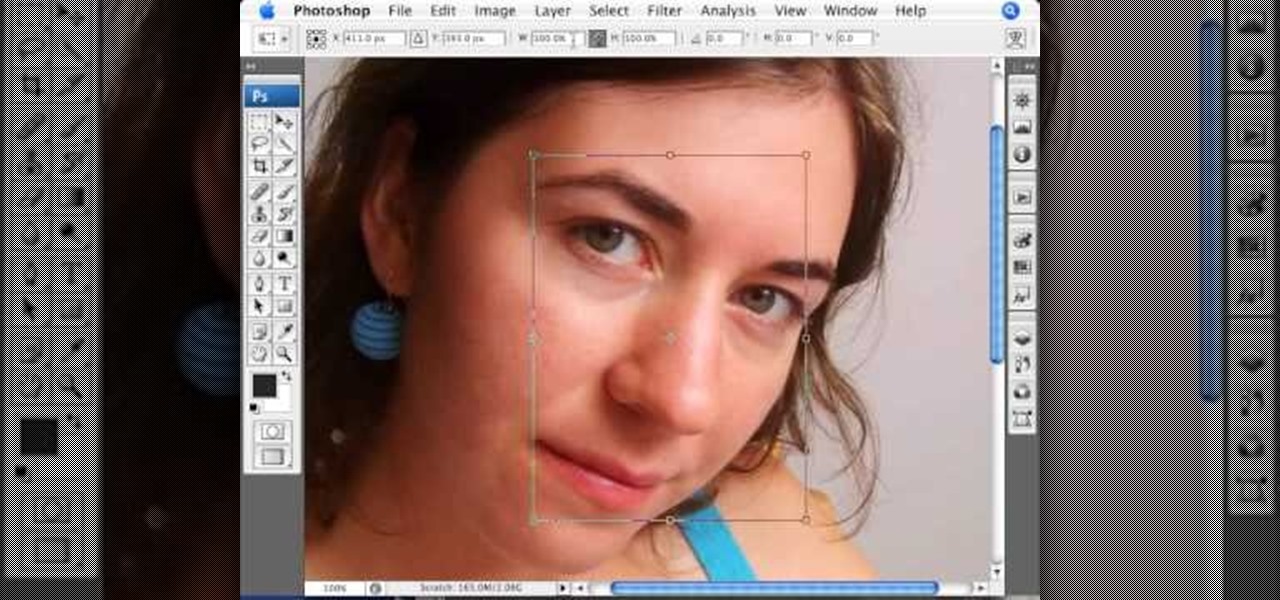
How To: Perform a digital nose job in Photoshop
This Photoshop tutorial on performing a nose job using Photoshop contains detailed instructions on the use of Photoshop tools to, depending on taste, enhance the appearance of an individual. The person narrating the tutorial specifies the necessity of subtlety with the modification of the picture in order to remove any appearance of modification. The way described is essentially to select the general nose area, feather the selection by an optional amount, and set it in a separate layer. Then ...

How To: Draw realistic eyelashes in Photoshop
This video demonstrates how to draw eyelashes using Adobe Photoshop and a graphics tablet. You need three tools to draw eyelashes: Soft Round Brush, Smudge Tool, and Eraser. Create a new layer. On the upper eyelid, draw each eyelash with Soft Round Brush (color: black, width 17px, opacity 100%). Use Smudge Tool (width 45 and straight 25%) on the eyelashes to straighten them. Use Eraser (width 65 and opacity 100%) if necessary. Create a new layer and use the same tools for the bottom of the ey...
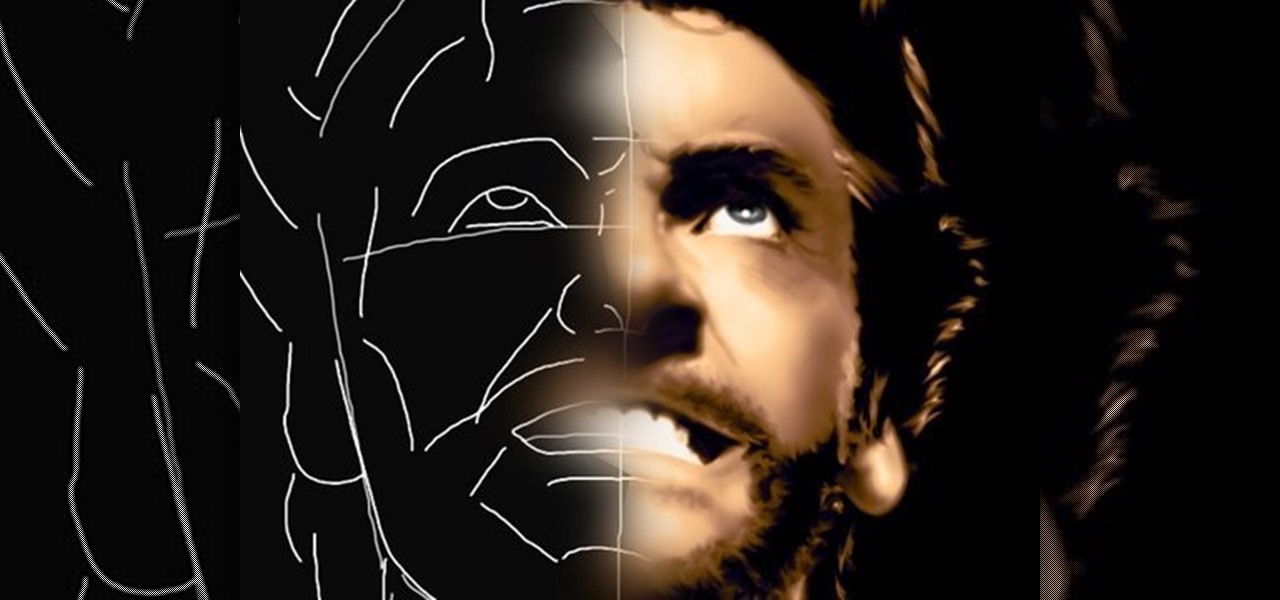
How To: Draw Wolverine from X-Men in Photoshop
Artist Stephanie Valentin takes us through the steps of how to draw the X-Men character Wolverine in Photoshop. She outlines the necessary tools to be able to make the drawing and provides detailed information on width, shading, and opacity to make sure the colors are all accurate. After creating a series of layers, gradients and various sketches, she shows us how to create the character. In just five hours with this tutorial, you can learn how to create Wolverine using Photoshop.

How To: Create an electricity text effect in Photoshop
In this tutorial CreativeIceDesigns shows you how to make really cool electricity text effect by using Photoshop. To do this you need to open Photoshop and create new document. Layer will be black. Go to Type tool and type the word which you want to give effect. Now duplicate the layer and hide one. After that go to filter, stylize and wind option. Give this effect from all side. Change the color and unhide the text layer. After watching this you will be also able to make electricity text eff...
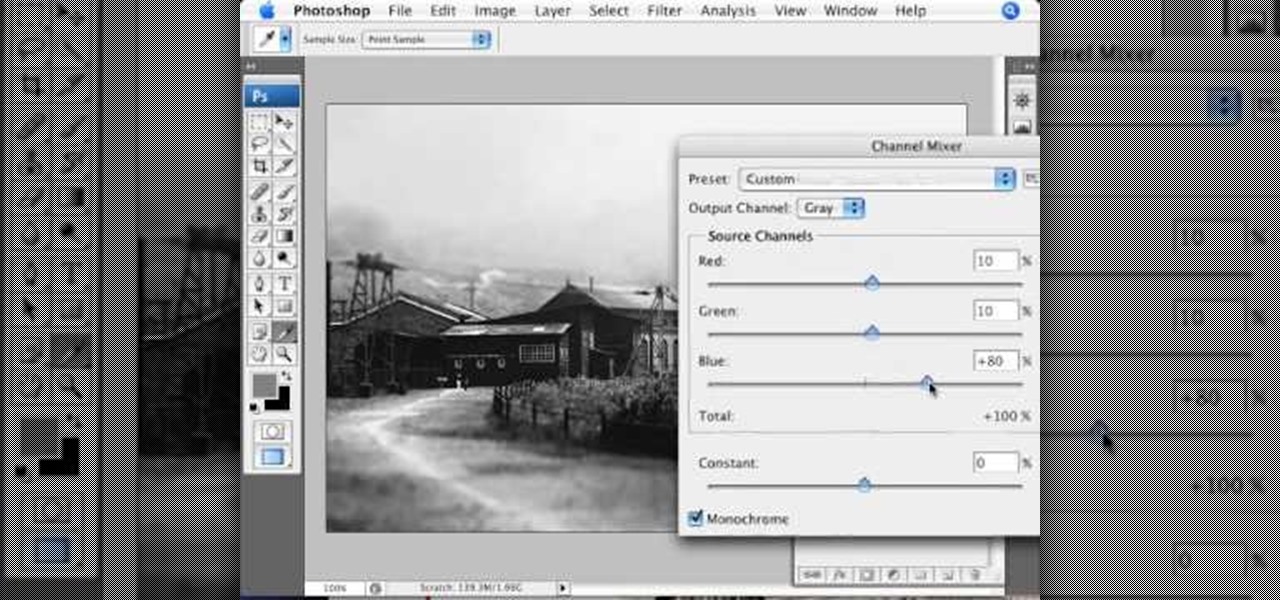
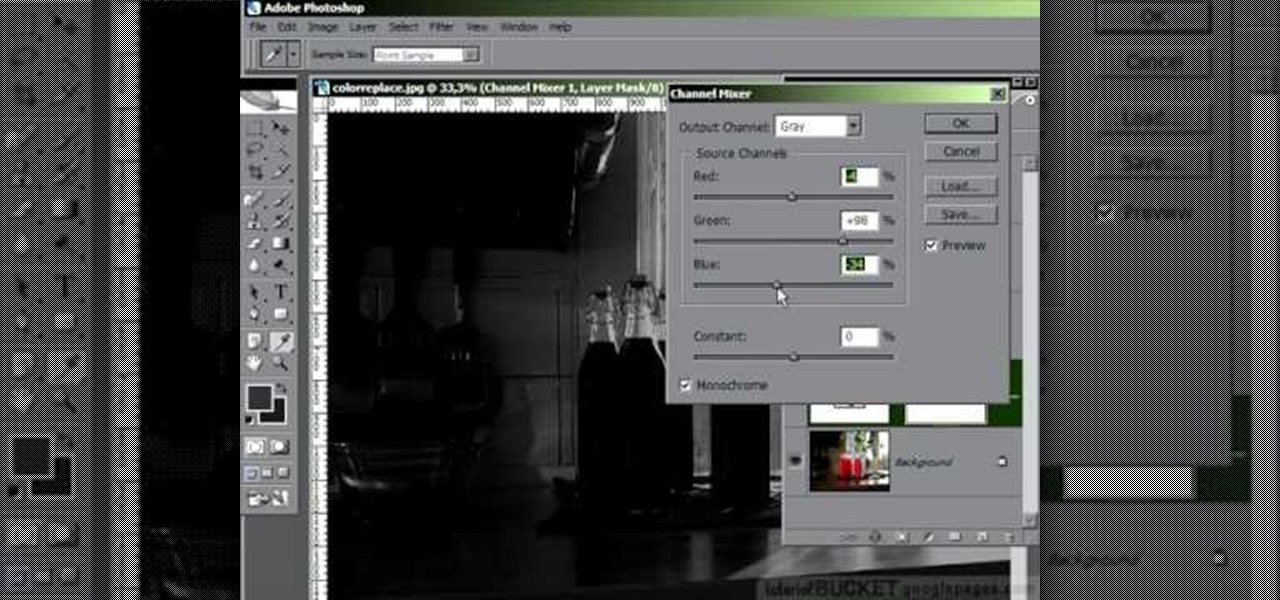
How To: Create a split tone effect in Photoshop
This video demonstrates the split tone effect in Photoshop. A split tone effect makes a picture look more rustic by changing the tones. First, add an adjustment layer to the picture by opening the channel mixer window. Select Monochrome and adjust the RGB values to create a black and white image to your own personal preference. Next, add another layer by opening the color balance window. Here you can change the colors of the light areas by selecting Highlights and changing the color sliders, ...
How To: Create glowing line effects in Photoshop
This is really cool, you can make these awesome neon glowing lines using your Adobe Photoshop. This is a fun way to make creative and colorful designs and it looks really neat without spending time working on detailed shapes.
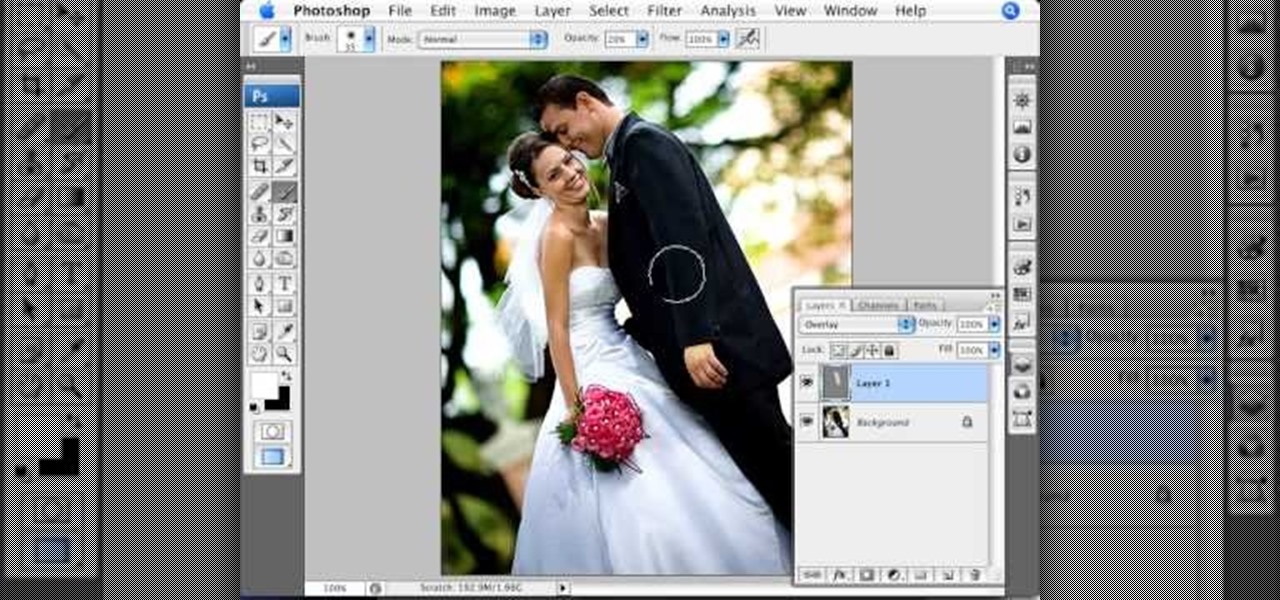
How To: Dodge & burn non-destructively in Photoshop
Photoshopuniverse teaches you how to use the Dodge and Burn tools in a non destructive manner, in Adobe Photoshop. Dodge makes things lighter. Burn does the opposite. The problem is that this is destructive operation. Use the Brush tool at 20% opacity. Create a new layer with 50% grey. Change the layer's mode to Overlay. With the black color you will make things darker and with the white lighter. To view the changes, review the overlay layer. To correct a mistake on this layer, use a brush wi...

How To: Draw a realistic ear in Photoshop
StephanieValentin teaches you how to draw a realistic ear in Adobe Photoshop. You create a new document of 1300x1900 pixels and then create 9 layers named L00, L01 and so on until L08. The first layer should be black. On Layer 01 use a soft round brush with a white color, 100 pixels width and 50% opacity. This is the base sketch of the ear. You then apply a gaussian blur of 30 pixels. For Layer 02 you use a soft round brush with a white color, 50 pixels width and 50% opacity. Apply a gaussian...
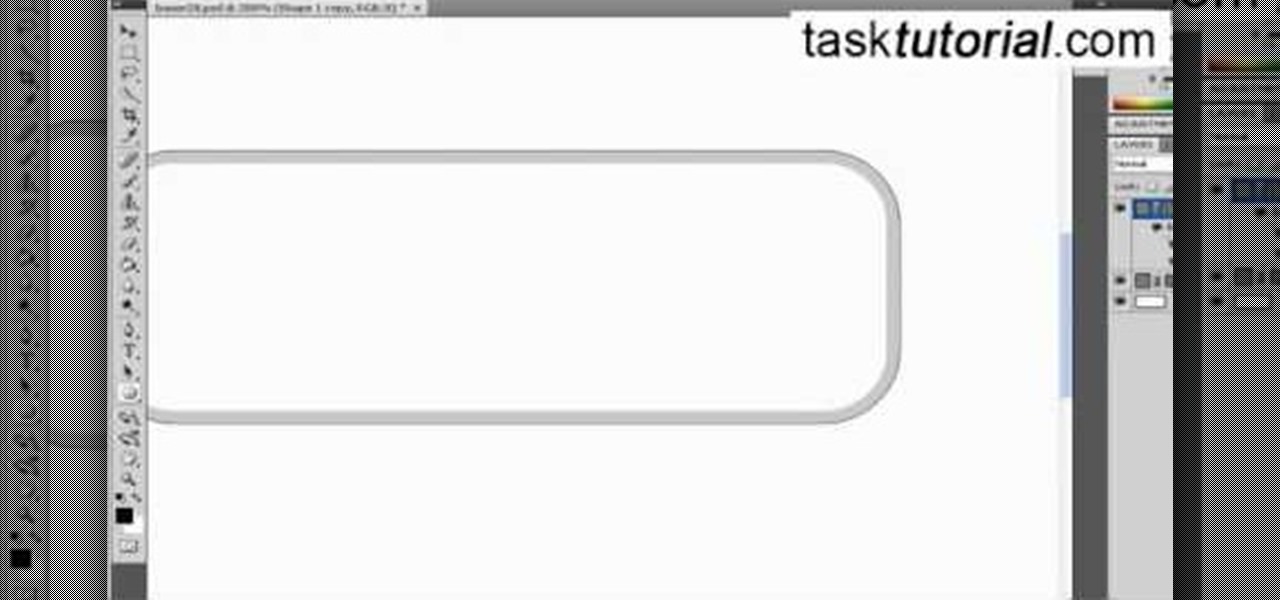
How To: Create a "buy now" button in Photoshop
If you ever wondered how to create a buy now button for your website this video shows how to do it using Photoshop. To do this open Photoshop and start with a new file. First draw a rectangle which will be now modified into the buy now button. Set the radius of the rectangle to forty pixels. Fill it with gray color. Duplicate the layer. Open the layer options of the duplicated layer and set the stroke position option to inside. Set its weight to 6 pixels and set its colors to light gray. Now ...
How To: Create a cell phone icon in Photoshop
Learn how to create a cell phone icon in Photoshop with this video tutorial. Draw a rectangle of radius 30 pixels by holding shift key. Right click on the toolbar and select Stroke button. It will open Layer Style dialog box. Set stroke color and set size to 2 pixels. Select Stop Color set little light red color and click on OK. Now, check on Inner Color option change size to 4 and Capacity value to about 60%. Now select Ellipse tool which will draw a ellipse and cover half of rectangle. Sele...

How To: Create a photo background in Photoshop
Have you ever wanted to create a background with one of your photos? This video shows you how to use one of your photos to create a photo background using Adobe Photoshop. It will show you how to use the free transform tool, overlay blend modes, hue and saturation, drop shadows, and other cool effects. Learn all about creating photo backgrounds with this video tutorial.

How To: Make a multi colored eye in Photoshop
This tutorial explains how to create a multi colored eye effect. First open the image in Photoshop and unlock the layer. Make a selection of the eye with either the lasso, magnetic lasso or pen tool. If you are using the pen tool, like in the tutorial, right click and choose mark selection, feather radius of three pixels. Now copy and paste the eye. Go to File and select New. Create an image of 1000 by 1000 pixels. Unlock the layer and make sure tea background and foreground colors are black ...
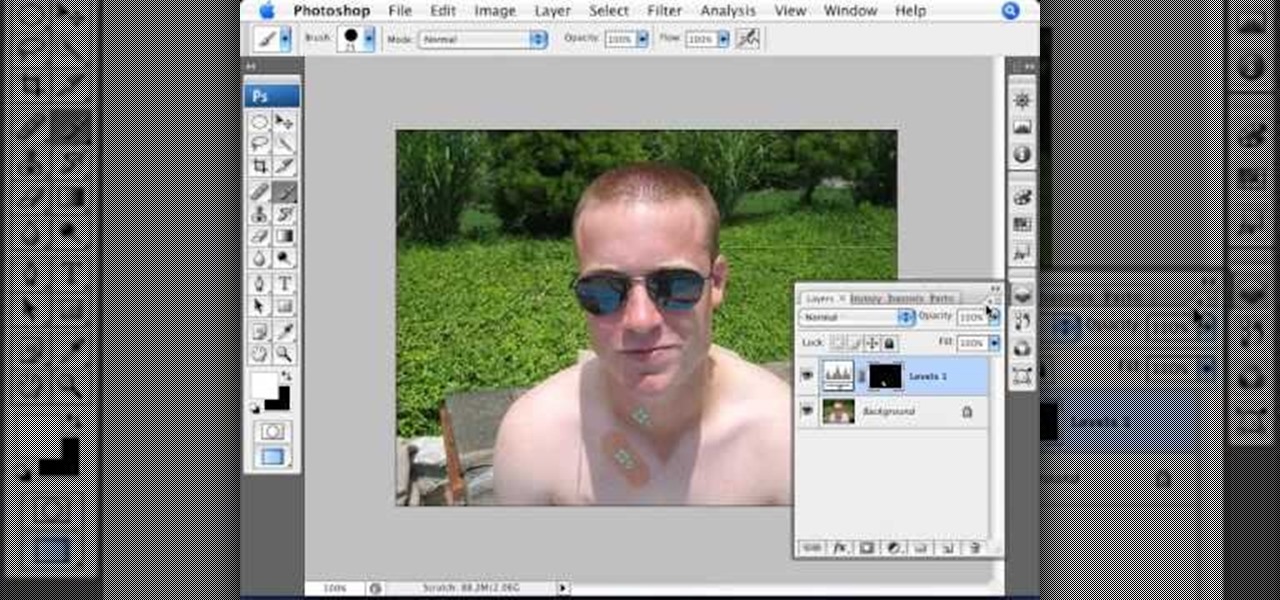
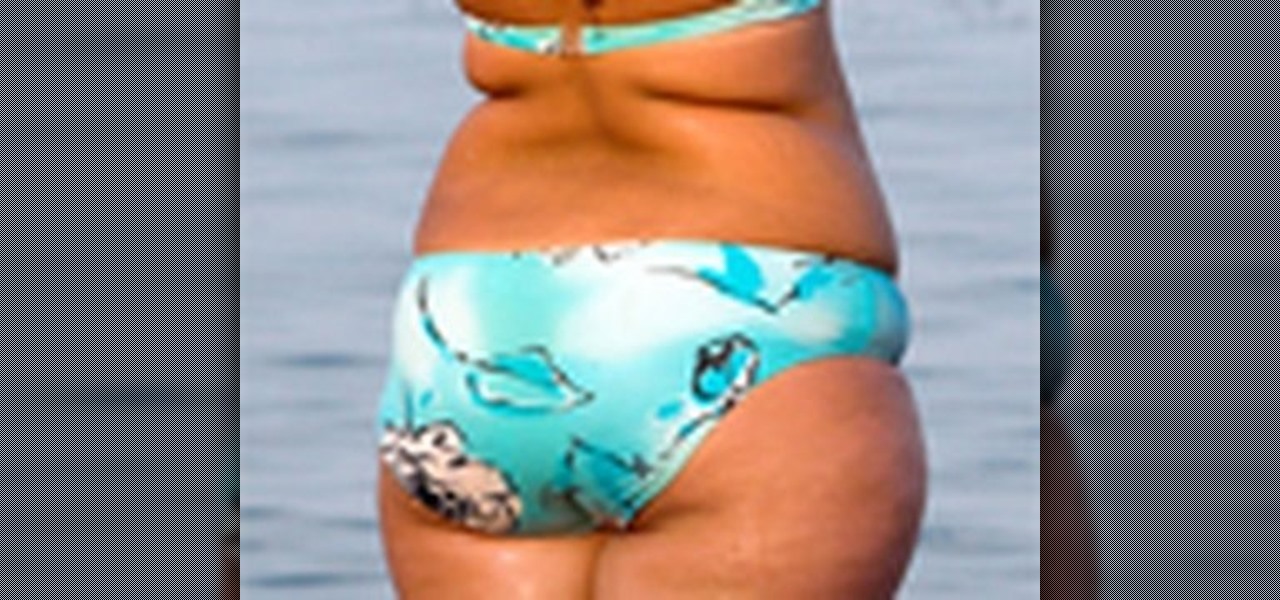
How To: Remove tanlines in Photoshop
In this Photoshop tutorial, learn how to use the software program to remove tan lines from a photo subject. To complete this editing process in Photoshop, follow the steps in this tutorial to learn how to utilize a layer mask, eye dropper tool, and adjust colors. By following the steps in this Photoshop tutorial, you can tan the parts of a subject's skin by learning how to blend colors within the software program so that someone comes out with a more even skin tone.

How To: Create a postage stamp in Photoshop
This video tutorial by photoshopuniverse shows you how to create a postage stamp in Photoshop. First take a suitable image and decide the shape of the stamp. Corp the image to suit the shape of the stamp by selecting the area and choosing corp and increase the canvas size as shown in order to create the perforated cutout. Transform the image into a regular layer and once again increase the canvas size to create a back ground with an appropriate color as shown. Add a layer mask, chose the brus...

How To: Get cool blue eyes in Photoshop
The presenter beings the video by describing the screen cast program he is using to record the video. It is giving him some problems but he asks us to bear with him. The video then shows before and after images to demonstrate the effect. The effect is achieved by duplicating the eye color to another layer and then using layer blending options to achieve the desired brightness. The presenter has a website with many other Photoshop technique videos.

How To: Create a Christmas ornament in Photoshop
The video is a straight forward Photoshop tutorial on how to create a Christmas ornament. The video shows you how to do this with very simple shapes, gradients, and a few layers. All you have to do is keep up the simple instructions. The finished product is very pleasing to the eye, a glossy, shiny, Christmas ornament. The video also provides a link to an external website where the Photoshop project files can be downloaded for reference and are easily customized.
How To: Cross process in Photoshop
Don from Lighting-Essentials.com explains the steps of cross processing in Photoshop. Using this he shows you that you can take great photographs of models without a lot of equipment. He starts by touching up his photograph before-hand; then he goes on to using an action called Cross Process. Cross Process is an action available from a link on his website. Acidify is the exact action he uses to make a unique effect on photographs.

How To: Create a cartoon flower in Illustrator
Tasktutorial will teach you how to create a nice vector cartoon flower using Adobe Illustrator. Start by selecting Rounded Rectangle Tool, and draw a black rectangle. Then select multiple points and move it according to the video, using arrow keys. Then draw an ellipse with the Ellipse Tool, using the Shift key. Watch the video to see the remaining easy steps in creating a vector flower using Adobe Illustrator and also get some cool tips and recommendations for best results.
How To: Create a vector logo from a bitmap logo in Photoshop
Thinkingserious teaches us how to use Adobe Photoshop to transform a normal bmp or jpeg logo into a vector logo that can be MADE as small or large as desired without losing quality. He creates the text, leaves it white and then adds a stroke. He picks the exact color from the original image. The stroke should be 1. Then the gradient is done using the colors from the bmp image. This is a two-step process. First he creates the top gradient. He also adds a soft inner bevel. The end result is sav...
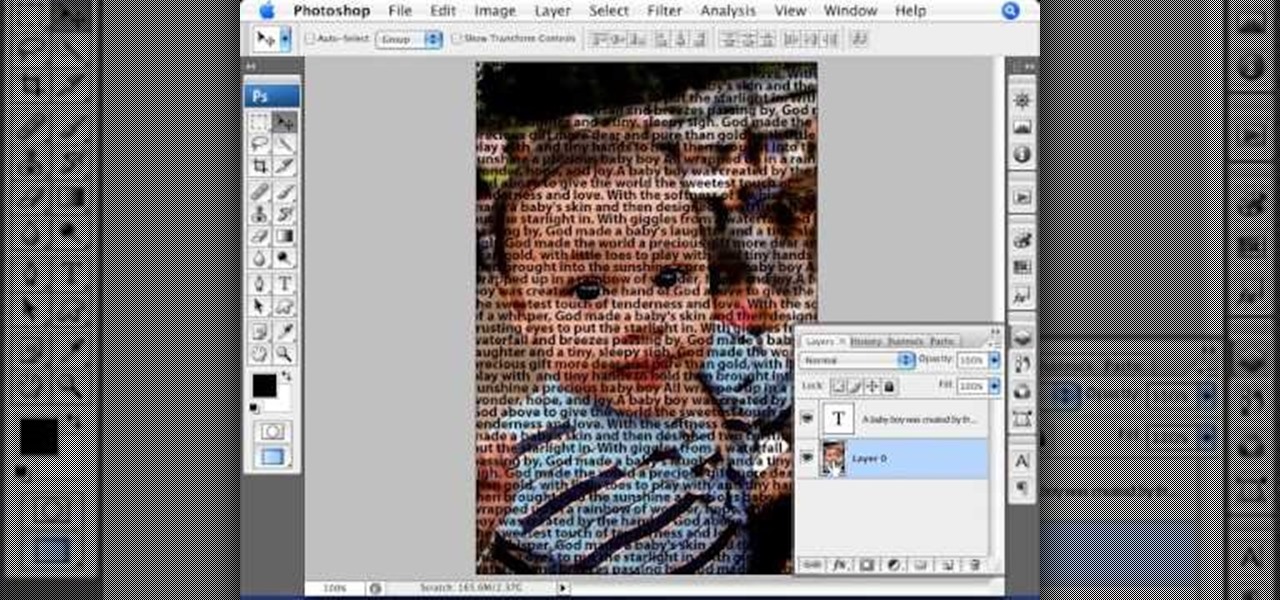
How To: Create an image out of text in Photoshop
Photoshop Universe presents a step-by-step tutorial on how to mask images over text. First and foremost you'll need to have a poem or some other block of text in mind to use. Once you've selected your text you'll use methods such as copying and pasting, using clipping masks, and mild typeface editing. By the end of this tutorial you will have the abilities you need in Photoshop to make your very own text based image!