

Photoshop How-Tos


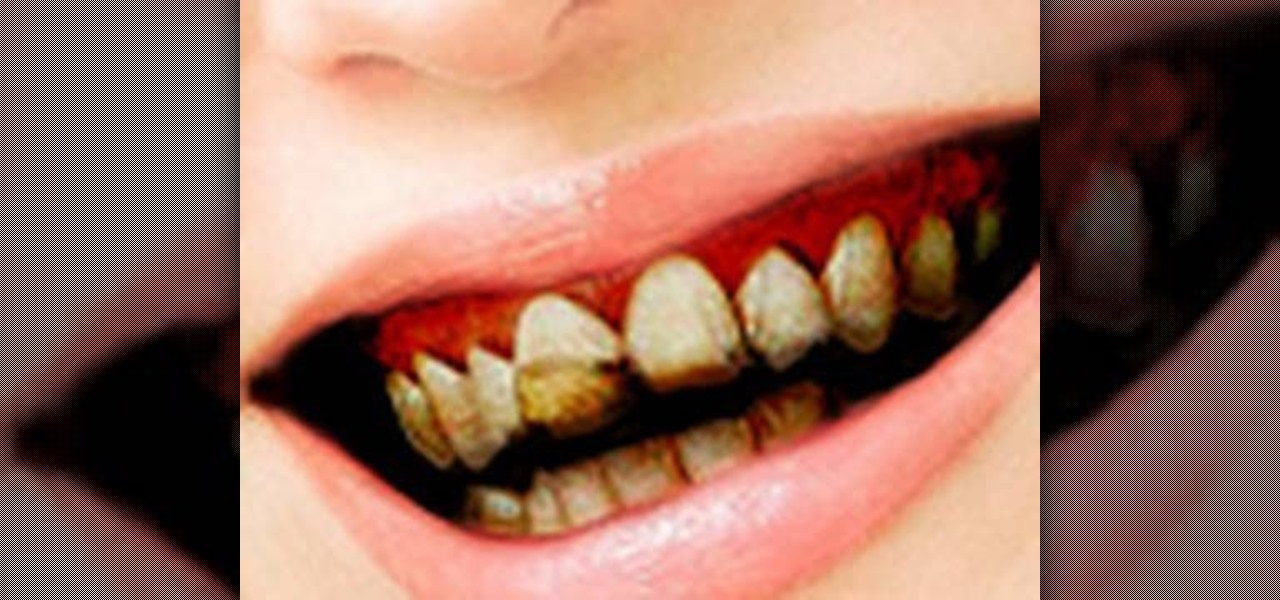
How To: Create bad teeth using Photoshop CS4
Nobody in the world enjoys seeing somebody with really bad teeth. Or enjoys kissing them for that matter. So this video is perfect for you pranksters out there looking to get revenge on a family member, friend, or even enemy. Find out what it takes to make rotten teeth using Photoshop.

How To: Create a glass text effect in Photoshop CS3/CS4
This Software video tutorial shows how to create a glass text effect in Photoshop CS3/CS4. Download a free trial version of Photoshop CS4 from Adobe. Open Photoshop, go to ‘file’ and click ‘open’. In the next box, give it a name, select width and height at 90 pixels, background contents to ‘transparent’ and click OK. Select the color palette and choose the background color and click OK. Now open ‘paint bucket tool’ and fill in the color. Then go to ‘text tool’, select the font, size and posit...
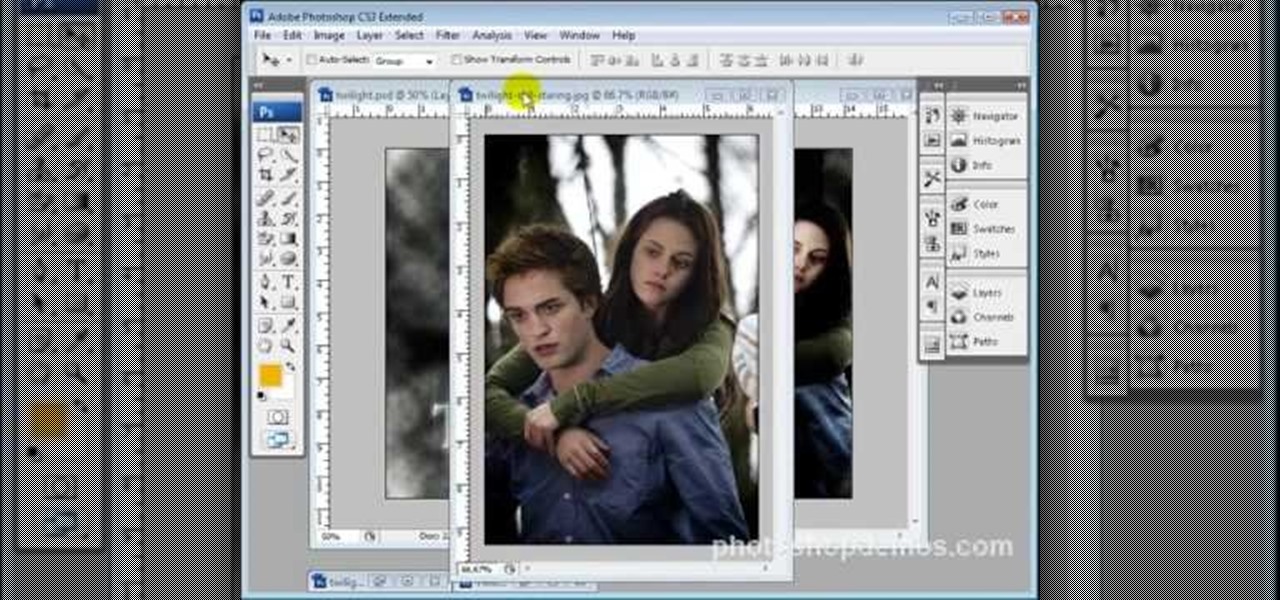
How To: Make your own Twilight movie poster with Photoshop
This three part video tutorial will show you how to take an ordinary photo and turn it into a Twilight movie poster, using Photoshop. This video takes you step by step through the process from finding your image to editing it into a funky, unique poster. Now all you have to do is print it out and blow it up and you will be the envy of all your Twihard friends!
How To: Use fit image in Photoshop
This tutorial will focus on how to use the fit image function within Adobe Photoshop. You will utilize this function when you want the pixel width to match between different sized photos in portrait and landscape. First you will select all the photos (you must create a batch action in Photoshop). Next select the fit image option in the file menu under automate. You will need to put the same number into length and width to constrain the proportions of your landscape and portrait photos have th...
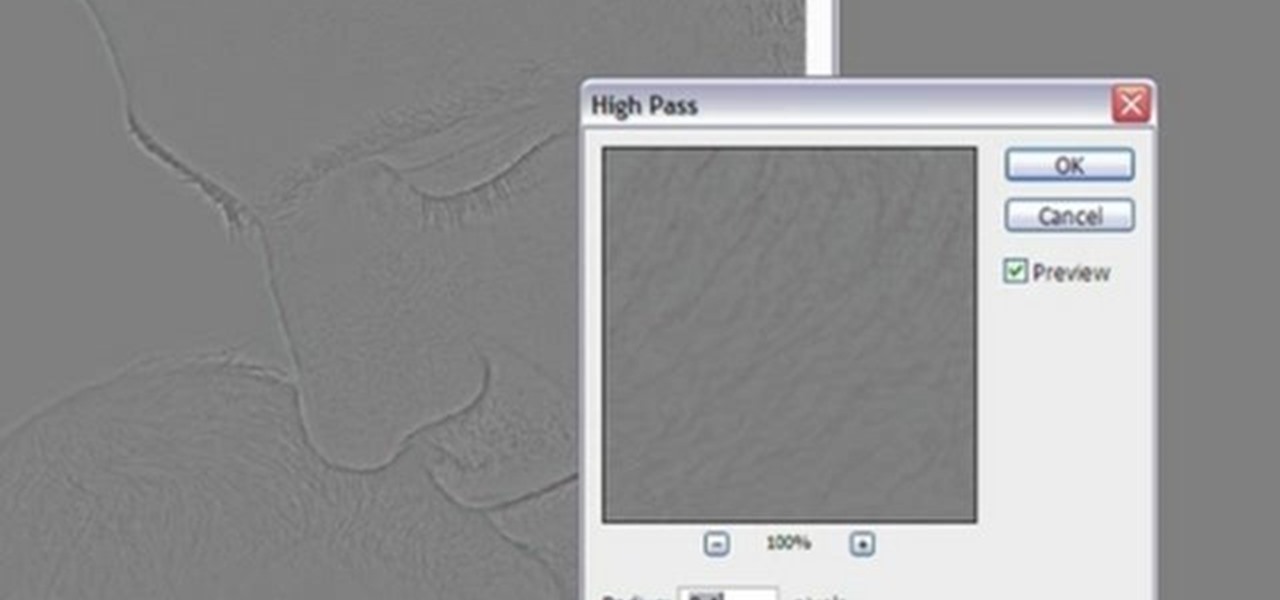
How To: Use the high pass sharpening filter in Photoshop
In this video tutorial, viewers learn how to sharpen photos in Adobe Photoshop CS3. Begin by opening the image in the program and duplicate the image layer. To duplicate, press the control and J button. With that images, go to Filter, choose Other and select High Pass. The images will now be covered entirely of gray. It is recommended to set the radius as 5-6 pixels and then press OK. Change the layer blending mode to overlay, soft light, hard light, vivid light or linear light. This video wi...
How To: Remove pimples and wrinkles in Photoshop
This video in the Software category will show you how to remove pimples and wrinkles in Photoshop. Yanik from Yanik’s photo school presents this video. Select the photo you want to work on. First you duplicate the layer by ctrl+J or select from the dropdown menu. You start off with removing those pimples that you want to remove completely. Select the spot healing or the regular healing brush. Yanik prefers the regular healing brush. Also choose a small brush size. To select a source point, ho...

How To: Make a book cover in Photoshop
In this Software video tutorial you will learn how to make a book cover in Photoshop. Go to file -> new. Give it a name, set width 900, height 1200 and resolution 300 and click OK. You can change these settings if you like. Go to your paint bucket tool and paint the background black. Then go to layer -> new ->new layer -> OK. Now select the elliptical marquee tool and holding ‘shift’ drag from the top left hand corner and make a circle. Go to your paint bucket tool and paint the circle with a...
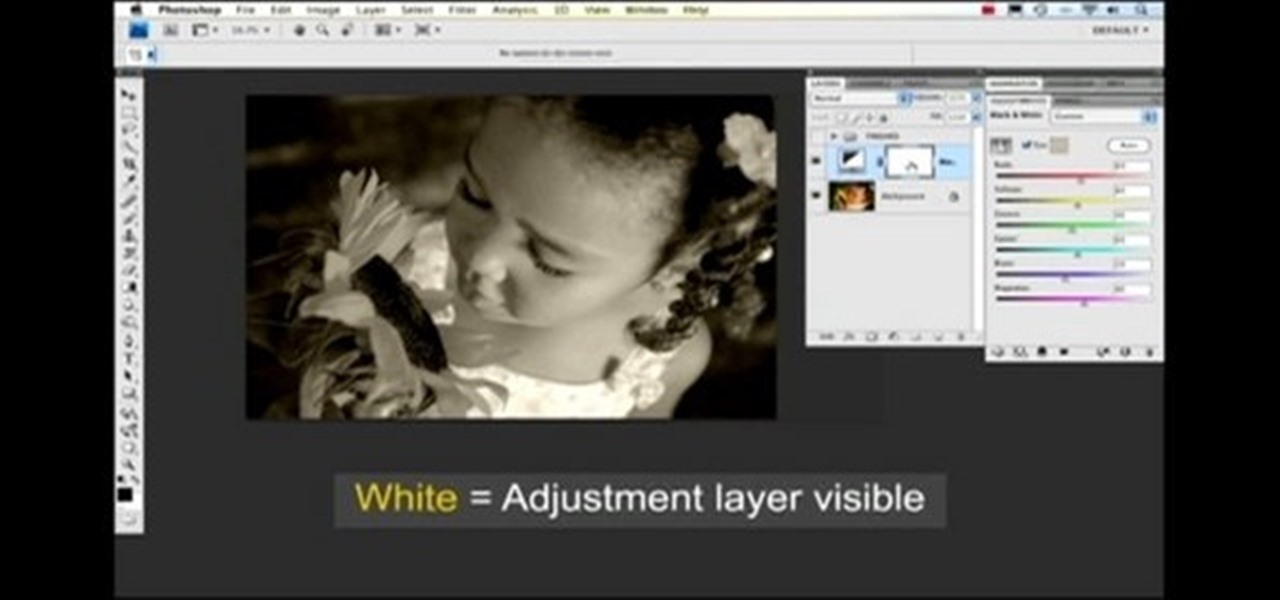
How To: Hand color using layer masks in Photoshop CS3 and CS4
Nichole Young demonstrates how to hand color using layer masks in Photoshop CS4, which also works in Photoshop CS3. The procedure can be summarized in two stages: turning the picture you would like to edit black and white and then bringing color back into it to give it a hand-colored look. The black-and-white effect is achieved by creating a new layer over the background layer. The next step is to give the picture a warm look by adjusting the layer’s respective color balance. Then bring the c...

How To: Batch process multiple photos in Photoshop
Yanik Chauvin demonstrates how to create a batch using Photoshop and them Lightroom so you can decide which is faster and more convenient for you. In Photoshop, he first changes the color in the image, which he explains step by step the process, then saves the image as an action. He then shows you the process to batch the images so they will appear on your desktop. He also does the same thing with the image in Lightroom and shows you the process in which you would change the color and sync th...
How To: Make your own Avatar movie poster in Photoshop
The Avatar craze continues to spread like wild fire as everybody wants to know how they can replicate the Na'vi look with their own photos. With this tutorial, learn how to make your own Avatar Movie poster using your photograph in Photoshop.
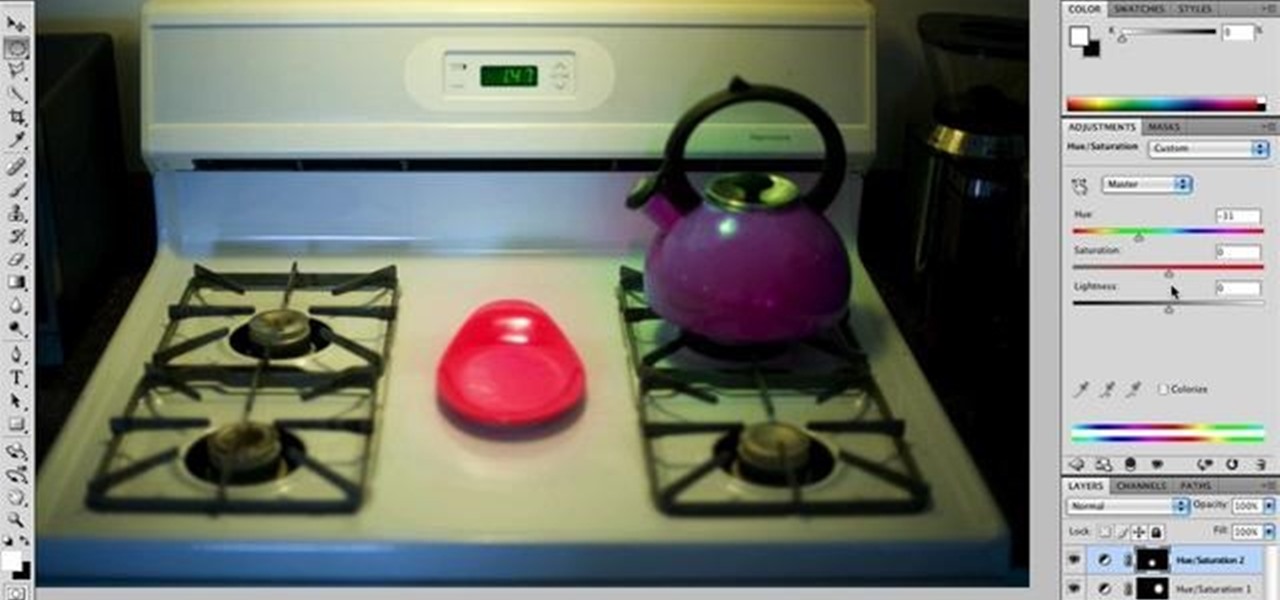
How To: Change the hue and saturation in Photoshop
Nick from Greyscale Gorilla gives a great tutorial on not only how to adjust the hue and saturation of various objects in Photoshop, but he also demonstrates how to select and isolate these objects for better chromatic keying.
How To: Do non-destructive burning and dodging in Photoshop
Nicole Young demonstrates how to use non-destructive dodging and burning using layers in Photoshop. Your first move is to create a new layer and then hit shift + delete to select the level of opacity. You want the layer to be fifty percent grey. Now select overlay from the menu which will make anything that is fifty percent grey will be transparent. You will be dodging and burning with white and black brushstrokes. To switch from black and white background colors just hit x. Other keyboard sh...
How To: Use Photoshop Express online for free
This is a great video series from Yanik Chauvin demonstrating how to use Photoshop Express online for free. This great tool is a wonderful resource for those who can't afford Photoshop but still need to do basic photo editing.
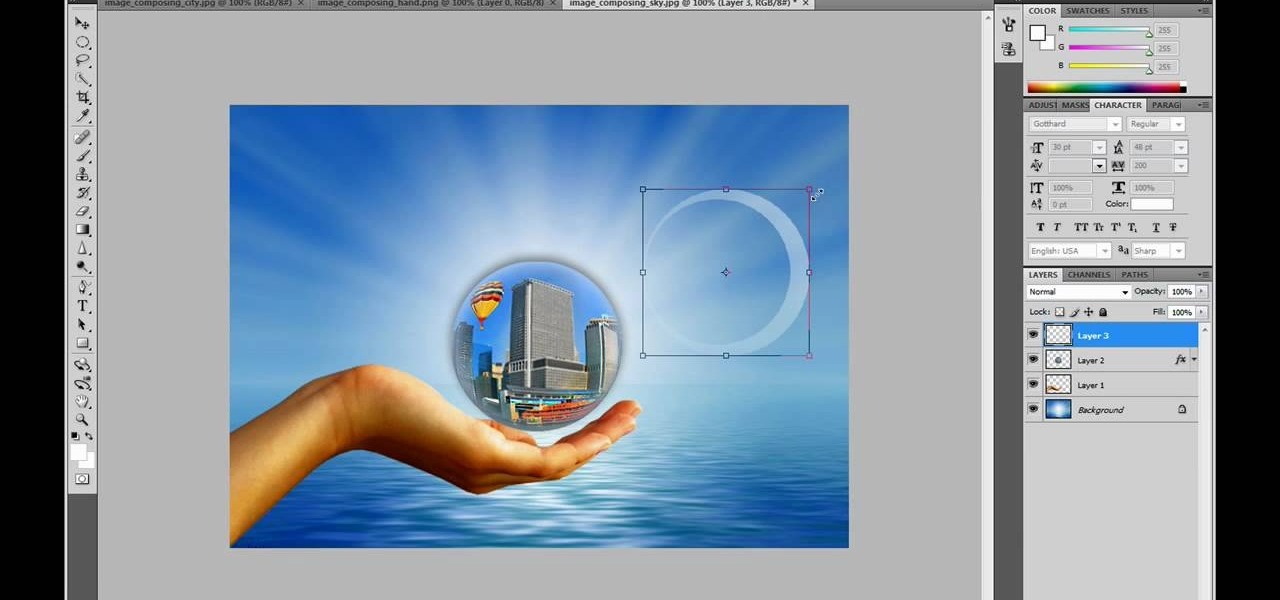
How To: Create a real cool manipulated globe in Photoshop
This video in the Software category will show you how to create a real cool manipulated globe in Photoshop. You will combine a few images and distort one of them to create a 3D image of a globe. There are 3 components; the background, a hand and an image globe. First open the background image. Then open the hand image, copy and paste it over the background, resize and position it correctly. Now open the third image, choose the elliptical marquee key, draw a circle and copy and paste it over t...
How To: Turn yourself into a Na'vi Avatar in Photoshop
This is a great video that shows you how to transform a photograph of yourself into a creepy blue person from James Cameron's "Avatar". In a few simple steps, you'll be radioactive.
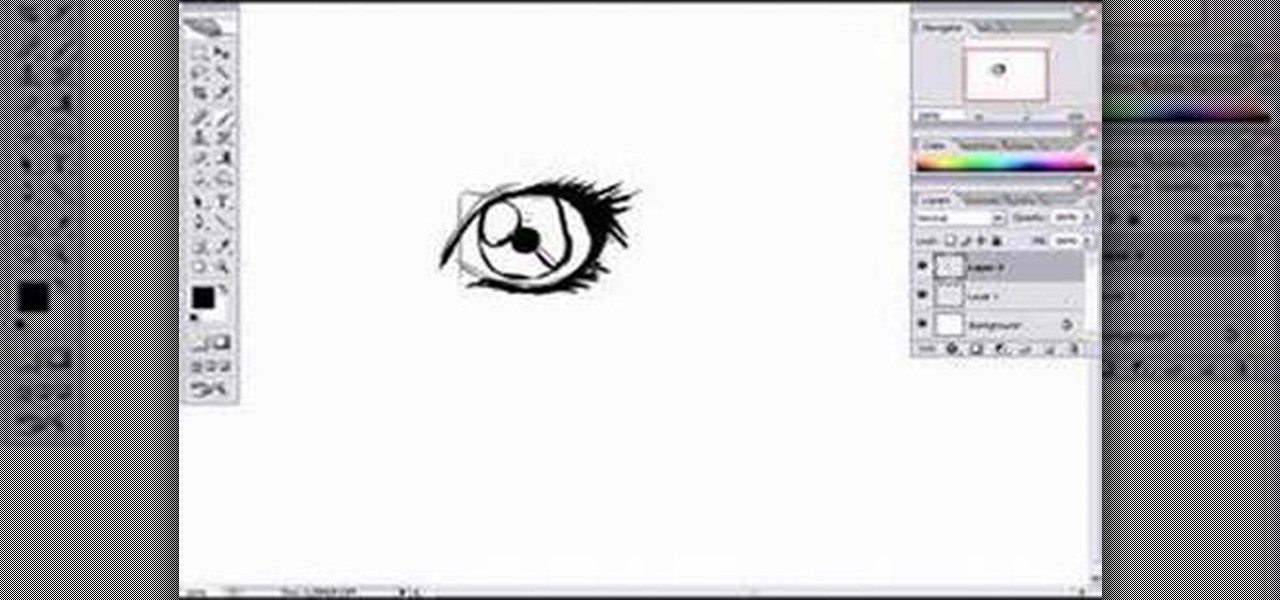
How To: Draw a female eye using Photoshop
In this video tutorial, viewers learn how to draw a female eye using Photoshop. Begin by creating a rectangular box. This will contain the eye. Now draw the shape of the eye in the box. Now add in the details. Draw in the shape, eyelashes, eye brows, eye lids and eye ball. When drawing the lashes, draw them as a mass instead of individually. Then add the eye lids with a few lines above the eye. Then draw two circles for the eye (eye ball and pupil). This video will benefit those viewers who e...
How To: Auto align and merge images in Photoshop
Open your first image and go to the rectangular marquee tool and select all of the image. Next click command or control C to copy image. Then go to your second image and click command or control V to paste the image. Select both the layers (hold down shift when clicking the layer), then go to edit, auto align layers and choose the top option then click ok. Last add a mask to your top layer, this is done by selecting the gradient tool (make sure its set black to white, the mode is normal and o...
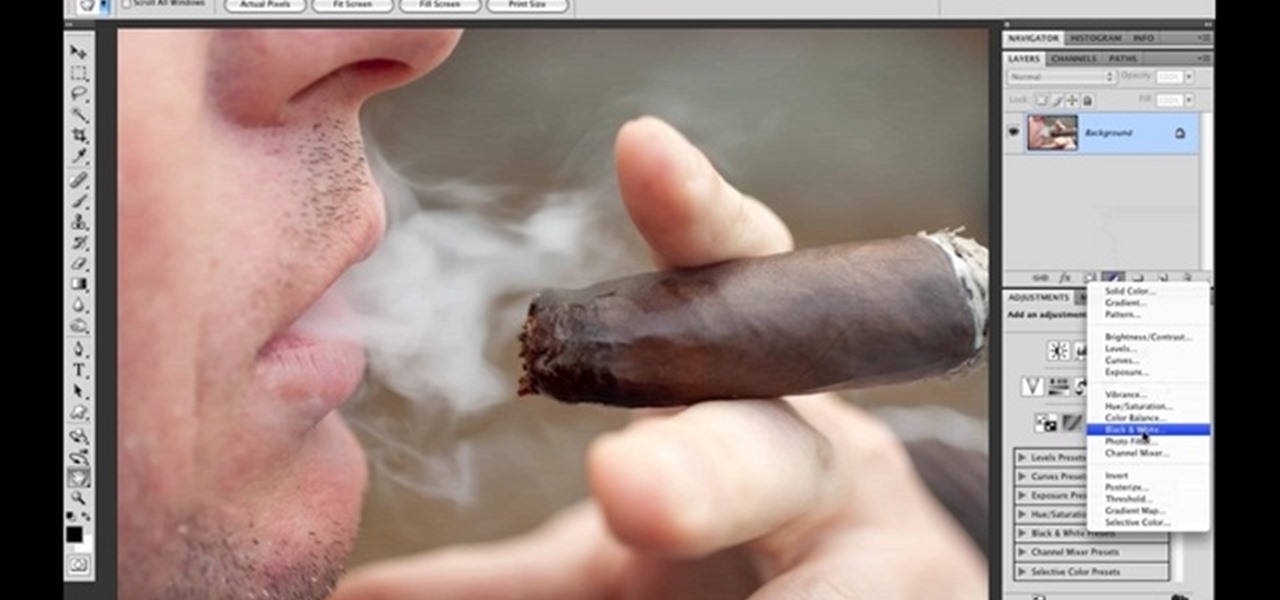
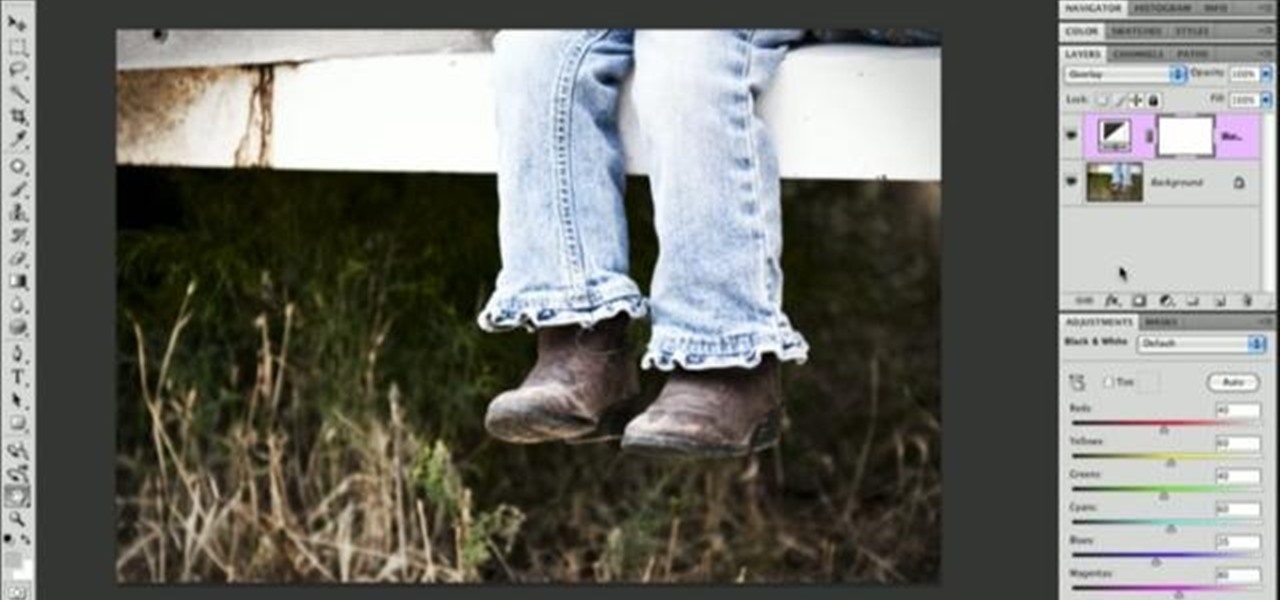
How To: Use Photoshop to create more dramatic photos
Photo Focus] contributor Nicole Young shows how to use Photoshop to introduce drama in our pictures. It requires only a few simple steps. First thing done was to add a black and white layer adjustment. This can be done in two ways. First by going down to layers panel and select black and white or if we have Photoshop cs4, we can go down to adjustment panel and click on the black and white option. This adjustment can also be done by clicking auto mode. Now the next thing...
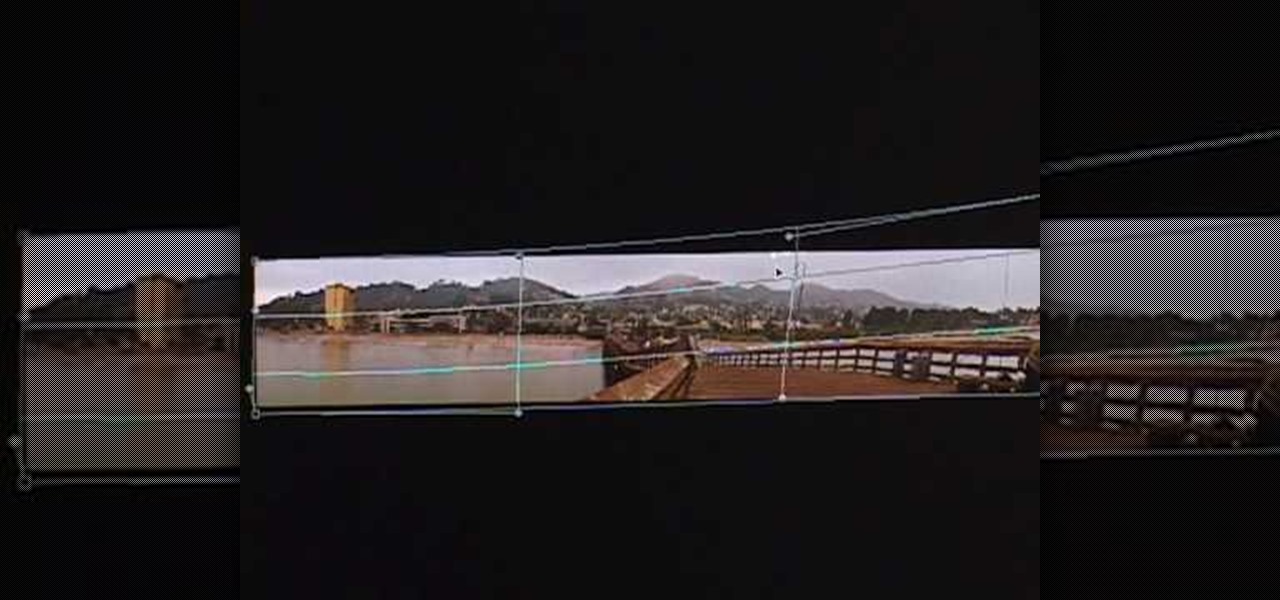
How To: Create simple panoramic images in Photoshop
This video in the Software category will show you how to create simple panoramic images in Photoshop. This video uses only five images for this effect. Select the five images and put them in a folder. Go to File -> Automate -> Photomerge. On the Photomerge page select ‘Folder’ and browse. Find and ‘choose’ the folder you created. Under the layout panel on left hand side of the page, select ‘cylindrical ‘option and click OK. Now the panoramic image will appear that will have some blank areas. ...
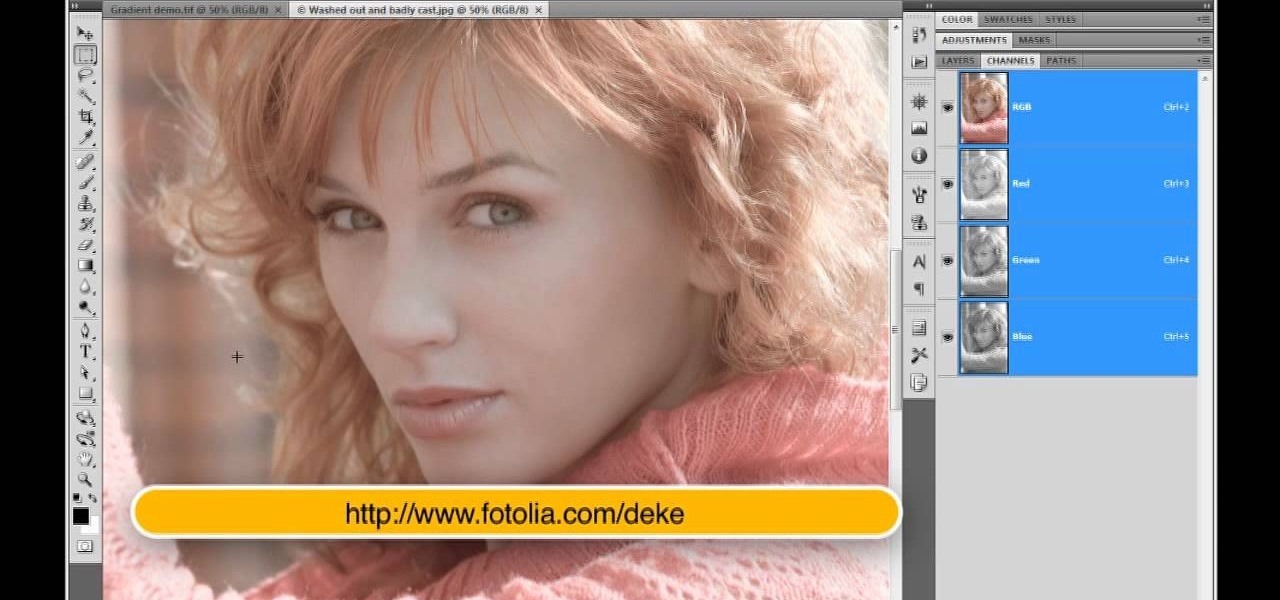
How To: Use the levels and histogram in Photoshop
Deke McClelland explains what the Levels and Histogram commands can do in Photoshop in this video tutorial. Levels allows you to adjust the luminance levels allowing you to adjust the contrast and colors within each color channel of an image. Thus, Levels allows you to adjust the individual colors that can be found within a gradient. This command is very similar to the curves command but to a less powerful extent. It is also more efficient than the curves command. The Histogram is another col...

How To: Change the color of any object in Photoshop
The video explains how to change the background color of objects using Photoshop in a simple manner. This way is better quick mask mode, because this way is more efficient and more advanced. First you click control G, Image control color and then you take the Image samples. The tutorial shows how the oranges are changed from their original color into a reddish color. Then it shows you how it adjusts the shadows of the oranges and the color of the leafs. The video is quick and it explains full...
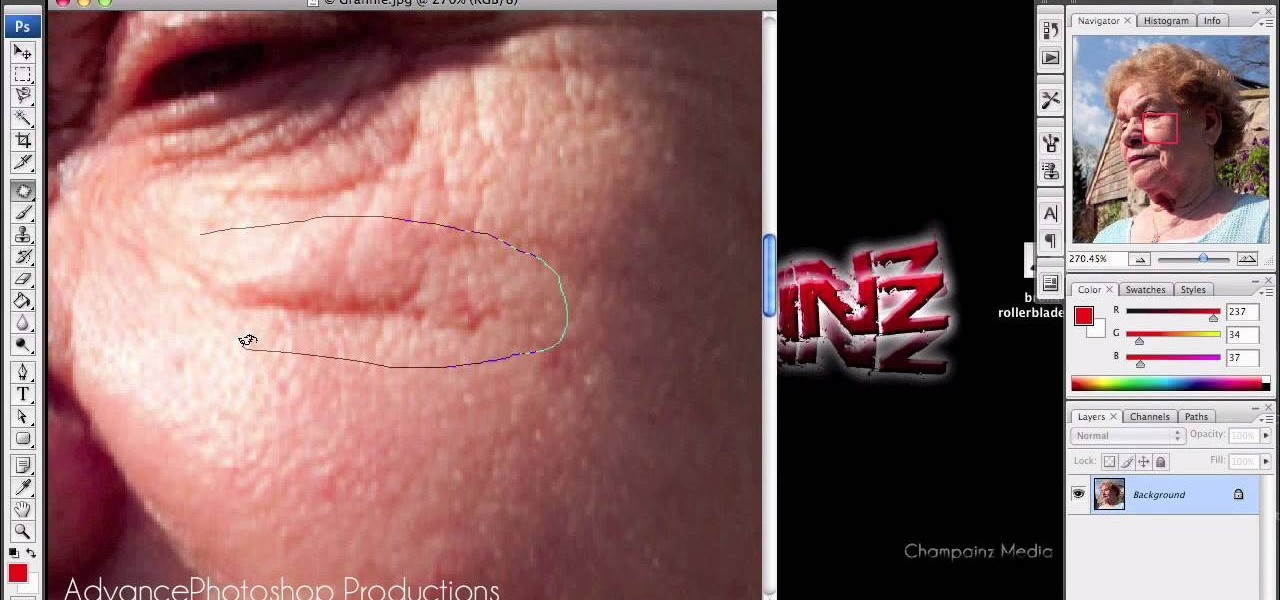
How To: Remove wrinkles and unwanted blemishes from an image
In this video, we are given ways to clean up an image, or remove unwanted objects in an image using Adobe Photoshop. The first tool that we are shown is the clone stamp tool. It allows you to clone a certain sample of an image, for you to use to paint over the object in the image you don't want anymore. In the video, the narrator shows us how to seamlessly take a man out of an outdoor setting. The next tool that we are shown is called the patch tool. In the video, the narrator uses the patch ...
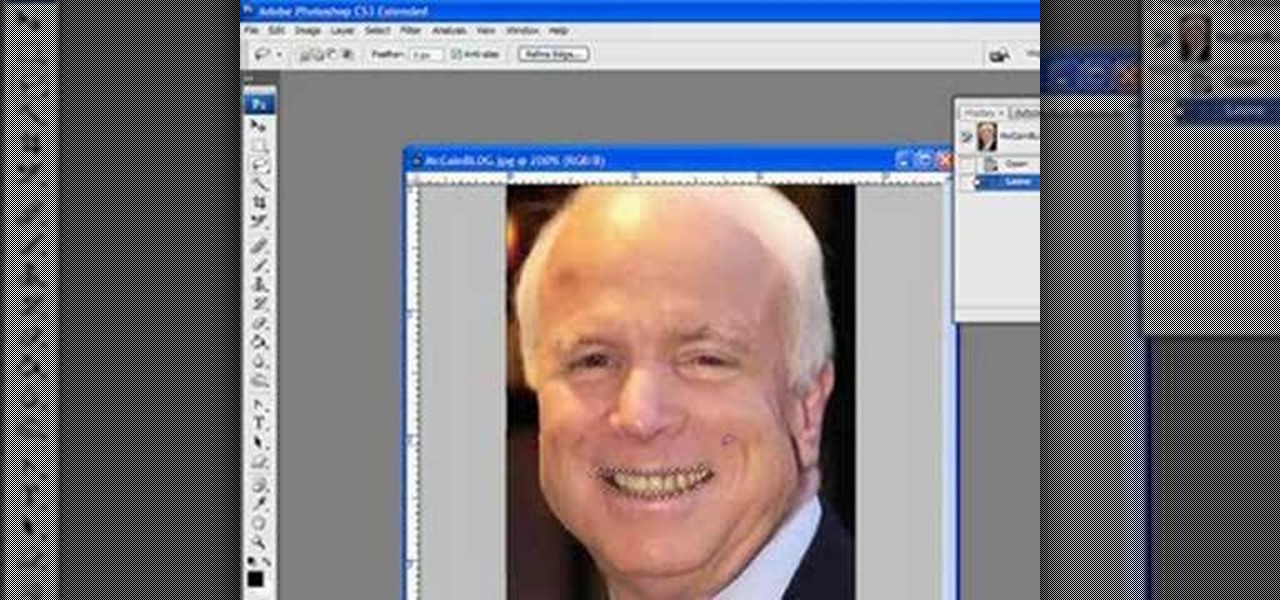
How To: Whiten John McCain's yellow teeth
To whiten teeth in Photoshop, first open up the picture and trace the inside of his lips with the lasso cursor. Now go to Image up on the toolbar on the top, click on it and then click on Adjust. There is a box with the word red in it with an arrow next to it. Click on the arrow and go down to yellow. Take the arrow for black, cyan and magenta and move it to the left a little. Next, take the arrow for yellow and move it all the way to the left. Now go back up to the box with the word yellow i...
How To: Make a GIF from video in Photoshop CS4
Learn how to make an animated GIF from a video clip using Adobe Photoshop CS4. You'll need to use an external editing program (like Sony Vegas) to create a small clip from your larger video beforehand. From Photoshop, go to "File" and select "Import" and then "Video Frames to Layers" from the pop-up menu and select your video clip. Choose "From Beginning to End" when prompted about range to import. The duration of the video clip will now be displayed in frames. By default, each frame is set t...
How To: Make a professional Google Chrome logo in Photoshop
The tutorial shows you how to make a professionally looking Google Chrome logo in Photoshop CS4. To start, download the Google Chrome logo, as well as an Earth picture, in a Zip file from Inteltuts. Next, open the logo file in Photoshop CS4, turn the white background layer into transparent, and transform the logo by de-saturating the picture, but make sure you leave the blue center area untouched. The last step is to transform the Earth picture so that it fits right into the center of the des...

How To: Design a smiley in Photoshop
If you're just starting out using Adobe Photoshop, then this is the perfect thing to try out. Creating a smiley face is one of the easiest things you can do in Photoshop, so it's the perfect design project to learn from. Just follow along with the steps in the video, and you'll have your very own, shiny, smily face icon.
How To: Make a quick and easy wallpaper in Adobe Photoshop CS4
Adobe Photoshop CS4 lets you create images and graphics that represent your personality. This video tutorial demonstrates how to make a quick, cool, and easy wallpaper design for your personal computer desktop. Either copy the provided example, or make your own tweaks and come up with a cool custom design.
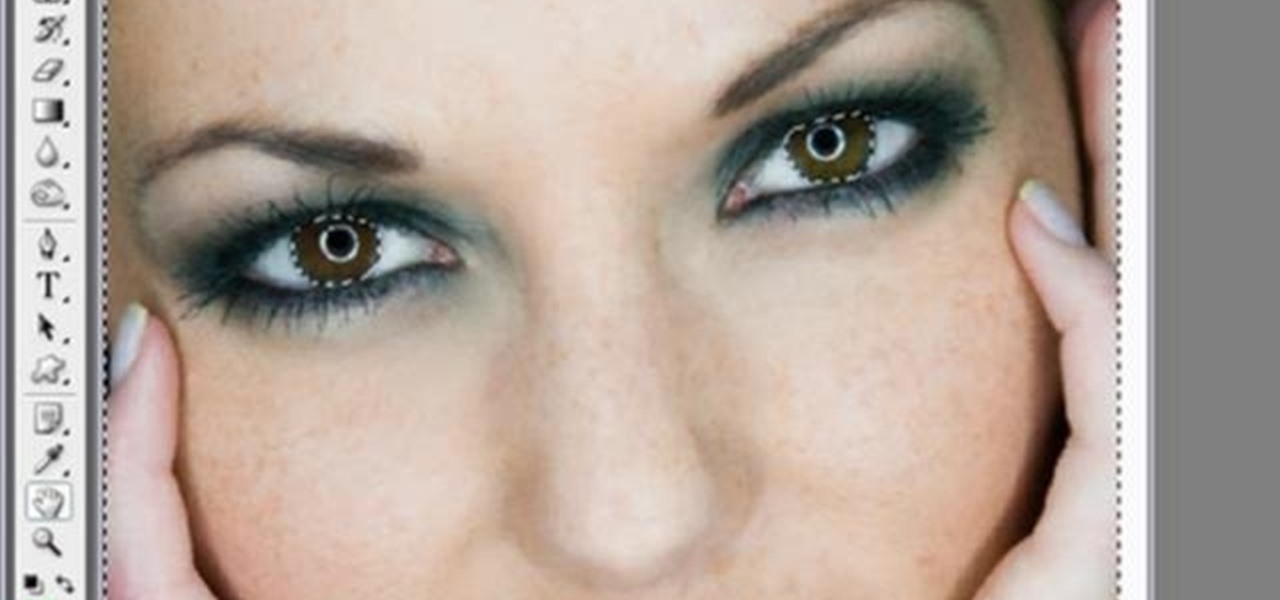
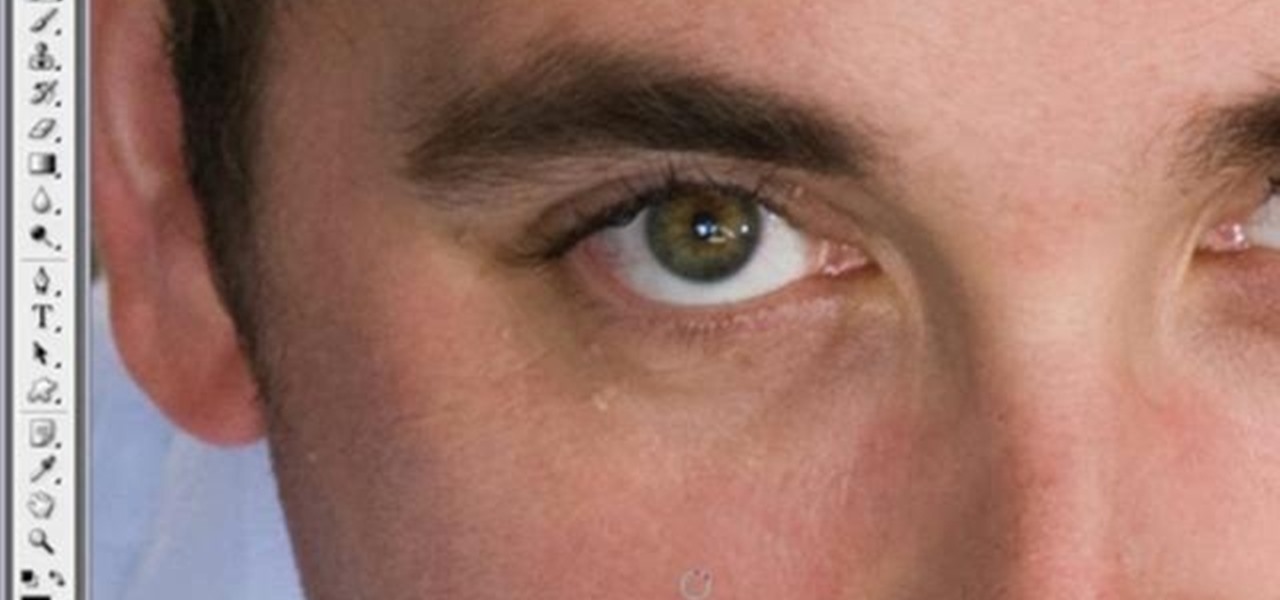
How To: Subtly change eye color in Photoshop
Yanik Chauvin continues his online photo school with this video on how to change eye color in Photoshop. Yanik makes this complicated program seem simple as he shows exactly what steps to take to make realistic color change in the eyes of a person. He creates a layer that will be used to edit the eyes, then zooms in on and selects them. He picks a nice green color to use, shows what settings to use to make it look realistic, then applies final touches by changing the opacity of the new color....
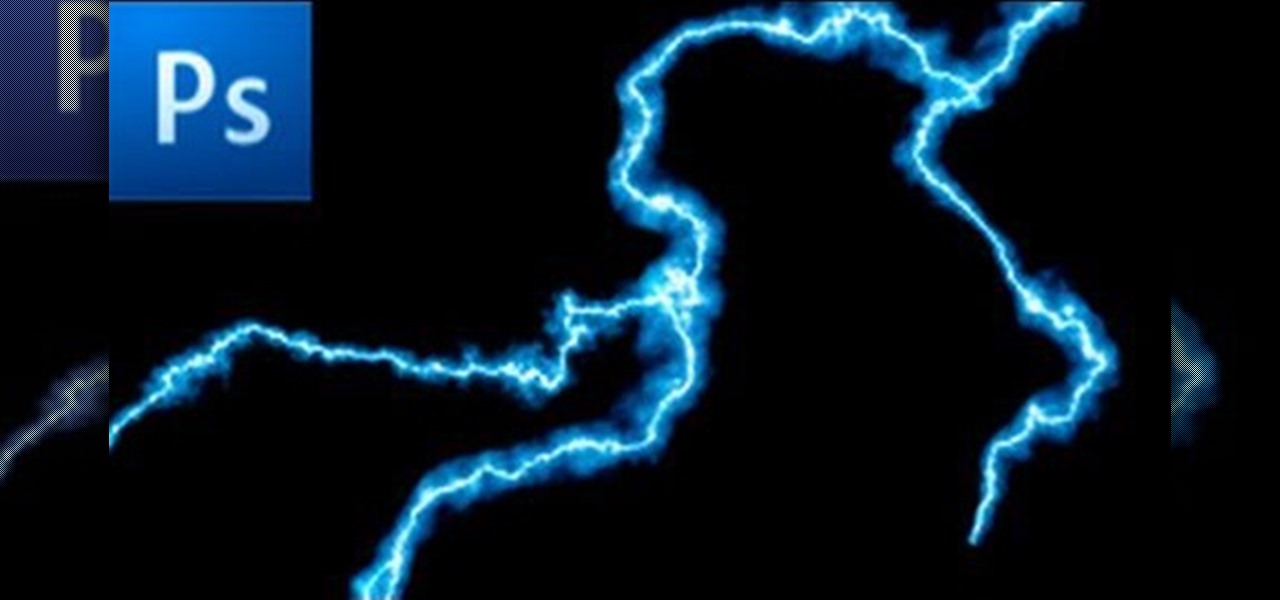
How To: Make lightning in Photoshop
This is a tutorial showing how to make a lightening effect on Photoshop. First click on the gradient tools and then click on the colors. Check to see if there is black on one side and white on the other, if there is then click the ok button. Then hold the shift key while dragging the mouse across the screen. This will make a black to white gradient effect on the screen. After that, click on the filter button at the top of the screen, then click render, and then difference clouds. After the cl...
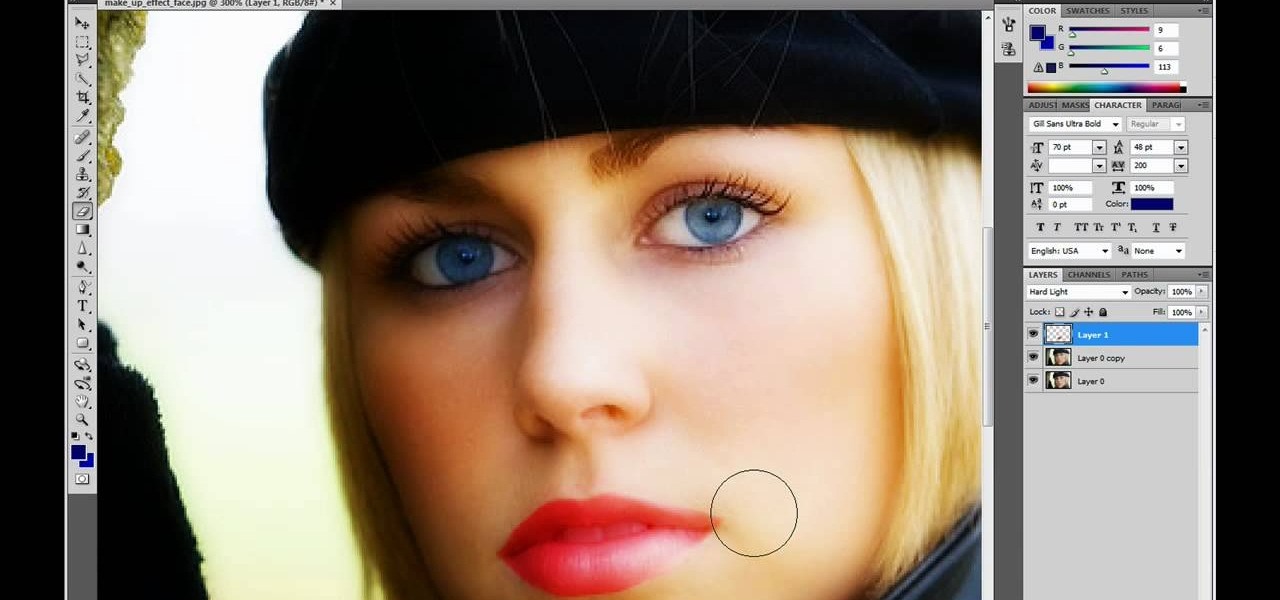
How To: Retouch an image in Photoshop CS4
This video is describing how to retouch a photograph by using Photoshop CS4. The first step is to get a photo that you would like to edit, preferably of a person's face. Then make a new layer that duplicates the background, go to Gaussian blur, then go to hard light for your layer blending. Then draw lipstick on the model by using the polygon lasso tool and the hue/saturation tool. Then chase the hue and saturation to the correct color, then erase the edges that you accidently missed with you...

How To: Use the vanishing point filter in Photoshop
In this video tutorial, viewers learn how to use the vanishing point filter in Adobe Photoshop. Begin by selecting the image you want with rectangular marking tool. Then hold Control and C to copy it. Now go to your 3D shape. Press on Filter and select Vanishing Point. Click on one of the corners and drag to each corner. Hold Control and drag it down to create another selection. Now paste the photo by hold Control and V. Then drag the photo to the selected shape area. This video will benefit ...

How To: Create a Shepard Fairey "Hope" poster in Photoshop
Ash Davies believes that it is important to understand how to properly use Photoshop, especially with the Obama "Hope" posters that have become increasingly popular. The first step is to cut out the image that you want to use for the poster. To do this, you have to use the polygon tool and trace around the object you wish. After done, select Layer via cut to separate. Creating a new layer and choose color fde5a9 for the background layer. After this, you can create the different blue and red l...
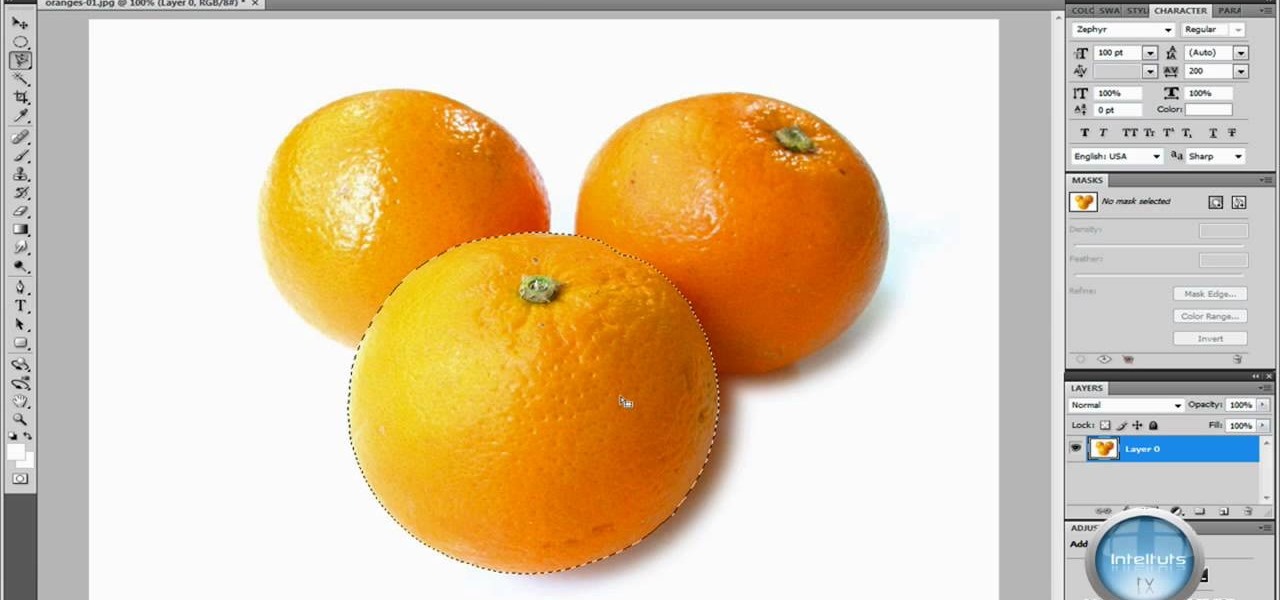
How To: Extract and color correct in Photoshop CS4
In this Software video you will see how to extract and apply color correction in Photoshop CS4. First select the object and extract it. The tool that you use to extract will depend on the type of image. For example, for oranges, select the Magnetic Lasso Tool from the left hand panel. Take the cursor, click on the outer line of an orange and drag the cursor along the outline of the orange. The tool automatically creates anchor points. You don’t have to click. But, if you want to create an anc...
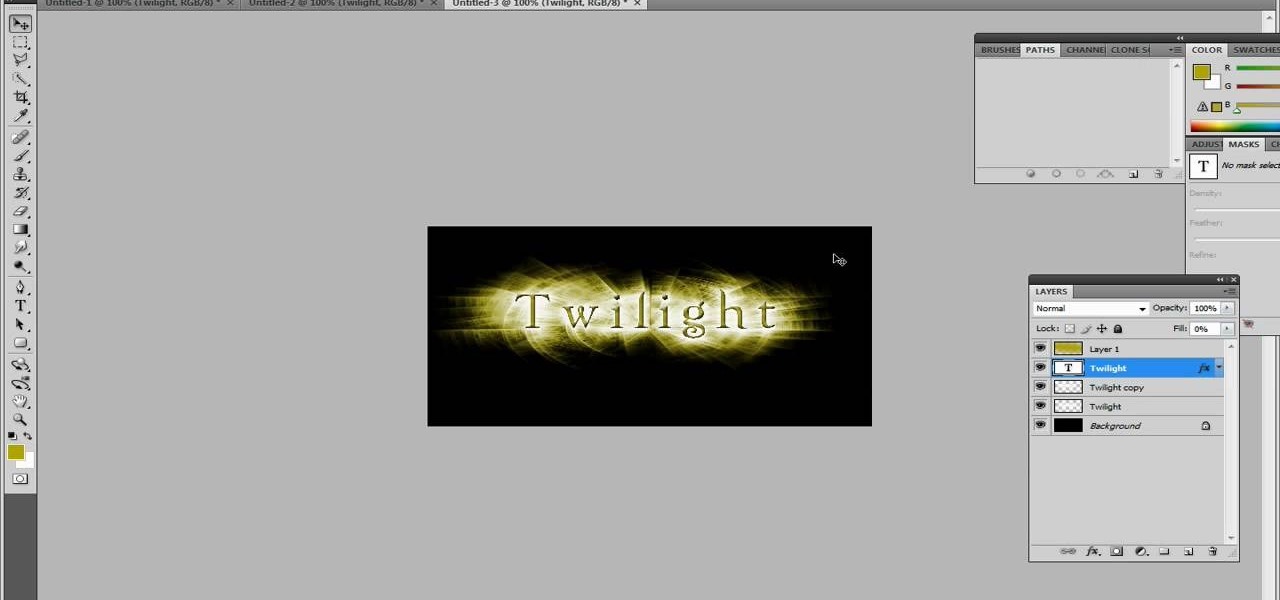
How To: Create a Twilight text effect in Photoshop CS4
In this Inteltus tutorial video, viewers are treated to a step-by-step guide to creating a Twilight inspired text effect in Adobe Photoshop CS4. Starting from scratch, the host goes through the actions in real time, explaining each step of the way. The viewer is free to make their own modifications to the file in order to integrate the effect into their own Photoshop work. While the video is aimed towards experienced Photoshop users, it is broken down enough that even a beginner will have no ...
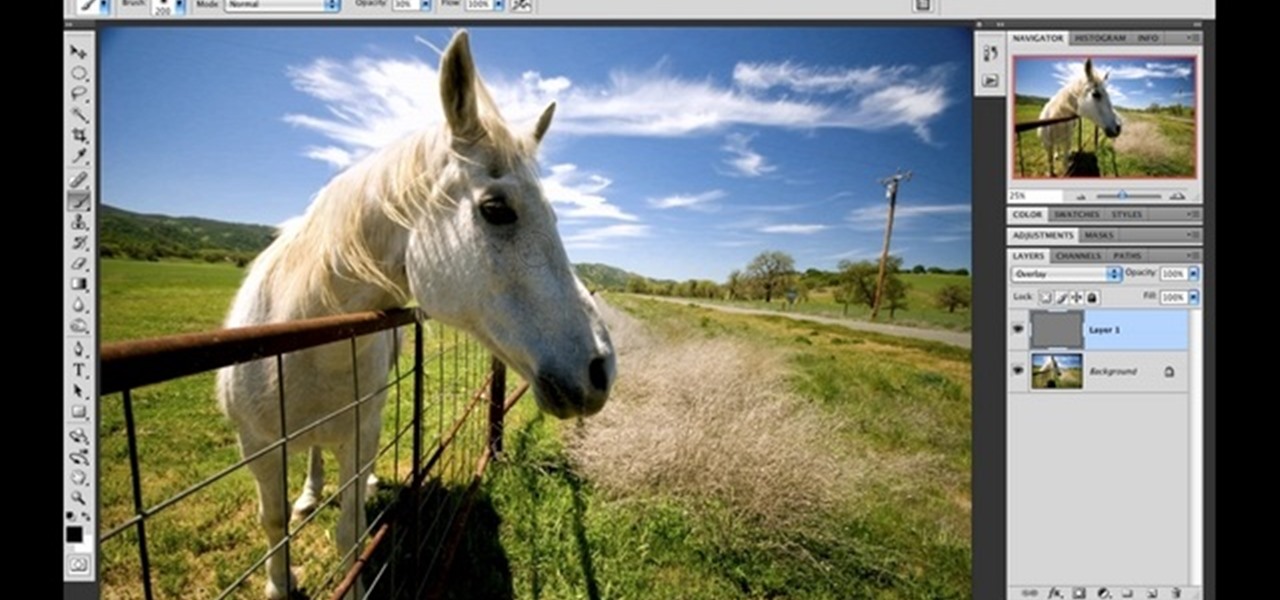
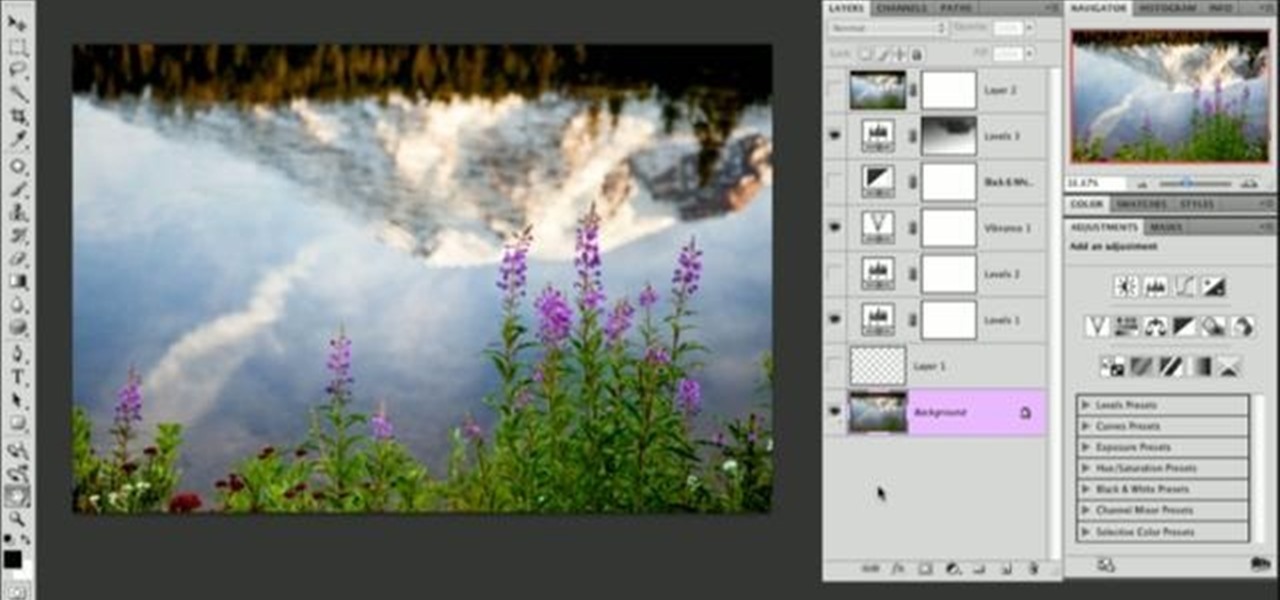
How To: Give a dramatic punch to an image in Photoshop
In order to add a nice contrast punch to an image using Photoshop, go to your adjustment layer and click on the black and white adjustment layer. Then go to your "blend modes" and change it to "overlay". If you find that the effect is too harsh you can adjust your opacity settings or you can switch your blend mode to "soft lights". In "overlay" using the black and white adjustment panel you can change your settings to meet your preference. If you are using a previous version of Photoshop that...
How To: Make a professional YouTube logo in Photoshop CS4
Adobe Photoshop CS4 is a common and popular tool for logo creation. In this video the finer details of using CS4 to create logos, specifically for use on YouTube, are explained. Lighting effects, glossing, and glowing are covered thoroughly with step by step instructions on using layers and shading are provided, and the video carefully demonstrates each process before moving on. Many options are shown, as well as detailed examples of each technique and even the basic tools inherent to Photosh...

How To: Create a Matrix background effect in Photoshop
First thing to do is to create a new pic image called matrix. The next thing you want to do is to change the width and the height of your picture, as well as the resolution. Pick any background color you want, take the paint bucket tool and fill the background. To get the matrix code, go to Filter, Texture, and then finally Grain. You want to set the intensity to 90, contrast to 50, and grain type should be vertical. To get the grain to be green, you press Ctrl+U, press colorize and drag the ...

How To: Have fun with the liquify tool in Photoshop
In this Software video tutorial you will learn how to have fun with the’ liquefy’ tool in Photoshop. The video is by Yanik Chauvin. Open Photoshop, select a picture that you want to have fun with, go to ‘filter’ and click open the ‘liquefy’ tool. This video is looking at 3 tools under liquefy. They are Forward Wrap Tool, Pucker Tool and Bloat Tool. These tools can be modified by the brush options on the right hand side. The Pucker Tool reduces the size of a feature on the image. The Bloat Too...

How To: Add a reflection in Photoshop
Yanik Chauvin shows viewers how to add a reflection using Photoshop. This tutorial focuses on how to do a reflection on a white background. You can do this with objects as well as people. Bring up your image with a white background to add the reflection to. First, you should press ctrl+j to add a second layer. In order to do a reflection, you need room, so you need to increase your canvas size. To do this click image, click canvas size, and click the bottom arrow so it can expand downward. Yo...
How To: Toggle layer visibility in Photoshop
Learn how to toggle layer visibility in Photoshop in this video tutorial. Nocole Young will show you how to do this easily. When you are working on any image in Photoshop, you usually create a number of layers. You would like to see what the image will look like before you start editing the image. You can always toggle the visibility between the layers by clicking the ‘eye-ball’ toggle on the right hand side of the page on the layer panel. Click the ‘eye-ball’ toggle next to a layer and you w...